


Using C# with Unity
Going forward, it’s important to think of Unity and C# as symbiotic entities. Unity is the engine where you’ll create scripts and GameObjects, but the actual programming takes place in another program called Visual Studio Code.
Setting up Visual Studio Code in Unity 6
Before continuing, it’s important that Visual Studio Code is set up as the script editor for your project. Go to the Unity menu | Settings | External Tools and check that External Script Editor is set to Visual Studio Code (or Windows):
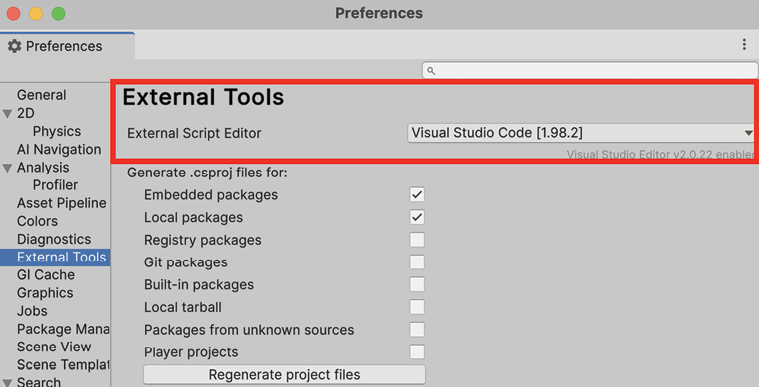
Figure 1.15: Changing External Script Editor to Visual Studio
As a final tip, if you want to switch between light and dark modes, go to the Unity menu | Preferences | General and change Editor Theme:
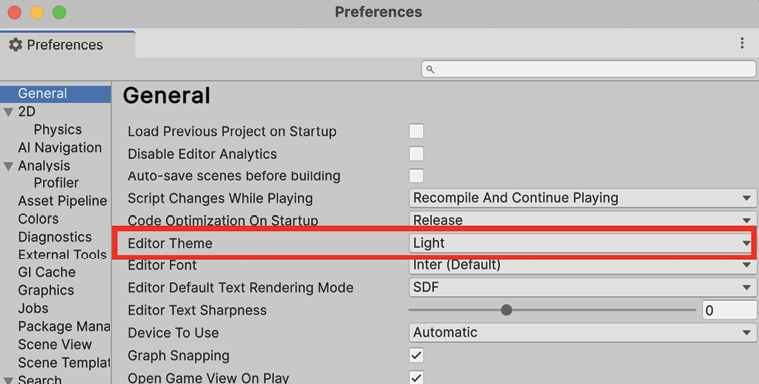
Figure 1.16: Unity general preferences panel
We haven’t covered any basic programming concepts yet, but they won’t have a home until we know how to create an actual C# script in Unity. Let’s see how we can achieve this in the next section!
Working with C# scripts
A C# script is a special kind of C# file in which you’ll write C# code. These scripts can be used in Unity to do virtually anything, from controlling an in-game character with your keyboard to animating objects in your level.
There are several ways to create C# scripts from the editor:
- Select Assets | Create | Scripting | MonoBehaviour Script
- Right under the Project tab, select the + icon | Scripting | MonoBehaviour Script
- Right-click on the Assets folder in the Project tab and select Create | Scripting | MonoBehaviour Script from the pop-up menu
- Select any GameObject in the Hierarchy window and click Add Component | New Script
A MonoBehaviour script is a type of C# script that’s specific to Unity (don’t get too bogged down with this right now; we’ll get into more details as we go along). Whenever you’re instructed to create a C# script, please use whichever method you prefer, and I’ll call out any additional information you may need.
Resources and objects other than C# scripts can be created in the editor using the preceding methods. I’m not going to call out each of these variations every time we create something new, so just keep the options in the back of your mind.
For the sake of organization, we’re going to store our various assets and scripts inside their own named folders. This isn’t just a Unity-related task—it’s something you should always do, and your co-workers will thank you (I promise):
- Select Assets | Create | Folder and name it
Scripts:
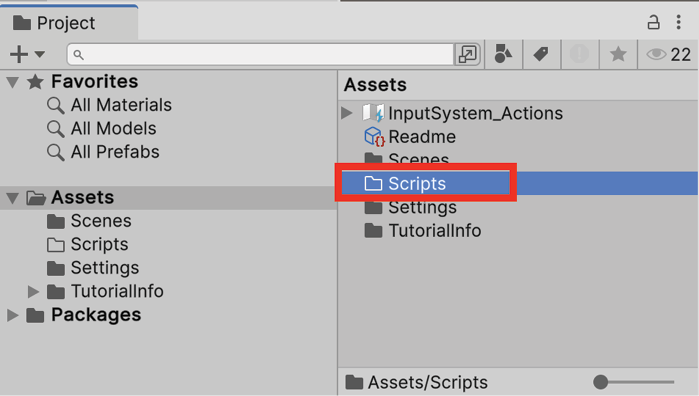
Figure 1.17: Creating a C# script
- Double-click on the Scripts folder and create a new C# script. By default, the script will be named
NewBehaviourScript, but you’ll see the filename highlighted, so you have the option to immediately rename it. Type inLearningCurveand hit Enter:
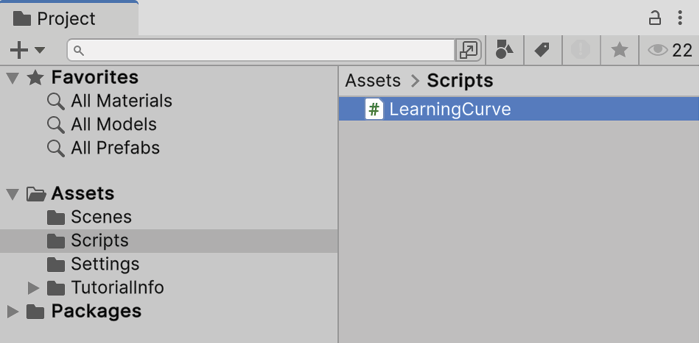
Figure 1.18: Project window with the Scripts folder selected
- You can use the small slider in the bottom right of the Project tab to change how your files are displayed.
So, you’ve just created a subfolder named Scripts, as shown in the preceding screenshot. Inside that parent folder, you created a C# script named LearningCurve.cs (the .cs file type stands for C-Sharp, in case you were wondering), which is now saved as part of our Hero Born project assets. All that’s left to do is open it up in our code editor program!
Introducing the Visual Studio Code editor
While Unity can create and store C# scripts, they need to be edited using Visual Studio Code (which we downloaded as a pre-packaged module) and will open automatically when you double-click any C# script from inside the editor.
Opening a C# file
Unity will synchronize with Visual Studio Code the first time you open a file. The simplest way to do this is by selecting the script from the Project tab. Take the following steps:
- Double-click on
LearningCurve.cs, which will open the C# file in Visual Studio Code:
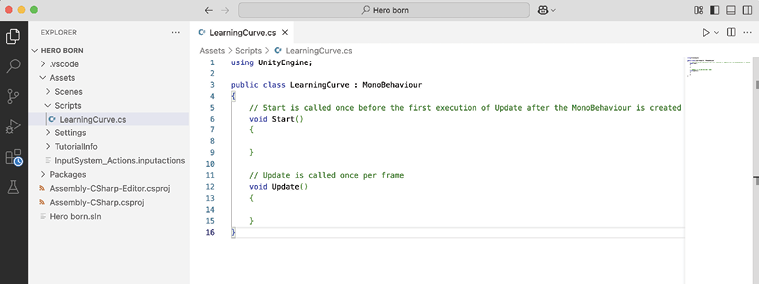
Figure 1.19: LearningCurve C# script in Visual Studio
- You’ll see a folder structure on the left-hand side of the interface that mirrors the one in Unity, which you can access like any other.
- On the right-hand side is the actual code editor where the magic happens (all the code you write will live here). There are far more features to the Visual Studio Code application, but this is all we need to get started.
 Quick tip: Enhance your coding experience with the AI Code Explainer and Quick Copy features. Open this book in the next-gen Packt Reader. Click the Copy button
(1) to quickly copy code into your coding environment, or click the Explain button
(2) to get the AI assistant to explain a block of code to you.

 The next-gen Packt Reader is included for free with the purchase of this book. Scan the QR code OR go to https://packtpub.com/unlock, then use the search bar to find this book by name. Double-check the edition shown to make sure you get the right one.

The Visual Studio Code interface is slightly different for Windows and Mac environments, but the code we’ll be using throughout this book will work equally well with both. All the screenshots in this book have been taken in a Mac environment, so if things look different on your computer, there’s no need to worry.
Beware of naming mismatches
One common pitfall that trips up new programmers is file naming—more specifically, naming mismatches—which we can illustrate using line 5 from Figure 1.19 of the C# file in Visual Studio Code:
public class LearningCurve : MonoBehaviour
The LearningCurve class name is the same as the LearningCurve.cs filename. This is an essential requirement. It’s OK if you don’t know what a class is quite yet. The important thing to remember is that, in Unity, the filename and the class name need to be the same. If you’re using C# outside of Unity, the filename and class name don’t have to match.
When you create a C# script file in Unity, the filename in the Project tab is already in Edit mode, ready to be renamed. It’s a good habit to rename it then and there. If you rename the script later, the filename and the class name won’t match.
If you were to rename the file at a later point, the filename would change, but line 5 would be as follows:
public class NewBehaviourScript : MonoBehaviour
If you accidentally do this, it’s not the end of the world. All you need to do is right-click on the script in the Project tab and choose Rename:
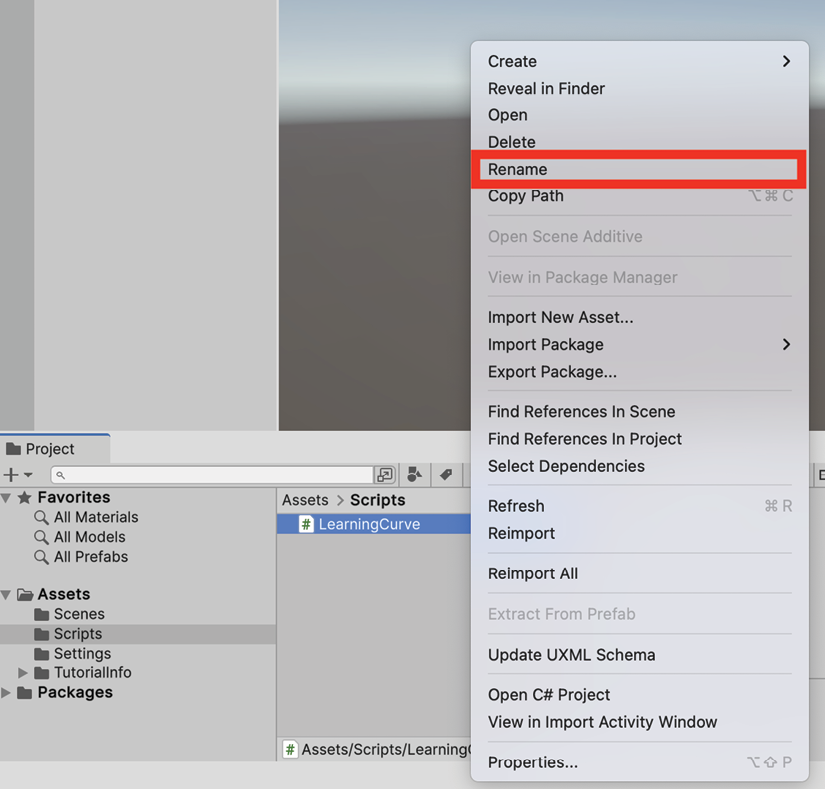
Figure 1.20: Renaming a C# script
Syncing C# files
As part of their symbiotic relationship, Unity and Visual Studio Code communicate with each other to synchronize their content. This means that if you add, delete, or change a script file in one application, the other application will see the changes automatically.
So, what happens when Murphy’s Law, which states that “anything that can go wrong will go wrong,” strikes and syncing just doesn’t seem to be working correctly? If you run into this situation, take a deep breath, select the troublesome script in Unity, right-click, and select Refresh.
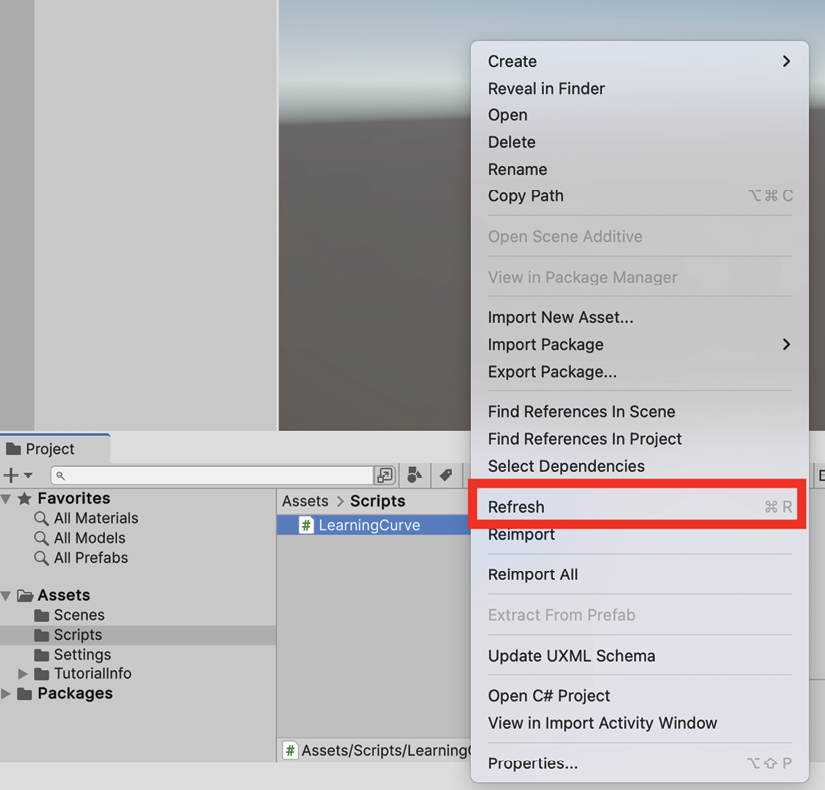
Figure 1.21: Refreshing a C# script
You now have the basics of script creation under your belt, so it’s time we talk about finding and efficiently using helpful resources.


