Download code from GitHub
It has always been a dream to produce a hassle-free backend that will help in providing profound solutions to build better mobile and web applications. In April, 2012, James Tamplin and Andrew Lee launched Firebase. In its early stage, Firebase provided an API that helped to integrate the online chat modules to websites. Now Firebase is one of the dominant BaaS (Backend as a Service) platforms that is continuously improving the cloud experience by introducing new features and functionalities. Firebase is the only provider with autosyncing database functionality. It lets you grow great applications, develop your consumer base, and acquire more monetary value. Each feature works freely, and they work far superior together. Firebase has created a massive buzz in the developer community. Most of the traditional backend services are quite easy to implement and get into production. Firebase is the best fit when there is a short development time and the application demands data in real time as it is easy to scale. We can also mix and match Firebase products to solve everyday app development challenges.
In this chapter, we will cover the following topics:
- Overview of the Firebase Realtime Database
- Setting up the development environment for the Firebase toolchain
- Creating our first Firebase Android project and structuring the data
- Reading and writing the data and enabling offline capabilities
- Working with different structures of data in the Realtime Database
- Pros and cons of using the Realtime Database
The Firebase Realtime Database gives you a chance to fabricate rich, community-oriented applications by enabling secure access to the database specifically from client-side code. Data will continue to be cached locally, and even while disconnected to the internet, real-time events keep on firing, giving the end client a responsive ordeal. At the point when the device recaptures connection, the Realtime Database synchronizes the local data changes with the remote updates that happened while the client was disconnected, consolidating any data contentions consequently.
The Realtime Database gives an adaptable, expression-based rules language, called Firebase Realtime Database Security Rules, to characterize how your data ought to remain organized and when data can be fetched from or written over. At the point when incorporated with Firebase Authentication, engineers can characterize on who approaches what information, and how they can get to it.
The Realtime Database is a very powerful NoSQL database and, in that capacity, it has several advancements and usefulness when compared with a relational database. The Realtime Database API is intended just to permit operations that can continue to be executed rapidly. Firebase allows the developer to assemble an impressive real-time experience that can serve millions of clients without bargaining on responsiveness. Along these lines, it is critical to consider how clients need to get to your information and after that structure it accordingly.
The Firebase Realtime Database supports Android, iOS, web, and more. All data is put away in JSON format and any change in data is reflected promptly by performing a sync operation across every platform. Realtime Database enables us to construct more adaptable real-time applications effortlessly. It helps users to collaborate with one another. At the point when clients are disconnected from the internet, the Realtime Database SDKs employ local cache on the device to store changes. Later when the device comes online, the local data is automatically synchronized to Realtime Database. The Realtime Database incorporates with Firebase Authentication to give basic and instinctive authentication for developers. You can utilize the Firebase security model to permit access-based client identity or with pattern coordinating on your data.
In October, 2017, Google announced Cloud Firestore, the latest real-time, scalable NoSQL database from Firebase and Google Cloud Platform. Since Firestore is still in the beta program, we will learn about Firestore, and the last chapter is dedicated to it.
To get started, we need to integrate the Firebase SDK to the project, and it is a one-time integration. Later, we can choose any of the Firebase tools that we want to work with and add the appropriate gradle dependency.
To develop Firebase applications, you can surely use your development environment; the essential requirements are as follows:
- Your favorite operating system (Windows, macOS, or Linux)
- Determine whether you have the latest JRE installed on your operating system
- Install the latest version of JDK or Open JDK
- Install the newest version of Android Studio (at the time of writing, the most recent stable version is 2.3.3 and 3.0 is still in beta, or any newer version should also be excellent)
- Android SDK with one complete API will be very significant
There are two ways that you can connect Firebase to your Android project, from the Firebase console creating the new project and adding the dependencies and Google config file. The other way is just to add Firebase support to an Android project directly from Android Studio:
- The usual way of connecting Firebase is to visit the Firebase console at https://console.firebase.google.com/
- Create a new project using the
Add Projectbutton, and if you already have an existing project, you are free to choose it - In the overview section of the console, you can choose to add an Android application by clicking on the relevant button and add the necessary information to the fields
- Download the
google-services.jsonfile, add it to your project'sappfolder root, and the classpath gradle dependencies in the project'sgradlefile - To reduce the effort, we can make Android Studio do all this for us by choosing the
Tools|Firebasemenu option and clicking on the Firebase tools that you want to integrate from the list - After you chose the Firebase tool, tap on
Saveand retrieve data - In the next window panel, you will see options such as
Launch in the browser,Connect your app to Firebase, and so on, click on theConnect your app to Firebasebutton and select your project or you can create the new project in theConnect to Firebasewindow - Go back to the Firebase panel and click on the
Add the Realtime Database to your applicationbutton
Since we have connected to Firebase, it is as simple as it sounds, all we have to do is select the Add the Realtime Database to your application button in the Firebase assistance window, you will see a dialog for requesting your authorization to change the gradle file with a few dependencies. Tap on Accept Changes, now we are all set to explore Realtime Database abilities.
Since the nuts and bolts of the Firebase Realtime Database are set up, the next stage is to explore how data can be composed or written to a database tree from an Android application. This section will give points of interest on the most proficient method to write, how to erase database tree nodes, and furthermore, outline a few strategies for taking care of database write errors.
Essentially, a reference to the database is required. Every Firebase project has its own particular devoted Realtime Database items of which can be examined by opening the project inside the Firebase console and picking the Database option. Inside the console, panels can be selected to show data trees set away in the database, the rules outlined for fetching the access, database use estimations, and so on.
Firebase databases are usually Representational State Transfer (REST) endpoint references, which we will use to add the data. We will understand how to fetch the reference with the following code snippet:
// fetch reference database
FirebaseDatabase mDatabase = FirebaseDatabase.getInstance();
DatabaseReference mDbRef = mDatabase.getReference("Donor/Name");
The preceding code will fetch the reference, on the off chance that the particular path does not exist now, it is composed automatically inside the tree when data is written at that location.
Fetch an instance of your database employing getInstance() and reference the location you need to write. You can write most of the primitive data types as they also include Java objects:
// Write a message to the database
FirebaseDatabase mDatabase = FirebaseDatabase.getInstance();
DatabaseReference mDbRef = mDatabase.getReference("Donor/Name");
mDbRef.setValue("Parinitha Krishna");
The following screenshot explains the dashboard changes after running the preceding code:

If you notice that there aren't any changes in the dashboard from the write operation, we shall attach an onFailure callback like the following for identifying what's stopping it:
// Write a message to the database
FirebaseDatabase mDatabase = FirebaseDatabase.getInstance();
DatabaseReference mDbRef = mDatabase.getReference("Donor/Name");
mDbRef.setValue("Parinitha Krishna").addOnFailureListener(new OnFailureListener() {
@Override
public void onFailure(@NonNull Exception e) {
        Log.d(TAG, e.getLocalizedMessage());
    }
});
Note
Before we compile the preceding code snippet, we need to change the rules to be true since we are no longer using any authentication service. Go to the Rules tab and change the read and write service to be true. When we do this, remember that the endpoint is publicly accessible by anybody who has the URL:{
"rules": {
".read": true,
".write": true
}
}
After writing the data into Firebase now it's time to read what we have written. Firebase Realtime Database syncs all the data in real time across platforms and devices. So we have an onDatachanged() callback to read the data:
// Read from the database
mDbRef.addValueEventListener(new ValueEventListener() {
@Override
public void onDataChange(DataSnapshot dataSnapshot) {
// This method is called once with the initial value and again
        // whenever data at this location is updated.
String value = dataSnapshot.getValue(String.class);
        Log.d(TAG, "Value is: " + value);
    }

@Override
public void onCancelled(DatabaseError error) {
// Failed to read value
Log.w(TAG, "Failed to read value.", error.toException());
    }
});Create a model class with constructors and declare a string to fetch the database reference for a unique key to add the list of objects. The model class is as follows:
public class Users {

private String Name;
private String Email;
private String Phone;

public Users() {
    }

public String getName() {
return Name;
    }

public void setName(String name) {
Name = name;
    }

public String getEmail() {
return Email;
    }

public void setEmail(String email) {
Email = email;
    }

public String getPhone() {
return Phone;
    }

public void setPhone(String phone) {
Phone = phone;
    }

public Users(String name, String email, String phone) {
Name = name;
Email = email;
Phone = phone;
    }

}
Now in the activity class using the DatabaseReference class we can set the object value to Firebase, as follows:
public class MainActivity extends AppCompatActivity {

private static final String TAG = "MainActivity";
private FirebaseDatabase mDatabase;
private DatabaseReference mDbRef;
private String userId;

@Override
protected void onCreate(Bundle savedInstanceState) {
super.onCreate(savedInstanceState);
        setContentView(R.layout.activity_main);

// Write a message to the database
mDatabase = FirebaseDatabase.getInstance();
mDbRef = mDatabase.getReference("Donor/Name");

//Setting firebase unique key for Hashmap list
String userId = mDbRef.push().getKey();
// creating user object
Users user = new Users("Hillary", "hillary@xyz.com", "90097863873", "Tokyo");

mDbRef.child(userId).setValue(user);

    }
}
The preceding code will add the object into Firebase as follows:

To read the object data from Firebase Realtime ValueEventListner() whenever there is an update in the database in onDatachanged callback we can read the data changes:
mDbRef.child(userId).addValueEventListener(new ValueEventListener() {
@Override
public void onDataChange(DataSnapshot dataSnapshot) {

        Users user = dataSnapshot.getValue(Users.class);

        Log.d(TAG, "User name: " + user.getName() + ", email " + user.getEmail());
    }

@Override
public void onCancelled(DatabaseError error) {
// Failed to read value
Log.w(TAG, "Failed to read value.", error.toException());
    }
});
When the code is executed, it will result in fetching the data tree to your project. It is up to us how we make use of the data.
Since we are using unique key mechanism the data will be added under the Name reference with a unique identifier:

In Firebase Realtime Database to listen to the data changes, we have addValueEventListener for listening to the multiple nodes. In case you want to check the single value by adding addListenerForSingleValueEvent(), we can do that as well:
mDbRef = mDatabase.getReference("/Donor/name");


ValueEventListener changeListener = new ValueEventListener() {
@Override
public void onDataChange(DataSnapshot dataSnapshot) {

    }

@Override
public void onCancelled(DatabaseError databaseError) {

    }
};

mDbRef.addValueEventListener(changeListener);
When a listener is not required, it should be detached from the database reference object as follows:
mDbRef.removeEventListener(changeListener);
In a simple way, DataSnapshot can be accessed through the getValue method. We can use the child() method to reach to a specific path of a snapshot. Consider the following example code snippet that fetches the title:
String title = mDataSnapshot.child("message1").child("title").getValue(String.class);And all the children can be accessed using the getChildren() method. Consider the following code that is reading all the child details inside a for each loop:
for (DataSnapshot child : mDataSnapshot.getChildren()) {
    Log.i(TAG, child.getKey());
    Log.i(TAG, child.getValue(String.class));
}To update data, we can use the setValue() method by passing updated values. You can likewise utilize updateChildren() by passing the way to update data without exasperating other child nodes:
String newEmail = "ashokslsk@gmail.com";
mDbRef.child(userId).child("email").setValue(newEmail);
The following screenshot illustrates the updated value for the email field:

By using the updateChildren() method of the database reference class, we can write the HashMap data structure into Firebase Realtime Database. Let's create a HashMap and add different key-value pairs, each should be reflected in the Realtime Database:
// Write a message to the database
mDatabase = FirebaseDatabase.getInstance();
mDbRef = mDatabase.getReference("Donor/Name");

//Writing Hashmap
Map<String, Object> mHashmap = new HashMap<>();

mHashmap.put("Name 1/title", "Ashok");
mHashmap.put("Name 1/content", "Parinitha");
mHashmap.put("Name 2/title", "Krishna");
mHashmap.put("Name 2/content", "Sumuthra");

mDbRef.updateChildren(mHashmap);
The following screenshot illustrates the HashMap writing in the Firebase console:

Lists are compelling data structures and they help in numerous use cases. Firebase has excellent support for HashMap and lists. Users can append the data according to the unique key from Firebase, or you can create your logic to create a unique identifier. Using the push() method a user can insert the data, and there are many ways to filter and match the data pushed. Let's see how the push() method helps in creating a list. As usual first grab the reference to the database and then using the push() method get the unique key. Using the push() method we can add a new child:
// Write a message to the database
mDatabase = FirebaseDatabase.getInstance();
mDbRef = mDatabase.getReference("Donor/Name");

//Setting firebase unique key for Hashmap list
String key = mDbRef.push().getKey();

mDbRef.child(key).setValue("First item");
Apart from allowing a database to create a list, it is also necessary to receive a data-changed notification from the list. This can be achieved through adding child event listeners. These listeners will notify the app when there is a new child added. We need to implement a couple of callbacks when we use this listener. Most commonly there is the onChildAdded() method when a child is added, and it sends a new data snapshot with data added. Note that onChildChanged() is called when there is an update to the existing node, and onChildRemoved() is called when a child node is removed. However onChildMoved() is called when any alterations change the list order:
ChildEventListener childListener = new ChildEventListener() {
@Override
public void onChildAdded(DataSnapshot dataSnapshot, String s) {
    }
@Override
public void onChildChanged(DataSnapshot dataSnapshot, String s) {
    }
@Override
public void onChildMoved(DataSnapshot dataSnapshot, String s) {
    }
@Override
public void onChildRemoved(DataSnapshot dataSnapshot) {
    }
@Override
public void onCancelled(DatabaseError databaseError) {
    }
};

mDbRef.addChildEventListener(childListener);
There are many ways to perform the query on the list. Firebase has a class named Query to access the database inside the application on specified criteria:
Query mQuery = mDbRef.orderByKey();

ValueEventListener mQueryValueListener = new ValueEventListener() {
@Override
public void onDataChange(DataSnapshot dataSnapshot) {
        Iterable<DataSnapshot> snapshotIterator = dataSnapshot.getChildren();
        Iterator<DataSnapshot> iterator = snapshotIterator.iterator();
while (iterator.hasNext()) {
            DataSnapshot next = (DataSnapshot) iterator.next();
            Log.i(TAG, "Value = " + next.child("name").getValue());
        }
    }
@Override
public void onCancelled(DatabaseError databaseError) {
    }
};

mQuery.addListenerForSingleValueEvent(mQueryValueListener);To delete data, you can call the removeValue() method onto database reference. You can likewise pass null to the setValue() method, which does the same delete operation:
//Removes the entire child
mDbRef.child(userId).removeValue();
//Passing null to remove the calue
mDbRef.chile(userId).child("name").setValue(null);

// Similarly Hashmap can also be removed
Map<String, Object> mHashmap = new HashMap<>();

mHashmap.put("Name 1/title", null);
mHashmap.put("Name 1/content", null);
mHashmap.put("Name 2/title", null);
mHashmap.put("Name 2/content", null);
The following screenshot shows the Firebase console reaction for the delete operation:

At the point when clients are disconnected from the internet, the Realtime Database SDKs employ local cache on the device to store changes. Later when the device comes online, the local data is automatically synchronized to Realtime Database. We can enable disk persistence to save the data offline from the following lines of code:
//Offline support
FirebaseDatabase.getInstance().setPersistenceEnabled(true);
Firebase database rules control the process in which the data is put away in a Firebase Realtime Database, data is secured, approved, and indexed. These rules are characterized, utilizing a rules articulation language, such as JSON that might be arranged on each project basis, utilizing either the Firebase console or Firebase command-line interface.
In this section, we will explore Firebase rules in detail through the Firebase console.
By default, Firebase sets the rules for users to authenticate before writing or reading operations. We can go to our project in Firebase console and choose the Database option in the left-hand options panel and go to the Rules tab in the Main panel. The default rules are as follows:
{
 "rules": {
 ".read": "auth != null",
 ".write": "auth != null"
 }
}
The following screenshot shows the default security configurations for any Realtime Database project:

Firebase offers a unique way to examine rules in the simulator. In the right-hand corner of the Firebase console's Main window, you will notice a blue button labelled as SIMULATOR, click on it to have a perceptible familiarity. Now we can see that there are two checkboxes and one input field to enter the URL and a toggle button indicating Authenticated. If you toggle it towards the right side, you will see a drop-down allowing you to choose the security provider, and it will also show UID and auth token payload. When we click on the RUN button, it will show the possible responses.
The following screenshot shows the Simulator in a default state:

If we press the RUN button, the simulator assumes that the user continues not-authenticated, and it will return a Simulated read denied error.
The following screenshot illustrates the not-authenticated user's state:

Note
If you want to allow the user to access the database without authentication then you need to set the rules to true.
Since now we know what a simulator is, let's check what happens when we push the toggle button and choose a provider:

It will grant the access to the database. Likewise, we can run the test on the write operation and understand what happens behind the screen.
Typically, there are four types of database rules. These rules dictate different responsibilities:
- Read and write rules: As already seen, the
.readand.writerule types are utilized to pronounce the conditions under which the data in a Realtime Database might be perused and written by clients. - Data validation rules: The
.validaterule type enables standards to be used that approve data values before they are written to the database. This gives an adaptable approach to guarantee that data sent to the database meets the precise form. This includes ensuring that the data sent to a specific database node is string and does not surpass a particular length, child node limits, and so on. - Indexing rules: The
.indexOnrule type gives a system by which you, as the application engineer, have database nodes to be indexed, so intern helps you in arranging your child nodes as indexes, and it will help in ordering and querying.
Database rules are versatile and powerful and if we want to customize certain operations we can achieve it through rules. For instance, if we require giving access to read all the data and no write access to users, we can achieve this by using the following rules:
{
"rules": {
".read": true,
".write": false
}
}
The preceding rules will allow the user to have a read access to the database. Since there isn't any path specified, the complete database is readable, but not writable. If we want to customize on node basis we can take the node name into the rules and we can give the rules as follows. Test the rules in the simulator before publishing them:
{
"rules": {
".write" : false,
"Donor" : {
".read" : true
}
}
}
The following screenshot illustrates custom rules for read-write access to a particular node:
We can customize the rules to a level where we can specify which node needs to be read, which node can be written, which cannot be written, and a lot more.
Another outstanding feature of Firebase is security. Ensuring that no data is being given access to the unapproved or not-authenticated users. For this problem there is a variable named auth. It is a predefined variable within the database rules. It contains the auth provider, used auth ID, and token and user's UID. Using this we can restrict the database access and grant the application on a use case basis. Consider the following diagram for apprehending the security. There are blood donors and the details are helpful for having authentic donor information:

Consider the following rules that allow only authenticated users to read the data:
 {
"rules": {
".write" : false,
"Donor" : {
"$uid": {
".read": "auth != null && auth.uid == $uid"
}
}
}
}
The following screenshot shows the simulated authenticated user:

In previous examples, we have seen how to set the rules, how to use the predefined variables of rules, and so on. Now let's understand what custom variables are. Anything that has $ and the name that describes the node will be a variable that we can use in rule expressions. Say for instance, the value allocated to the UID will, obviously, rely upon which node is being read, since every user ID node will have a unique value doled out to it. The $ variable gives an approach to store the value to the key and reference rule expressions.
With the ability to create custom variables, Firebase has predefined variables that can be used in database rules in many use cases. The following is a list of predefined variables:
auth: This variable contains all the authentication related data, including UID and provider information. A null value in auth variable indicates that a user is not-authenticated.now: This variable has the current timestamp in milliseconds elapsed from a few decades (January 1, 1970).data: This is the reference of current data associated with a read or write request. Data supplies aRuleDataSnapshotinstance for different methods to find the data content.newData: When a write request is approved it creates aRuleDataSnapshotinstance to write.root: This denotesRuleDataSnapshotof the tree from the current database tree.
RuleDataSnapshot is accessible from data and newData predefined variables. RuleDataSnapshot offers a variety of methods to perform operations on. They are enlisted as follows:
Method name | What it does |
|
|
| It will return a parent node from the current node. |
| This method will return true or false on a specified child existence. |
| This method will return true or false on a specified array of children existence. |
| This method will return true or false on |
| It will return the priority data from the snapshot. |
| It will return true or false if the snapshot has numeric value. |
| It will return true or false if the snapshot has a String value. |
| It will return true or false if the snapshot has a boolean value. |
| Used with the |
Consider the following code snippet that checks whether email fields exist or not, this will be very handy when you have huge datasets:
".write" : "data.child('Donor').child('Name').child('userid').child('email').exists()"We have explored all the possibilities of Realtime Database. Now let's build a small application using what we have learned. Ideating on the health and medical field is something that helps in the long term. In this project, we will build an Android mobile application that is crowdsourced to fetch email addresses of blood donors.
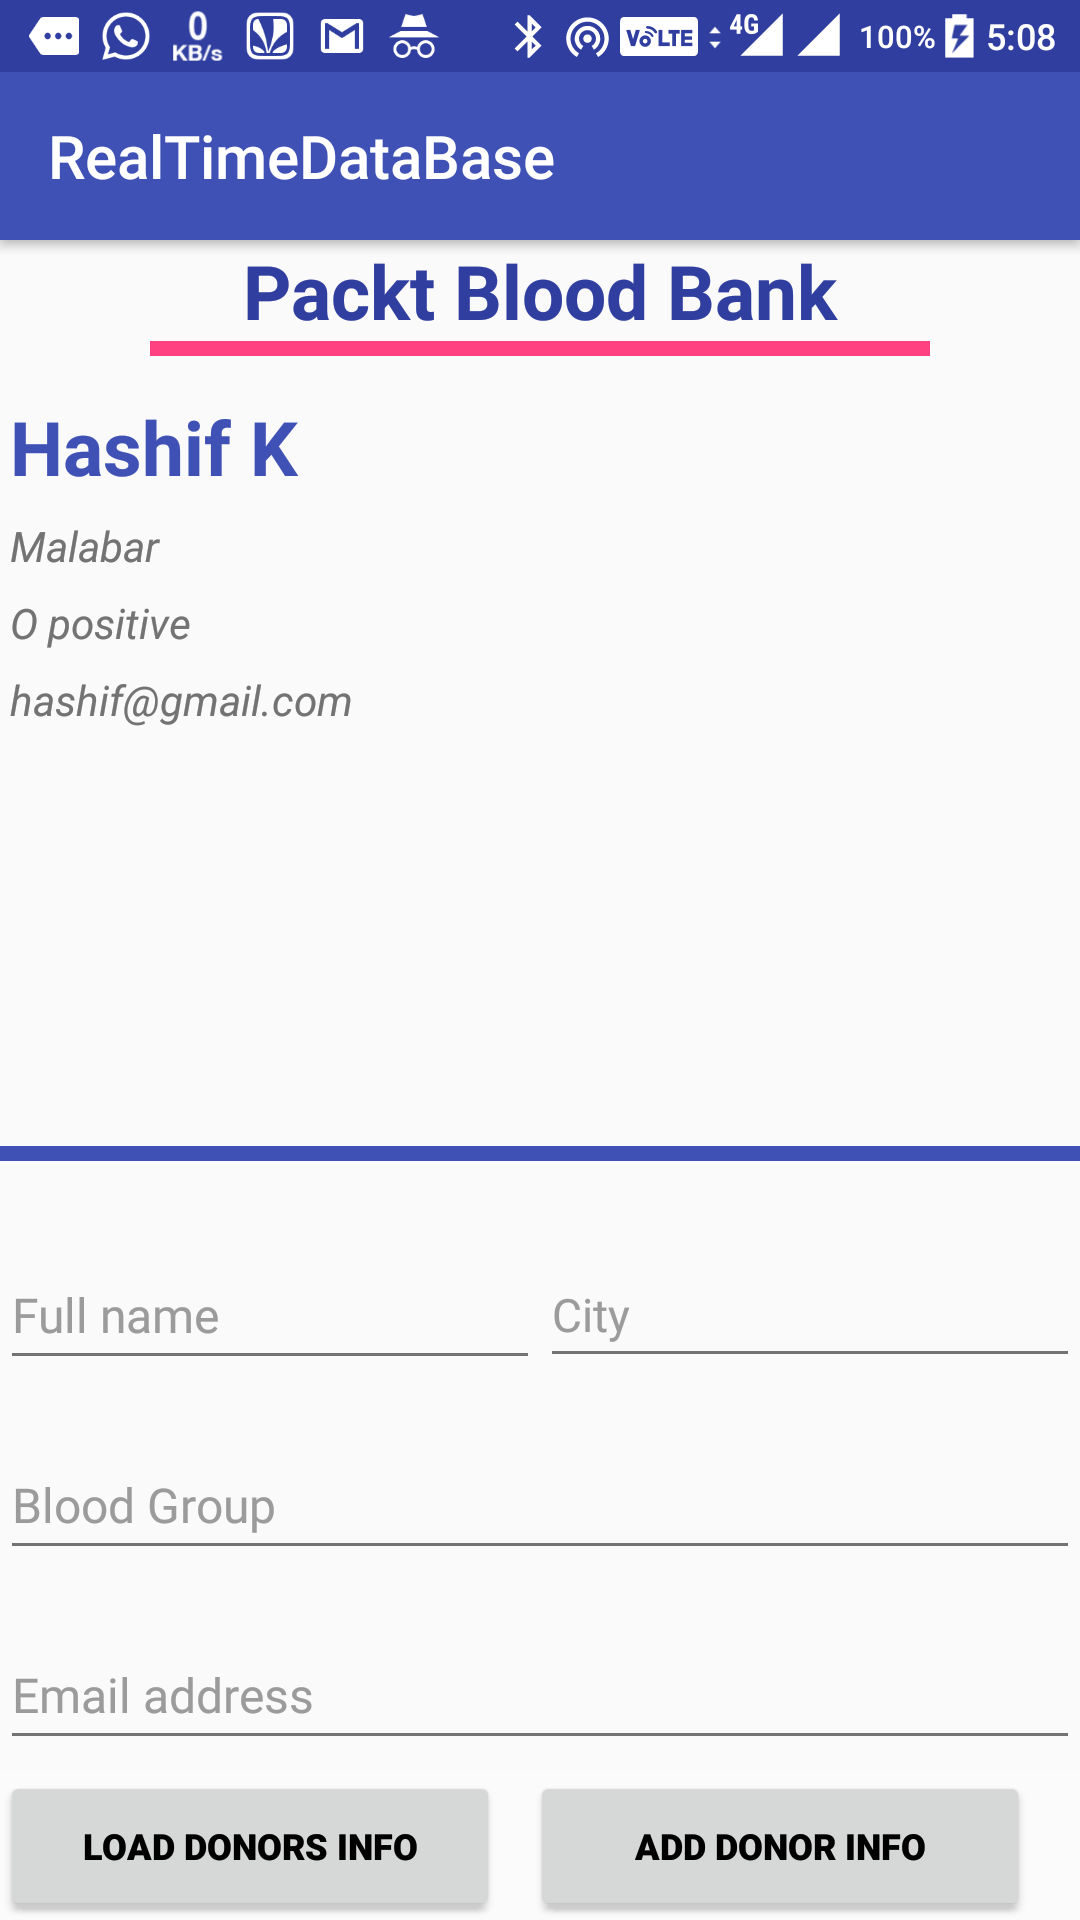
In this application, we will keep the user interface simple and informative. All we have is one RecyclerView and two buttons for adding and loading the data. The following xml layout code dictates the UI design:
<?xml version="1.0" encoding="utf-8"?>
<LinearLayout xmlns:android="http://schemas.android.com/apk/res/android"
xmlns:tools="http://schemas.android.com/tools"
android:id="@+id/activity_main"
android:layout_width="match_parent"
android:layout_height="match_parent"
android:orientation="vertical">

    <TextView
android:textColor="@color/colorPrimaryDark"
android:textStyle="bold"
android:textSize="25dp"
android:gravity="center"
android:text="Packt Blood Bank"
android:layout_width="match_parent"
android:layout_height="wrap_content" />
    <View
android:layout_marginLeft="50dp"
android:layout_marginRight="50dp"
android:layout_width="match_parent"
android:layout_height="5dp"
android:background="@color/colorAccent" />
The following code adds the vertical LinearLayout to support the DynamicData:
    <LinearLayout
android:layout_marginTop="10dp"
android:layout_width="match_parent"
android:layout_height="match_parent"
android:orientation="vertical">
        <LinearLayout
android:layout_width="match_parent"
android:layout_height="match_parent"
android:layout_weight="1"
android:orientation="vertical">

            <android.support.v7.widget.RecyclerView
android:id="@+id/peopleList"
android:layout_width="match_parent"
android:layout_height="match_parent" />
        </LinearLayout>
The above code sets the dynamic lists that load the data from RecyclerView. lets continue updating the same layout to make the UI complete.
        <View
android:layout_width="match_parent"
android:layout_height="5dp"
android:background="@color/colorPrimary" />
        <LinearLayout
android:layout_width="match_parent"
android:layout_height="match_parent"
android:layout_weight="1"
android:orientation="vertical">
The following layout adds a scrollable layout for the input controls.
            <ScrollView
android:scrollIndicators="right"
android:scrollbarStyle="insideOverlay"
android:layout_width="match_parent"
android:layout_height="match_parent"
android:scrollbars="vertical">
                <LinearLayout
android:layout_width="match_parent"
android:layout_height="150px"
android:layout_marginTop="40px"
android:gravity="center"
android:orientation="vertical">
                    <LinearLayout
android:layout_width="match_parent"
android:layout_height="150px"
android:layout_marginTop="40px"
android:gravity="center"
android:orientation="horizontal">
                        <EditText
android:id="@+id/donorNameInput"
android:layout_width="match_parent"
android:layout_height="wrap_content"
android:layout_weight="1"
android:hint="Full name"
android:textColor="#000000"
android:textSize="16dp" />
                        <EditText
android:id="@+id/donorCityInput"
android:layout_width="match_parent"
android:layout_height="wrap_content"
android:layout_weight="1"
android:hint="City"
android:textColor="#000000" />
                    </LinearLayout>
The following code adds the donor blood group type and email address:
                    <LinearLayout
android:layout_width="match_parent"
android:layout_height="150px"
android:layout_marginTop="40px"
android:gravity="center"
android:orientation="horizontal">
                        <EditText
android:id="@+id/donorBloodGroupInput"
android:layout_width="match_parent"
android:layout_height="wrap_content"
android:layout_weight="1"
android:hint="Blood Group"
android:textColor="#000000"
android:textSize="16dp" />
                    </LinearLayout>

                    <LinearLayout
android:layout_width="match_parent"
android:layout_height="150px"
android:layout_marginTop="40px"
android:gravity="center"
android:orientation="horizontal">

                        <EditText
android:id="@+id/donorEmailInput"
android:layout_width="match_parent"
android:layout_height="wrap_content"
android:layout_weight="1"
android:hint="Email address"
android:textColor="#000000"
android:textSize="16dp" />

                    </LinearLayout>
The following code adds the buttons to act on the data received from the input fields:
                    <RelativeLayout
android:layout_width="match_parent"
android:layout_height="wrap_content"
android:background="#36FFFFFF">
                        <Button
android:id="@+id/loadBtn"
android:layout_width="500px"
android:layout_height="150px"
android:text="Load Donors info"
android:textColor="#000000"
android:textStyle="bold" />
                        <Button
android:id="@+id/addBtn"
android:layout_width="500px"
android:layout_height="150px"
android:layout_marginLeft="30px"
android:layout_toRightOf="@id/loadBtn"
android:text="Add Donor info"
android:textColor="#000000"
android:textStyle="bold" />
                    </RelativeLayout>
                </LinearLayout>
            </ScrollView>
        </LinearLayout>
    </LinearLayout>
</LinearLayout>
We also need each item layout for the RecyclerView, which is defined as follows. In this layout, all we have is four TextView:
<?xml version="1.0" encoding="utf-8"?>
<LinearLayout xmlns:android="http://schemas.android.com/apk/res/android"
android:layout_width="match_parent"
android:layout_height="wrap_content"
android:orientation="vertical">

    <TextView
android:id="@+id/donorName"
android:layout_width="match_parent"
android:layout_height="match_parent"
android:gravity="center_vertical"
android:padding="10px"
android:textColor="@color/colorPrimary"
android:textSize="25dp"
android:textStyle="bold" />

    <TextView
android:id="@+id/donorCity"
android:layout_width="match_parent"
android:layout_height="match_parent"
android:gravity="center_vertical"
android:padding="10px"
android:text="+216 54 821 200"
android:textSize="14dp"
android:textStyle="italic" />

    <TextView
android:id="@+id/donorBloodGroup"
android:layout_width="match_parent"
android:layout_height="match_parent"
android:gravity="center_vertical"
android:padding="10px"
android:text="+216 54 821 200"
android:textSize="14dp"
android:textStyle="italic" />

    <TextView
android:id="@+id/donorEmail"
android:layout_width="match_parent"
android:layout_height="match_parent"
android:gravity="center_vertical"
android:padding="10px"
android:text="+216 54 821 200"
android:textSize="14dp"
android:textStyle="italic" />

</LinearLayout>
Now that we have our user interface in place, let's dive deep into the Java part. Let's create a class called Donor. This class is a Plain Old Java Object (POJO) class that we will use throughout the application, and the POJO class dictates the structure of the data.
The following POJO class expresses the idea and the data format that we will save in Firebase. Using the POJO class we will pass the data to the adapter:
package com.ashok.packt.realtime.database.model;

/**
 * Created by ashok.kumar on 20/10/17.
 */
public class Donor {

private String FullName;
private String Email;
private String City;
private String BloodGroup;
public Donor(){

    }
Now within the same class lets create a constructor for passing the data to the POJO:
public Donor(String fullName, String email, String city, String bloodGroup) {
FullName = fullName;
Email = email;
City = city;
BloodGroup = bloodGroup;
    }

public String getFullName() {
return FullName;
    }

public void setFullName(String fullName) {
FullName = fullName;
    }

public String getEmail() {
return Email;
    }

public void setEmail(String email) {
Email = email;
    }

public String getCity() {
return City;
    }

public void setCity(String city) {
City = city;
    }

public String getBloodGroup() {
return BloodGroup;
    }

public void setBloodGroup(String bloodGroup) {
BloodGroup = bloodGroup;
    }
}
Now let's write our Adapter class. The Adapter class requires POJO, view holder, and row layout. Consider spending some time on understanding the RecyclerView adapter:
package com.ashok.packt.realtime.database.adapter;

import android.content.Context;
import android.support.v7.widget.RecyclerView;
import android.view.LayoutInflater;
import android.view.View;
import android.view.ViewGroup;
import android.widget.TextView;
import com.ashok.packt.realtime.database.R;
import com.ashok.packt.realtime.database.model.Donor;

import java.util.List;

/**
 * Created by ashok.kumar on 20/05/18.
 */

public class RecyclerViewAdapter extends RecyclerView.Adapter<RecyclerViewAdapter.View_Holder>{

private Context mContext;
private List<Donor> ItemList;

public RecyclerViewAdapter(Context mContext, List<Donor> itemList) {
this.mContext = mContext;
ItemList = itemList;
    }
The constructors require context and the list of donor object for setting the data in RecyclerView callbacks.
@Override
public View_Holder onCreateViewHolder(ViewGroup parent, int viewType) {
        View itemView = LayoutInflater.from(parent.getContext())
                .inflate(R.layout.donor_list_row, parent, false);
return new View_Holder(itemView);
    }
The above Override method will be responsible for inflating the donor list item row.
@Override
public void onBindViewHolder(View_Holder holder, int position) {

        Donor Item = ItemList.get(position);
        holder.Name.setText(Item.getFullName());
        holder.City.setText(Item.getCity());
        holder.BloodGroup.setText(Item.getBloodGroup());
        holder.Email.setText(Item.getEmail());

    }

@Override
public int getItemCount() {
return ItemList.size();
    }

public class View_Holder extends RecyclerView.ViewHolder {

        TextView Name;
        TextView City;
        TextView BloodGroup;
        TextView Phone;
        TextView Email;

        View_Holder(View itemView) {
super(itemView);

Name = (TextView) itemView.findViewById(R.id.donorName);
City = (TextView) itemView.findViewById(R.id.donorCity);
BloodGroup = (TextView) itemView.findViewById(R.id.donorBloodGroup);
Email = (TextView) itemView.findViewById(R.id.donorEmail);
        }
    }

}
Now, MainActivity holds the complete logic for the application by adding the data to Firebase, fetching the data from Firebase, and loading that in RecyclerView. I have also written methods to update, find, and delete for your future reference:
package com.ashok.packt.realtime.database;

import android.os.Bundle;
import android.support.v7.app.AppCompatActivity;
import android.support.v7.widget.LinearLayoutManager;
import android.support.v7.widget.RecyclerView;
import android.util.Log;
import android.view.View;
import android.widget.EditText;

import com.ashok.packt.realtime.database.adapter.RecyclerViewAdapter;
import com.ashok.packt.realtime.database.model.Donor;
import com.google.firebase.database.ChildEventListener;
import com.google.firebase.database.DataSnapshot;
import com.google.firebase.database.DatabaseError;
import com.google.firebase.database.DatabaseReference;
import com.google.firebase.database.FirebaseDatabase;
import com.google.firebase.database.Query;
import com.google.firebase.database.ValueEventListener;

import java.util.ArrayList;
import java.util.Iterator;
import java.util.List;

public class MainActivity extends AppCompatActivity {

private DatabaseReference myDatabaseReference;
private String personId;
private List<Donor> ItemList;
private RecyclerView mRecyclerview;
private RecyclerViewAdapter mAdapter;
Lets initialise all the above code in the onCreate method as shown below:
@Override
protected void onCreate(Bundle savedInstanceState) {
super.onCreate(savedInstanceState);
        setContentView(R.layout.activity_main);

mRecyclerview = (RecyclerView) findViewById(R.id.peopleList);
        RecyclerView.LayoutManager mLayoutManager = new LinearLayoutManager(this);
mRecyclerview.setLayoutManager(mLayoutManager);

// for data persistence
FirebaseDatabase.getInstance().setPersistenceEnabled(true);
myDatabaseReference=FirebaseDatabase.getInstance().getReference("Donor");
personId= myDatabaseReference.push().getKey();


        (findViewById(R.id.addBtn)).setOnClickListener(new View.OnClickListener() {
@Override
public void onClick(View view) {

                String FullName = ((EditText)findViewById(R.id.donorNameInput)).getText().toString();
                String Email = ((EditText)findViewById(R.id.donorEmailInput)).getText().toString();
                String City = ((EditText)findViewById(R.id.donorCityInput)).getText().toString();
                String BloodGroup = ((EditText)findViewById(R.id.donorBloodGroupInput)).getText().toString();


                addPerson(FullName,Email, City, BloodGroup);
            }
        });


        (findViewById(R.id.loadBtn)).setOnClickListener(new View.OnClickListener() {
@Override
public void onClick(View view) {
                readData();
            }
        });
    }
After adding the views its now time to work on the adding and retrieving the data as shown below:
private void addPerson(String name, String Email, String city, String Bloodgroup){
personId= myDatabaseReference.push().getKey();
Donor person = new Donor(name, Email, city, Bloodgroup);
myDatabaseReference.child(personId).setValue(person);
}

private void updatePerson(String name,int phoneNumber){
myDatabaseReference.child(personId).child("fullName").setValue(name);
myDatabaseReference.child(personId).child("phoneNumber").setValue(phoneNumber);
 }

private void removePerson(String name){
myDatabaseReference.child(personId).removeValue();
 }
private void readData(){
ItemList = new ArrayList<>();
myDatabaseReference.addValueEventListener(new ValueEventListener() {
@Override
public void onDataChange(DataSnapshot dataSnapshot) {
 Iterable<DataSnapshot> snapshotIterator = dataSnapshot.getChildren();
 Iterator<DataSnapshot> iterator = snapshotIterator.iterator();
while((iterator.hasNext())){
 Donor donor = iterator.next().getValue(Donor.class);
ItemList.add(donor);
mAdapter.notifyDataSetChanged();
 }
 }

@Override
public void onCancelled(DatabaseError databaseError) {

 }
 });

mAdapter = new RecyclerViewAdapter(this, ItemList);
mRecyclerview.setAdapter(mAdapter);

 }
We also can do the specific person search as shown below:
private void findPerson(String name){
 Query deleteQuery = myDatabaseReference.orderByChild("fullName").equalTo(name);
 deleteQuery.addChildEventListener(new ChildEventListener() {
@Override
public void onChildAdded(DataSnapshot dataSnapshot, String s) {
 Iterable<DataSnapshot> snapshotIterator = dataSnapshot.getChildren();
 Iterator<DataSnapshot> iterator = snapshotIterator.iterator();
while((iterator.hasNext())){
 Log.d("Item found: ",iterator.next().getValue().toString()+"---");
 }
 }

@Override
public void onChildChanged(DataSnapshot dataSnapshot, String s) {

 }

@Override
public void onChildRemoved(DataSnapshot dataSnapshot) {

 }

@Override
public void onChildMoved(DataSnapshot dataSnapshot, String s) {

 }

@Override
public void onCancelled(DatabaseError databaseError) {
 Log.d("Item not found: ","this item is not in the list");
 }
 });
 }
}
When you compile and run the program in your Android device the output will have the following look and feel:
This chapter is an outstanding exercise intended to show the power of the Firebase Realtime Database, to store and manage data in the list format including saving, erasing, and furthermore, looking for list items. This has included the use of the push() method for the DatabaseReference class with the Query class and both value and child event listeners. We have also understood database rules, and we have built an application using all this knowledge that helps blood seekers by connecting to blood donors.