


 Download code from GitHub
Chapter 1: Getting Started with Gin
This chapter will give you a foundational understanding of what the Gin framework is, how it works, and its features. We'll also supply guidelines for setting up the Go runtime and development environment. Moreover, we'll discuss the advantages of using Gin as a web framework for building distributed applications. We will finish this chapter by learning to write our first Gin-based web application.
In this chapter, we will cover the following topics:
- What is Gin?
- Go runtime and integrated development environment (IDE)
- Go modules and dependency management
- Writing a Gin web application
By the end of this chapter, you will be able to build a basic HTTP server with the Gin web framework.
Technical requirements
To follow along with this chapter, you will need the following:
- Some programming experience. The code in this chapter is pretty simple, but it helps to know something about Go.
- A tool to edit your code with. Any text editor you have will work fine. Most text editors have good support for Go. The most popular are Visual Studio Code (VSCode) (free), GoLand (paid), and Vim (free).
- A command terminal. Go works well using any Terminal on Linux and Mac, and on PowerShell or CMD in Windows.
The code bundle for this chapter is hosted on GitHub at https://github.com/PacktPublishing/Building-Distributed-Applications-in-Gin/tree/main/chapter01.
What is Gin?
Before deep diving into the Gin web framework, we need to understand why Go is a top choice when it comes to building scalable and distributed applications.
Go (also referred to as Golang) is an open source programming language, developed by Robert Griesemer, Rob Pike, and Ken Thompson within Google in 2007. It is a compiled, statically typed language designed to enable users to easily write reliable, scalable, and highly efficient applications. The key features of Go are as follows:
- Simple and consistent: Go has a rich set of library packages with powerful standard libraries for testing, error management, and concurrency.
- Fast and scalable: Go is a general-purpose programming language developed for the multi-core reality of today's computers. It has built-in concurrency with Goroutines and channels. Goroutines provide lightweight, threaded execution. Declaring a Goroutine is as simple as adding the
gokeyword before a function. - Efficient: Go provides efficient execution and compilation. Go is also statically linked, which means that the compiler invokes a linker in the last step that resolves all library references. This means we would get one binary executable after compiling a Go program with no external dependencies. Moreover, it offers efficient memory utilization with a built-in garbage collector (Go exhibits many similarities with low-level programming languages such as C or C++).
- Community and support: Go is backed by Google and has an ever growing ecosystem and numerous contributors to the language on GitHub. Moreover, many online resources (tutorials, videos, and books) are available for getting started with Go.
Go has become hugely popular among enterprises and the open source community. Based on the StackOverflow Developer Survey 2020 (https://insights.stackoverflow.com/survey/2020), Go is in the top 5 of the most loved programming languages:

Figure 1.1 – Most loved programming languages according to the StackOverflow Survey 2020
Golang is known to be the number one choice when it comes to building large-scale, complex tools and cloud-based applications. The following image highlights the main open source projects that have been developed using Go:
- Docker: A solution that's used to create, deploy, and run applications using containers.
- Kubernetes: A container orchestration platform for managing containers across a fleet of nodes/machines.
- Etcd: A reliable distributed key-value store used to store data for a distributed system or application.
- InfluxDB: A scalable time-series database designed to handle high write and query loads.
- CoreOS: A lightweight operating system designed to deploy container-based applications.
- Terraform: An infrastructure-as-code tool for building, changing, and versioning cloud infrastructure.
- CockroachDB: A cloud-native SQL database for data-intensive applications.
- Consul: A distributed store with service discovery, service mesh, and health check monitoring capabilities:

Figure 1.2 – Open source tools powered by Go
As we can see, Go is a solid language for distributed systems and infrastructure tools. Docker, Kubernetes, Prometheus, and others are built using Go.
Go is also known for building web applications of all shapes and sizes. This is partly due to the fantastic work that has been put into making the standard library clean, consistent, and easy to use. Perhaps one of the most important packages for any budding Go web developer is the net/http package. This package allows you to build HTTP servers in Go with its powerful compositional constructs.
To build a web application, you'll need to build an HTTP server. The client (for example, a browser) makes an HTTP request with some information; the server then processes that request and returns a response. The response can be in JSON, XML, or HTML format:

Figure 1.3 – HTTP client-server communication
This pattern of request-response is one of the key focal points in building web applications in Go.
While the net/http package allows you to craft a web application easily, the routing mechanism is not so powerful, especially for complex applications. That's where a web framework comes into play. The top Golang web frameworks are listed in the following table:

Gin is possibly the most used and largest running Go web framework. The framework has already harvested 48,210 stars and 5,100 forks in GitHub, which shows that the framework is very popular. This modular framework can be extended easily with minimal fuss. It is great to use because many components can be reused with a direct net/http package.
Important note
Another strong but conservative framework is Gorilla/Mux. It has one of the biggest online communities with many resources on the internet to teach you how to build end-to-end web applications.
According to the official documentation https://gin-gonic.com/docs/, Gin is described as follows:
Gin is a minimalistic web framework suitable for building web applications, microservices, and RESTful APIs. It reduces boilerplate code by creating reusable and extensible pieces of code: you can write a piece of middleware that can be plugged into one or more request handlers. Moreover, it comes with the following key features:
- Well documented: The documentation for Gin is broad and comprehensive. Most tasks that you will need to do relating to the router can be found easily in the docs.
- Simplicity: Gin is a pretty minimalistic framework. Only the most essential features and libraries are included, with little to no boilerplate to bootstrap applications, making Gin a great framework for developing highly available REST APIs.
- Extensible: The Gin community has created numerous pieces of well-tested middleware that make developing for Gin a charm. Features include compression with GZip, authentication with an authorization middleware, and logging with external solutions such as Sentry.
- Performance: Gin runs 40x faster than Martini and runs comparatively well compared to other Golang frameworks. The following is the results of a benchmark I ran against multiple Go libraries:

Figure 1.4 – Golang web framework benchmarks
Important note
This benchmark was performed on a macOS High Sierra, 2.7 GHz Intel Core i7, 16 GB DDR3 computer, with Go 1.15.6 as the runtime environment.
That being said, before you can write your first line of Go code, you'll need to set up the environment. Let's start by installing Go.
Setting up the Go environment
At the time of writing this book, the latest version of Go is Go 1.15.6. To install Go, you can either download or use the official binary distributions, or you can install Go from the source code (https://github.com/golang/go).
Important note
The official binary distributions are available for FreeBSD (release 8 and above), Linux (2.6.23 and above), macOS (Snow Leopard and above), and Windows (XP and above). Both the 32-bit (386) and 64-bit (amd64) x86 processor architectures are supported. For FreeBSD and Linux, the ARM processor architecture is also supported.
To install Go, download the distribution package from the https://golang.org/dl/ web page, as shown here, and choose the file that's appropriate for your platform:
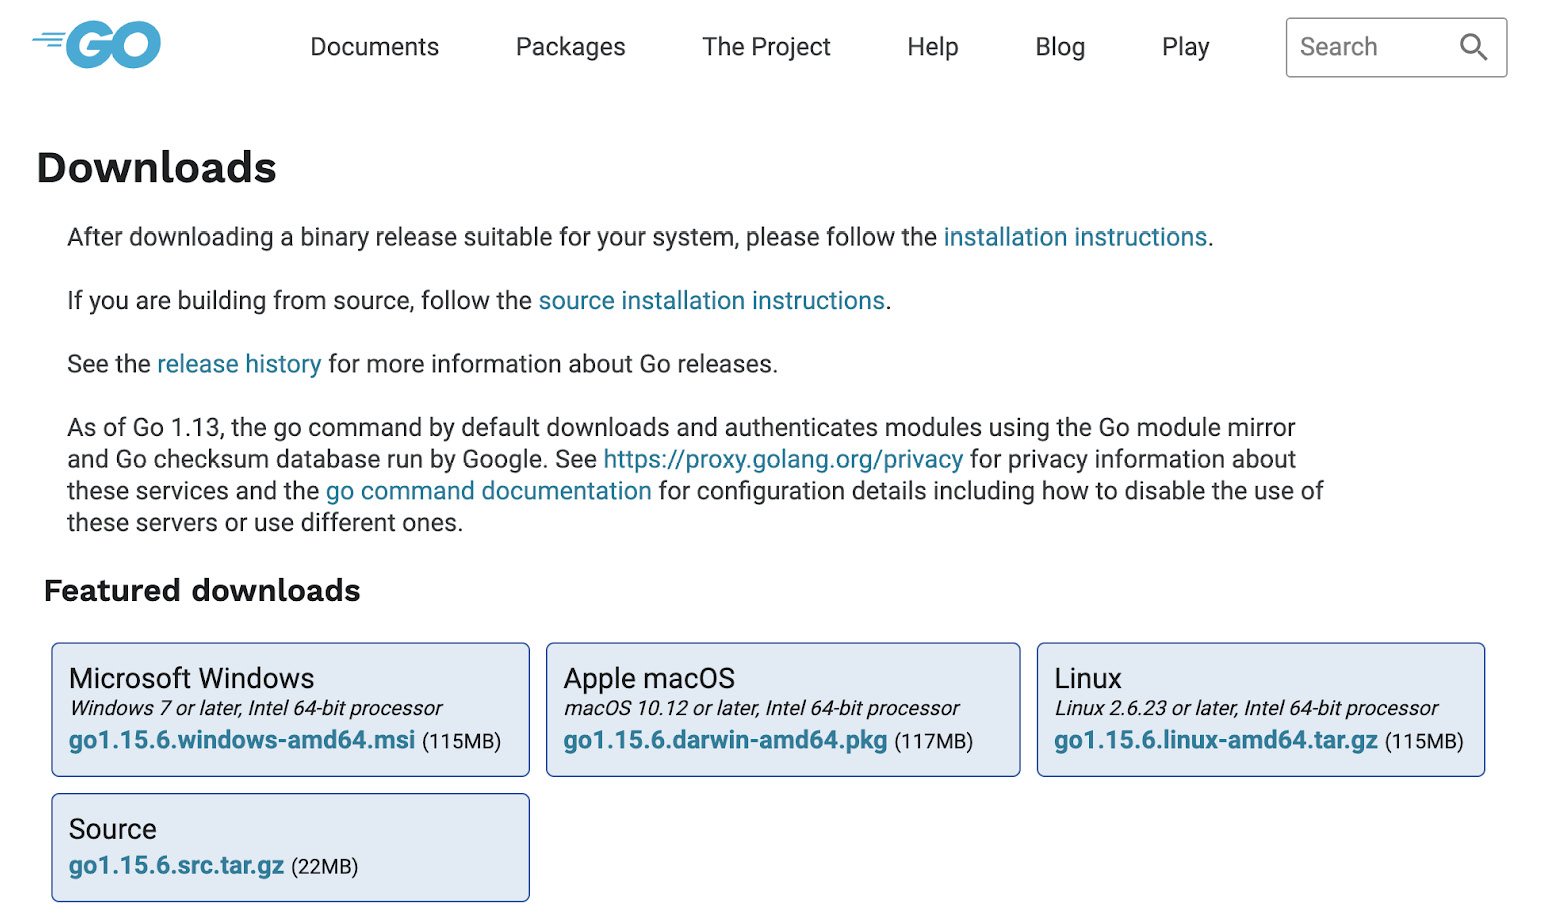
Figure 1.5 – Golang available packages
Once you have the distribution package, install Go according to your platform of choice. We will cover this in the following sections.
Linux/FreeBSD
To install Go on Linux or FreeBSD, you must download go.-.tar.gz. The latest Go for Linux on a 64-bit architecture is go1.15.6.linux-amd64.tar.gz:
wget -c https://golang.org/dl/go1.15.6.linux-amd64.tar.gz   //64bit
wget -c https://golang.org/dl/go1.15.6.linux-386.tar.gz     //32bit
Download the archive and extract it into the /usr/local folder. Then, run the following command as root or through sudo:
tar -C /usr/local -xzf go1.15.6.linux-amd64.tar.gz
Add /usr/local/go/bin to the PATH environment variable. You can do this by adding the following line to $HOME/.profile or /etc/profile (for a system-wide installation):
export PATH=$PATH:/usr/local/go/bin
Verify that you've installed Go by opening a command prompt and typing the following command:
go version
This command should display the installed version of Go:

Figure 1.6 – Installed version of Go
Let's move on to see how to set up a Go environment on Windows.
Windows
To install Go on Windows, you can either use the MSI installer or the ZIP archive. Installing from MSI is easier. The latest Go for Windows on a 64-bit architecture is go1.15.6.windows-amd64.msi. You will then need to execute one of the following commands based on your system:
wget -c https://golang.org/dl/go1.15.6.windows-amd64.msi   //64bit
wget -c https://golang.org/dl/go1.15.6.windows-386.msi     //32bit
Open the MSI file you downloaded and follow the prompts to install Go. By default, the installer will place Go at C:\Go and set up C:\Go\bin in your PATH environment variable. You can change the location as needed:
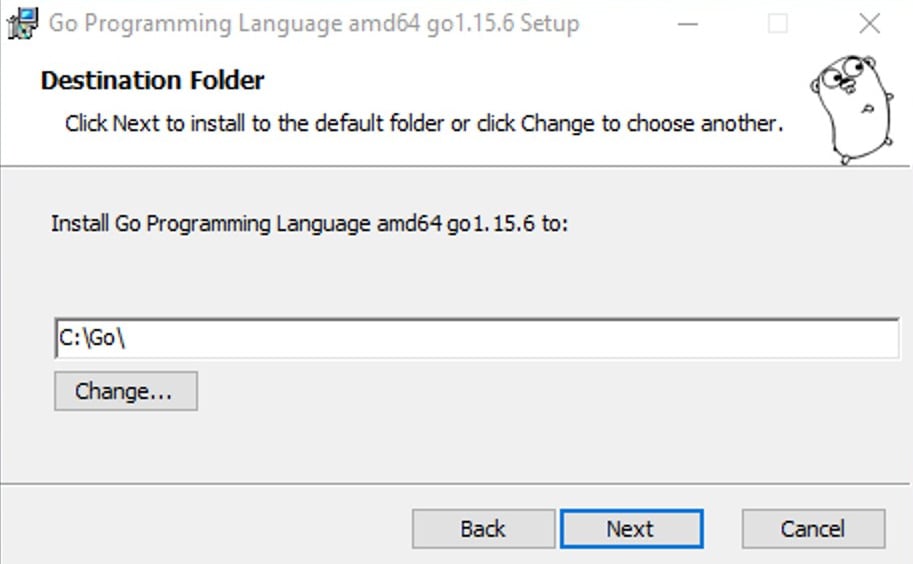
Figure 1.7 – Golang installation wizard
After installing Go, you will need to close and reopen any open command prompts so that changes to the environment that have been made by the installer are reflected in the command prompt.
Important note
Using the ZIP archive is easy as well. Extract the files into a directory (for example, C:\Go) and add the bin subdirectory to your PATH variable.
Once installed, click on the Start menu. Then, in the menu's search box, type cmd. After, press the Enter key. In the command prompt window that appears, type the go version command, as shown here:
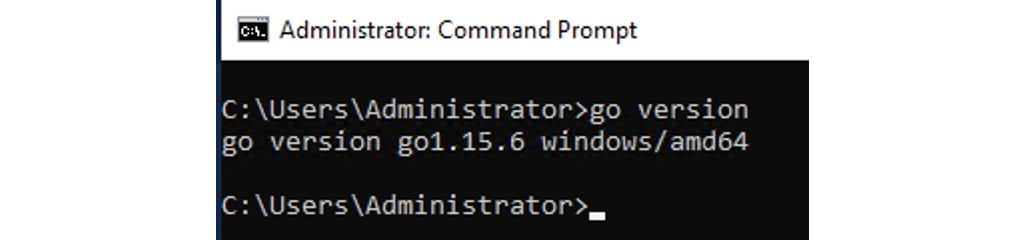
Figure 1.8 – Installed version of Go
You'll see go version go1.15.6 windows/amd64, as shown in the preceding screenshot. With that, you're all set up!
MacOS
For MacOS, you can download the appropriate PKG file; that is, go1.15.6.darwin-amd64.pkg (at the time of writing this book). Once downloaded, run through the installation wizard. The package will install the distribution to /usr/local/go and place the /usr/local/go/bin directory in your PATH environment variable:
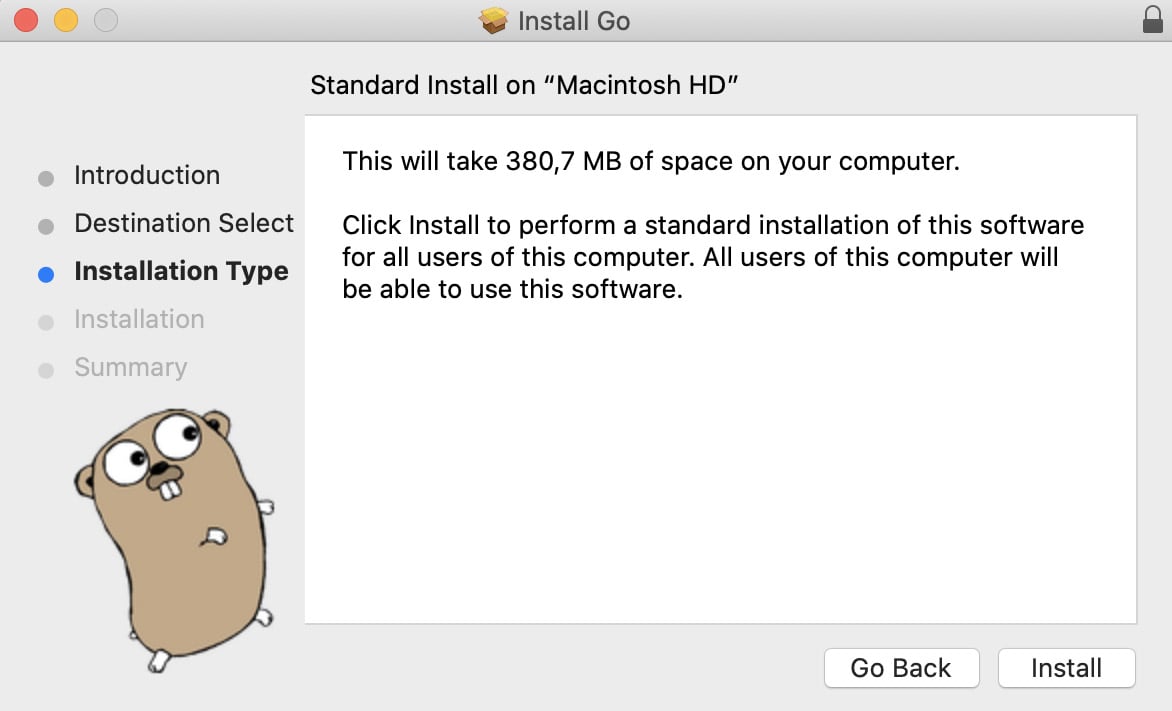
Figure 1.9 – Installing Go on MacOS
You'll need to restart your terminal, or run this command in your Terminal:
source ~/.profile
Alternatively, you can use Homebrew to install Go. This can be as simple as doing the following:
brew install golang@1.15.6
The Terminal window will give you feedback regarding the installation process of Go. It may take a few minutes before the installation is complete. Verify that you've installed Go by opening a command prompt and typing the go version command.
Important note
In the future, to update Go, you can run the following commands to update Homebrew and then update Go. You don't have to do this now as you've just installed the latest version:
brew update
brew upgrade golang
Now that you've installed Go, you need to set it up properly. Go development tools are designed to work with code maintained in public repositories, and the model is the same, regardless of whether you're developing an open source program or something else. Go code is developed in a workspace. A workspace is made up of three directories, namely the following:
bin: This will contain all you Go executable binaries.src: This will store your source files, which are organized in packages, with one subdirectory in thesrcdirectory representing one package.pkg: This will store your package objects.
The default directory for the Go workspace is the home directory with a go subdirectory or $HOME/go. Issue the following command to create the directory structure for your Go workspace:
mkdir -p $HOME/go/{bin,src,pkg}
The -p option tells mkdir to create all the parents in the directory, even if they don't currently exist. Using {bin, src, pkg} creates a set of arguments for mkdir and tells it to create the bin, src, and pkg directories. This will ensure the following directory structure is now in place:
The go, bin and  src folders should be at the same level (remove extra spaces from go and src folders, so the folders are aligned with bin folder)
$HOME
 └── go
 ├── bin
 └── src
Next, you need to set the GOPATH environment variable, as follows:
export GOPATH=$HOME/go
export PATH=$PATH:$GOPATH/bin
You can verify your $PATH has been updated by using the echo command and inspecting the output:
echo $PATH
You should see your $GOPATH/bin in your home directory. If you were logged in as USER, you will see /Users/USER/go/bin in the path:
/Users/USER/go/bin:/usr/local/sbin:/usr/local/bin:/usr/bin:/bin:/usr/sbin:/sbin
With the Go workspace and GOPATH created, we can go ahead and set up the development environment.
Integrated development environment
Throughout this book, I will be using an IDE to write RESTful API and services. Using an IDE can boost your productivity since it provides rich features such as autocompletion, highlighting code, a powerful built-in debugger, and custom extensions. There are many IDEs available. In this book, I will be using VSCode.
To install VSCode, download the appropriate package based on your system from https://code.visualstudio.com/download:
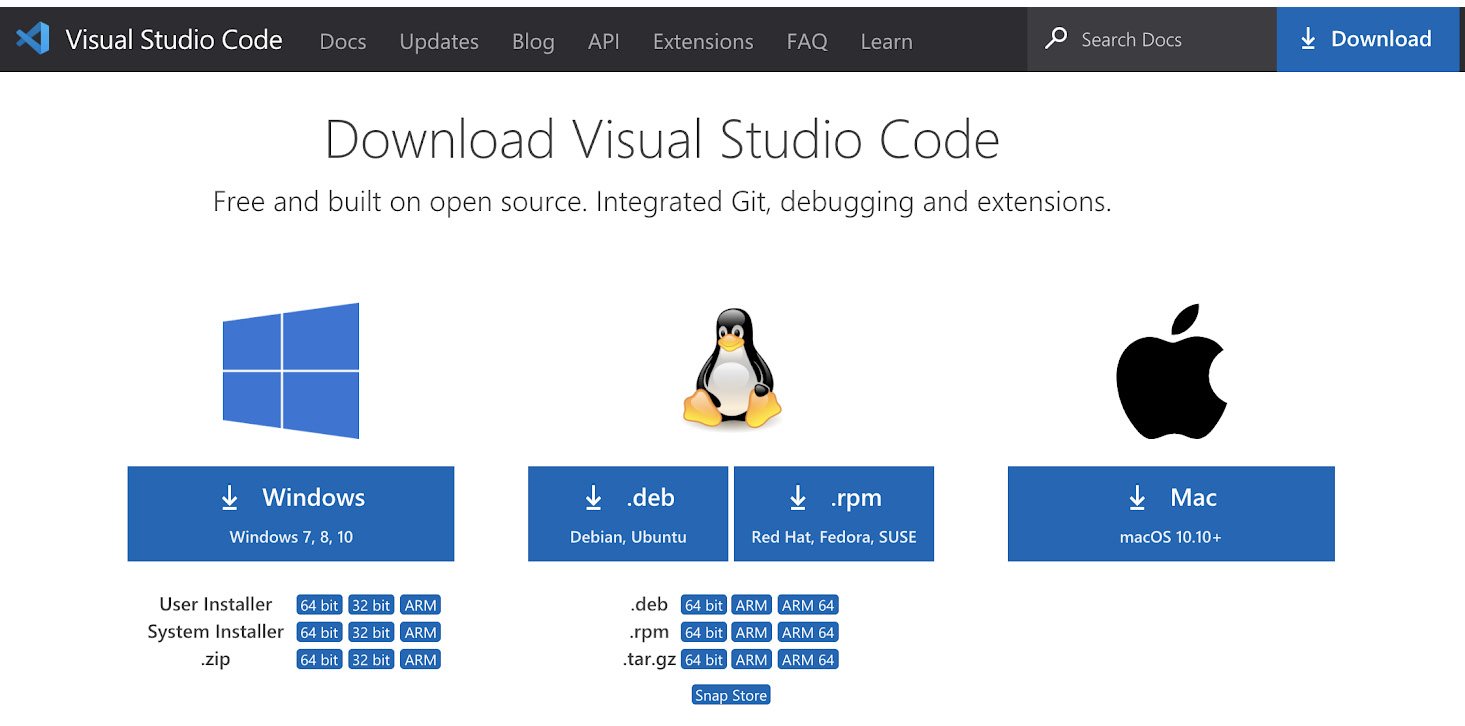
Figure 1.10 – VS Code – available packages
Note
Mac users can also use Brew to install VSCode with the following command:
brew install --cask visual-studio-code
Once downloaded, run the setup wizard and follow the instructions. Once the installation is complete, launch VSCode. You will be presented with the following start screen:

Figure 1.11 – VSCode user interface
VSCode supports all the popular programming languages and Git integration by default. You can also install extensions to extend the functionality of VSCode. The VS Code marketplace contains a huge list of free community plugins and extensions. To enable support for Golang, you need to install an extension called Go by navigating to the Extensions tab from the left sidebar:
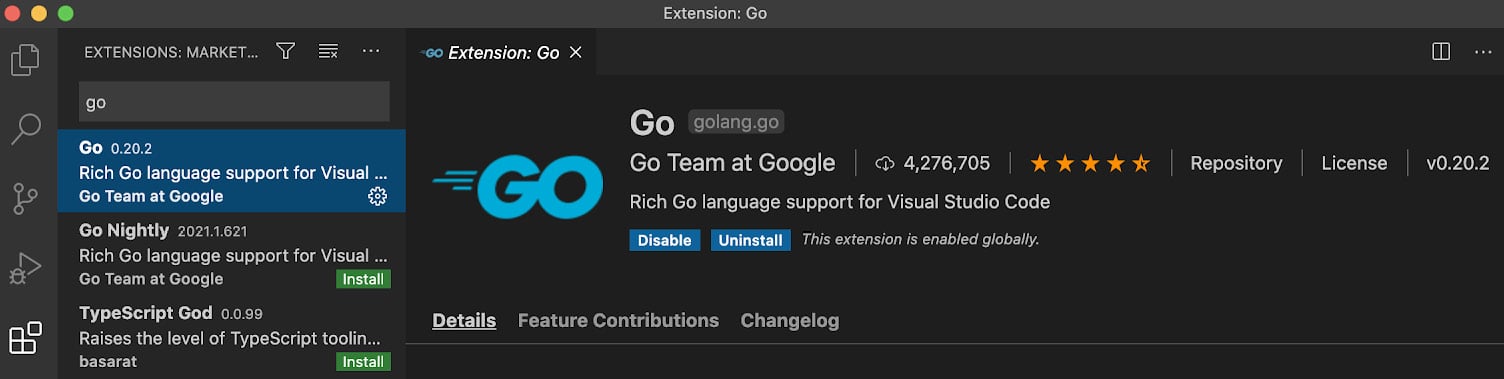
Figure 1.12 – Golang extension for VSCode
Click on the Install button and then restart VSCode for the changes to take effect.
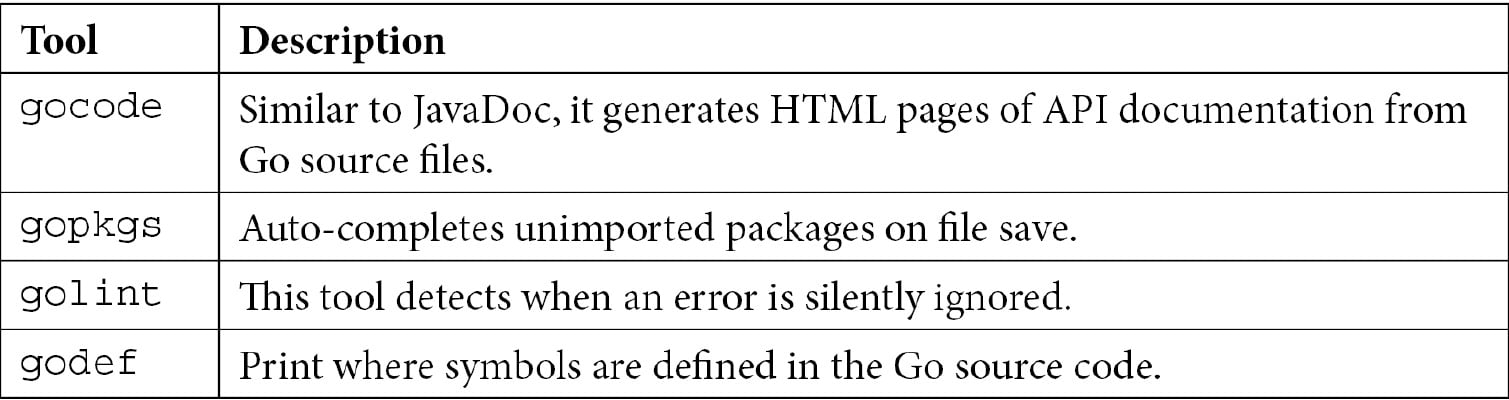
Installing Go tools
Next, we will install the following Go tools, which are a set of packages that help improve your development workflow and overall experience while writing code:
Important Note
A complete list of the available Go tools can be found at https://pkg.go.dev/golang.org/x/tools.
To install the tools, click on View | Command Pallete, or use the Ctrl + Shift + P shortcut and type goinstall update/tools:
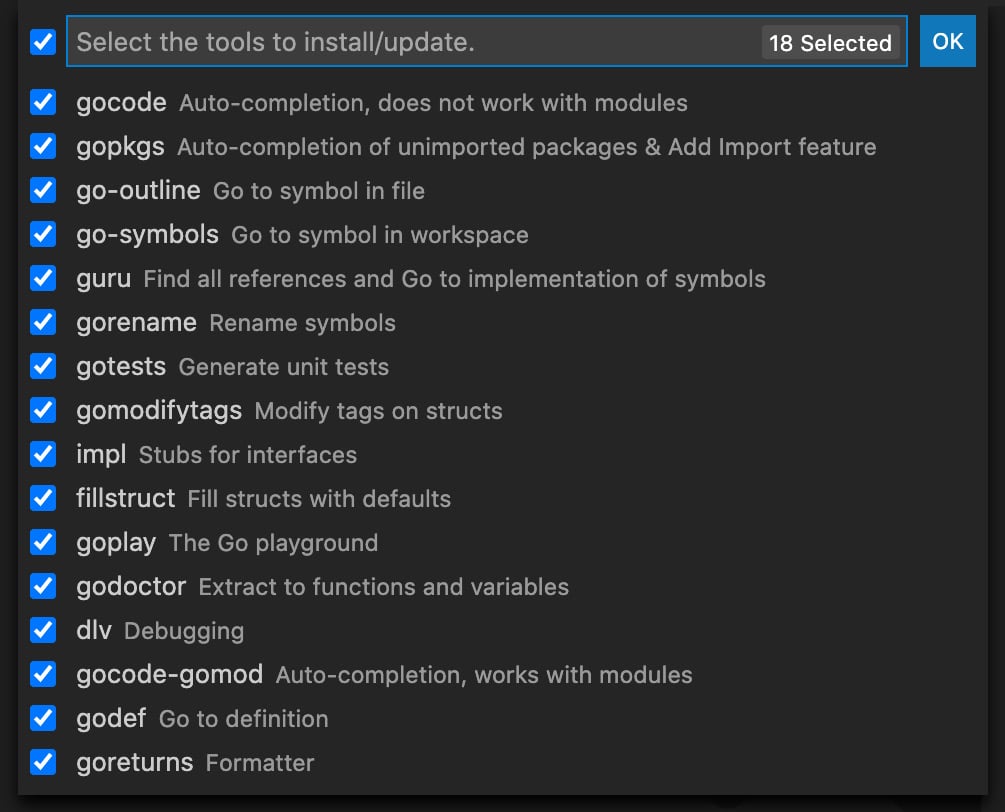
Figure 1.13 – Available Go tools on VSCode
Check all the dependencies and click on OK. It will take some time to download all the dependencies:
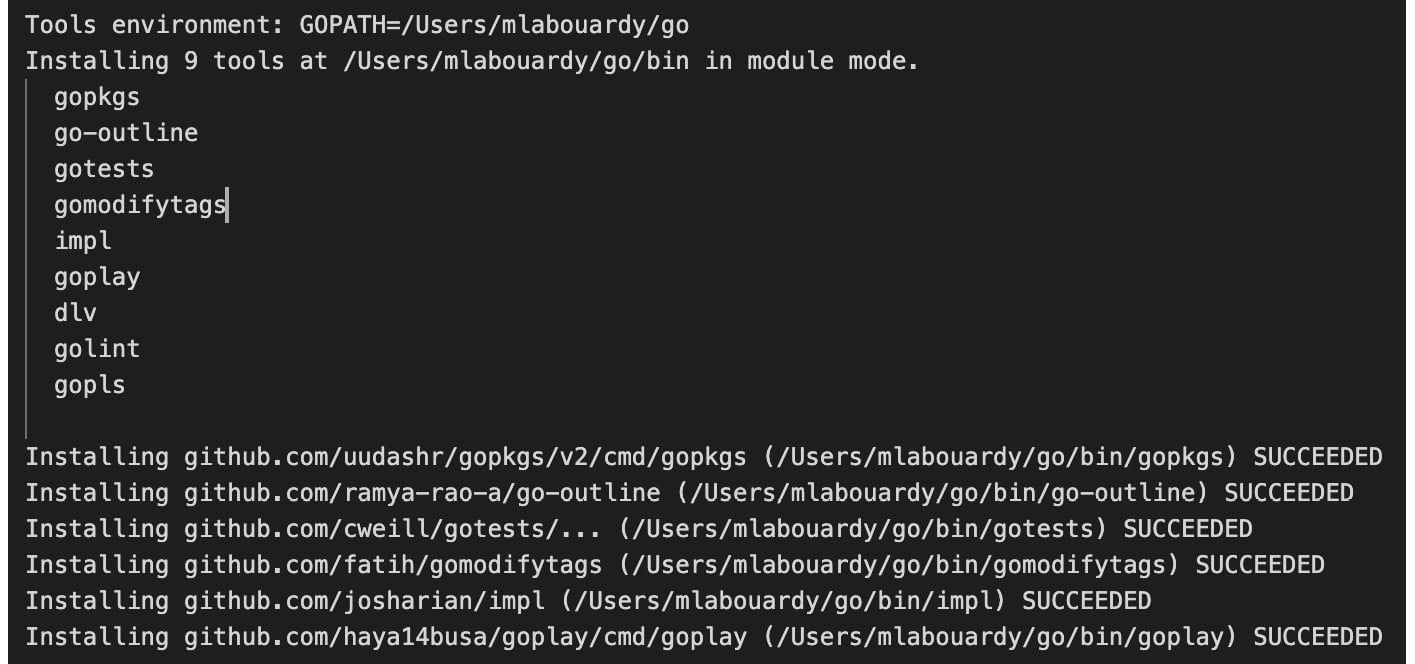
Figure 1.14 – Go tools installation
With Go installed and configured on your computer, you are now ready to install the Gin framework.
Installing and configuring Gin
Gin is a third-party package. To install Gin in Go projects, we need to use the go get command. The command takes the URL of the package to be installed as an argument. Issue the following command to install the gin package from GitHub:
go get github.com/gin-gonic/gin
Note
If you're running Go 1.16 and above, you need to disable Go modules via the GO111MODULE=off option.
When checking out the gin package, the go get command creates a Gin directory in the $GOPATH/src path. The directory will contain the source code of the Gin framework:
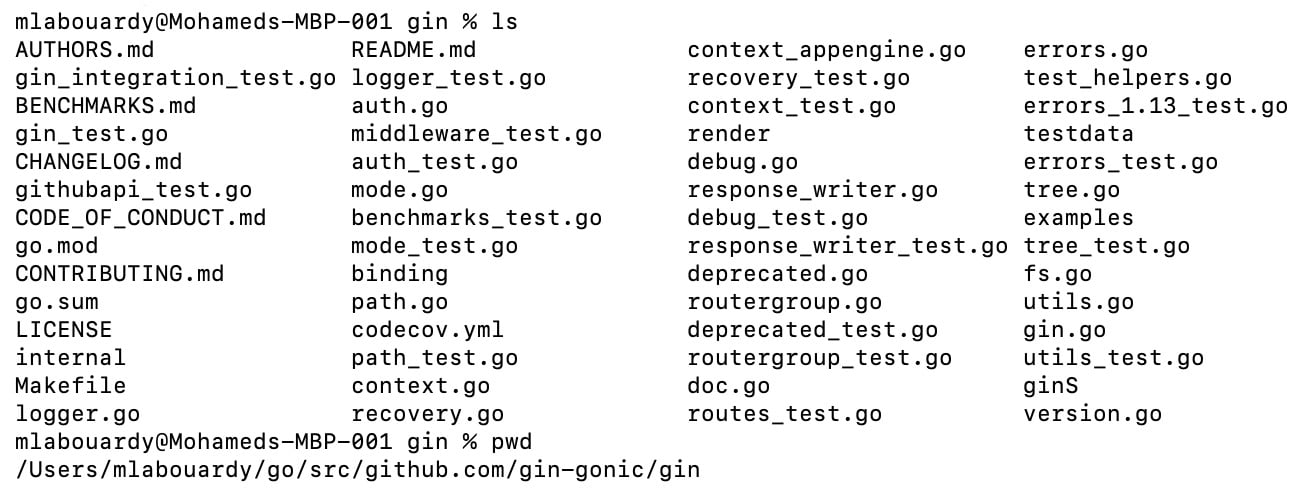
Figure 1.15 – Gin package source code
Begin by creating the hello-world project directory under $GOHOME/src/hello-world or any directory that seems appropriate:
mkdir -p $GOHOME/src/hello-world
cd $GOHOME/src/hello-world
Open the folder with VSCode and create a main.go file inside the project folder that contains the following content:
package main
import "github.com/gin-gonic/gin"
func main() {
   router := gin.Default()
   router.GET("/", func(c *gin.Context) {
       c.JSON(200, gin.H{
           "message": "hello world",
       })
   })
   router.Run()
}
The first line, package main, indicates that this is the main module in this project. The import section is for importing the gin package. This package provides us with the router variable, which is declared right below import and the API context to be used while we send the response in our main function.
Next, we create an HTTP GET method on the root (/) resource and define a function to be called when HTTP requests hit the root endpoint. The function sends a JSON response with a status code of 200 (OK) with a body of "message": "test successful".
Finally, we must deploy the router on port 8080 using the router.Run() method. The following diagram summarizes how an HTTP request is processed in Gin:
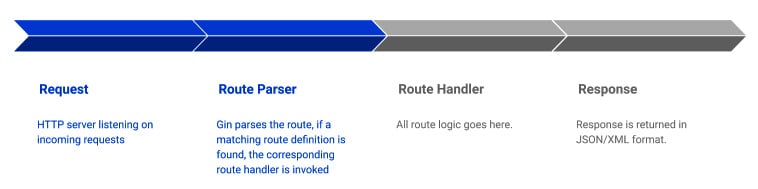
Figure 1.16 – Parsing incoming HTTP requests with Gin
To run the app, execute the following command from the terminal session:
go run main.go
All the files and commands executed henceforth will be within this directory. If you followed the setup process, you should see the following output in your Terminal:
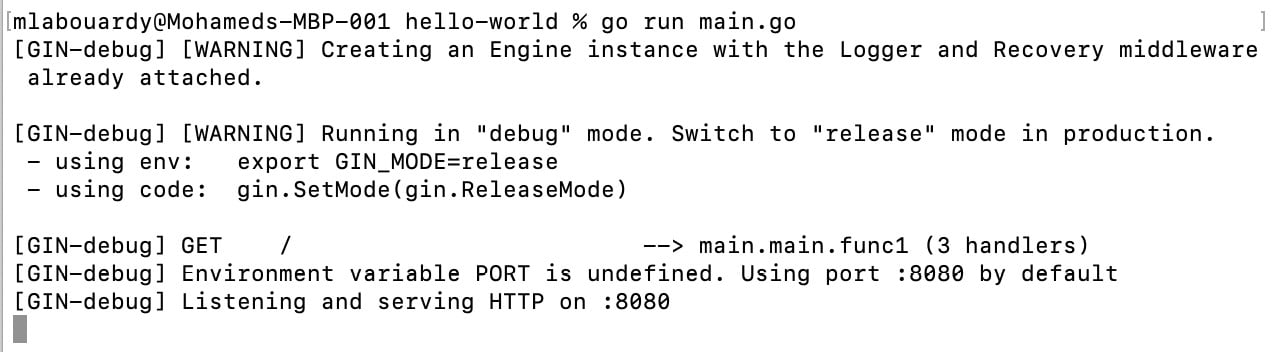
Figure 1.17 – Gin server logs
Point your favorite browser to http://localhost:8080. You should see a "hello world" message:
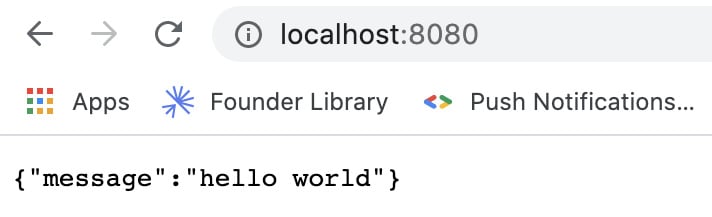
Figure 1.18 – Hello world example
Awesome – you have successfully started an HTTP server in Go with the Gin framework.
Back to the terminal, Gin will trace the HTTP requests:

Figure 1.19 – Tracing incoming HTTP requests
You can use a cURL command to issue an HTTP request:
curl -X GET http://localhost:8080
Alternatively, you can use an advanced REST client such as Postman. You can download the right version based on your platform from the following URL: https://www.getpostman.com/apps.
Once it has downloaded, run the wizard and open Postman. Set the fields as follows:
- HTTP method:
GET - URL:
http://localhost:8080 - Headers: Set
Content-Typetoapplication/json
The request should be configured like so:
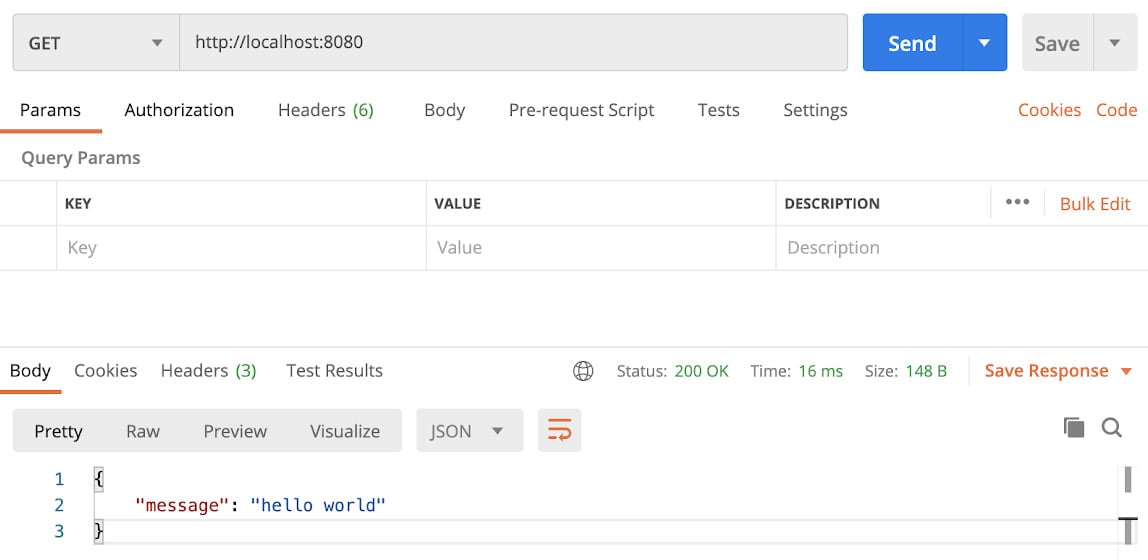
Figure 1.20 – GET request with the Postman client
It's worth mentioning that by default, the HTTP server is listening on port 8080. However, if the port is being used by another application, you can define a different port by adding an argument to the Run method:
r.Run(":5000")
This command will run the server on port 5000, as shown in the following screenshot:
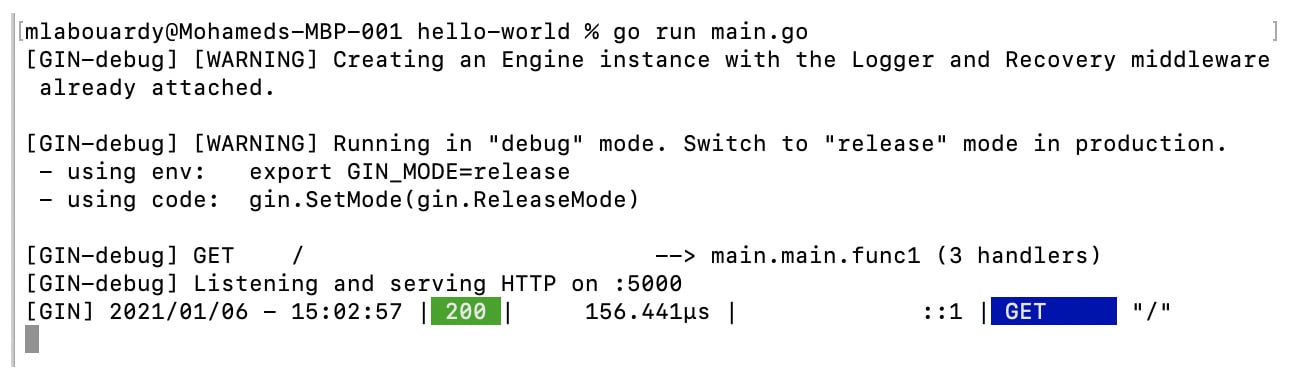
Figure 1.21 – Running the Gin server on port 5000
Note that the port parameter needs to be passed as a string, prepended by colon punctuation.
You should now be familiar with the basics of building and running a simple web application. In the next few sections, we will cover how to enhance those functionalities with third-party packages. But before we do that, let's cover how to manage Go dependencies.
Dependency management in Golang
For now, the code is stored locally. However, it's recommended to store the source code in a remote repository for versioning. That's where a solution such as GitHub comes into play. Sign up for a free account at https://github.com. Then, create a new GitHub repository called hello-world:
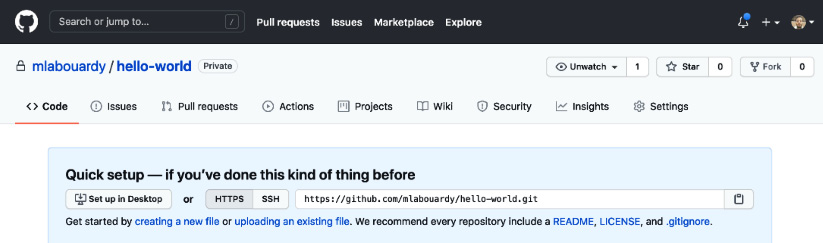
Figure 1.22 – New GitHub repository
Next, initialize the repository with the following commands:
git init
git remote add origin https://github.com/mlabouardy/hello-world.git
Commit the main.go file to the remote repository by executing the following commands:
git add .
git commit -m "initial commit"
git push origin master
Your repository should now look like this:

Figure 1.23 – Versioning main.go in Git
We can stop here. However, if you're working within a team, you will need some way to ensure all team members are using the same Go version and packages. That's where Go modules come into the picture. Go modules were introduced in 2018 to make dependency management a lot easier.
Note
Starting with Go 1.16, Go modules are the default way to manage external dependencies.
In the project folder, run the following command to create a new module:
go mod init hello-world
This command will create a go.mod file that contains the following content. The file defines projects requirements and locks dependencies to their correct versions (similar to package.json and package-lock.json in Node.js):
module github.com/mlabouardy/hello-world
go 1.15
To add the Gin package, we can issue the go get command. Now, our go.mod file will look like this:
module github.com/mlabouardy/hello-world
go 1.15
require github.com/gin-gonic/gin v1.6.3
A new file called go.sum will be generated upon adding the Gin framework (the output was cropped for brevity). You may assume it's a lock file. But in fact, go.mod already provides enough information for 100% reproducible builds. The other file is just for validation purposes: it contains the expected cryptographic checksums of the content of specific module versions. You can think of it as an additional security layer to ensure that the modules your project depends on do not change unexpectedly, whether for malicious or accidental reasons:
github.com/davecgh/go-spew v1.1.0/go.mod h1:J7Y8YcW2NihsgmVo/mv3lAwl/skON4iLHjSsI+c5H38=
github.com/davecgh/go-spew v1.1.1/go.mod h1:J7Y8YcW2NihsgmVo/mv3lAwl/skON4iLHjSsI+c5H38=
github.com/gin-contrib/sse v0.1.0 h1:Y/yl/+YNO8GZSjAhjMsSuLt29uWRFHdHYUb5lYOV9qE=
github.com/gin-contrib/sse v0.1.0/go.mod h1:RHrZQHXnP2xjPF+u1gW/2HnVO7nvIa9PG3Gm+fLHvGI=
github.com/gin-gonic/gin v1.6.3 h1:ahKqKTFpO5KTPHxWZjEdPScmYaGtLo8Y4DMHoEsnp14=
github.com/gin-gonic/gin v1.6.3/go.mod h1:75u5sXoLsGZoRN5Sgbi1eraJ4GU3++wFwWzhwvtwp4M=
github.com/go-playground/assert/v2 v2.0.1/go.mod h1:VDjEfimB/XKnb+ZQfWdccd7VUvScMdVu0Titje2rxJ4=
github.com/go-playground/locales v0.13.0 h1:HyWk6mgj5qFqCT5fjGBuRArbVDfE4hi8+e8ceBS/t7Q=
github.com/go-playground/locales v0.13.0/go.mod
You can list your dependencies with the following command:
go list -m all
The output is as follows:
github.com/mlabouardy/hello-world
github.com/davecgh/go-spew v1.1.1
github.com/gin-contrib/sse v0.1.0
github.com/gin-gonic/gin v1.6.3
github.com/go-playground/assert/v2 v2.0.1
github.com/go-playground/locales v0.13.0
github.com/go-playground/universal-translator v0.17.0
github.com/go-playground/validator/v10 v10.2.0
github.com/golang/protobuf v1.3.3
github.com/google/gofuzz v1.0.0
github.com/json-iterator/go v1.1.9
github.com/leodido/go-urn v1.2.0
github.com/mattn/go-isatty v0.0.12
github.com/modern-go/concurrent v0.0.0-20180228061459
e0a39a4cb421
github.com/modern-go/reflect2 v0.0.0-20180701023420
4b7aa43c6742
github.com/pmezard/go-difflib v1.0.0
github.com/stretchr/objx v0.1.0
github.com/stretchr/testify v1.4.0
github.com/ugorji/go v1.1.7
github.com/ugorji/go/codec v1.1.7
golang.org/x/sys v0.0.0-20200116001909-b77594299b42
golang.org/x/text v0.3.2
golang.org/x/tools v0.0.0-20180917221912-90fa682c2a6e
gopkg.in/check.v1 v0.0.0-20161208181325-20d25e280405
gopkg.in/yaml.v2 v2.2.8
Important Note
To remove unused dependencies, you can use the go mod tidy command.
Finally, add the go.mod and go.sum files to the remote repository using the following commands:
git add .
git commit -m "dependency management"
git push origin master
The updated repository will look as follows:
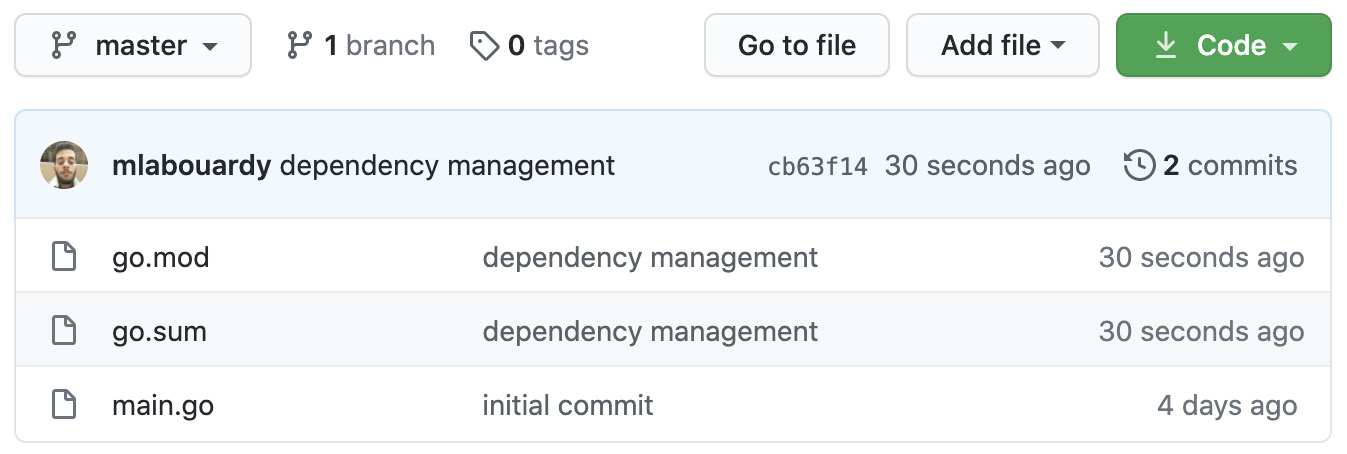
Figure 1.24 – Managing dependencies with Go modules
It's worth mentioning that the downloaded modules are stored locally in your $GOPATH/pkg/mod directory. However, sometimes, it's useful to store the modules or third-party packages that your project depends on and place them in a folder, so that they can be checked into version control. Fortunately, Go modules support vendoring:
go mod vendor
This command will create a vendor directory in your project folder that contains all your third-party dependencies. You can now commit this folder to your remote Git repository to ensure the stability of your future builds, without having to rely on external services:
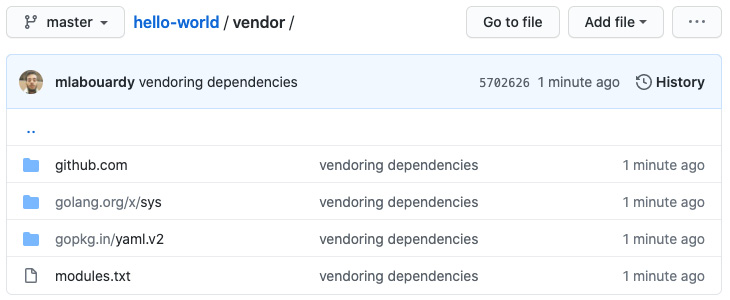
Figure 1.25 – Vendoring dependencies
Sometimes, you may wonder why a specific package is a dependency. You can answer this by analyzing or visualizing the project dependencies. To do so, we can use the go mod graph command to display the list of modules in the go.mod file:
go mod graph | sed -Ee 's/@[^[:blank:]]+//g' | sort | uniq >unver.txt
This command will generate a new file called unver.txt containing the following content (the output has been cropped for brevity):
github.com/gin-contrib/sse github.com/stretchr/testify
github.com/gin-gonic/gin github.com/gin-contrib/sse
github.com/gin-gonic/gin github.com/go-playground/validator/v10
github.com/gin-gonic/gin github.com/golang/protobuf
github.com/gin-gonic/gin github.com/json-iterator/go
github.com/gin-gonic/gin github.com/mattn/go-isatty
github.com/gin-gonic/gin github.com/stretchr/testify
github.com/gin-gonic/gin github.com/ugorji/go/codec
github.com/gin-gonic/gin gopkg.in/yaml.v2
Then, create a graph.dot file containing the following content:
digraph {
    graph [overlap=false, size=14];
    root="$(go list -m)";
    node [ shape = plaintext, fontname = "Helvetica",
          fontsize=24];
    "$(go list -m)" [style = filled,
                     fillcolor = "#E94762"];
This content will generate a graph structure using the DOT language. We can use DOT to describe graphs (directed or not). That being said, we will inject the output of unvert.txt into the graph.dot file with the following commands:
cat unver.txt | awk '{print "\""$1"\" -> \""$2"\""};' >>graph.dot
echo "}" >>graph.dot
sed -i '' 's+\("github.com/[^/]*/\)\([^"]*"\)+\1\\n\2+g' graph.dot
This results in a module dependency graph:
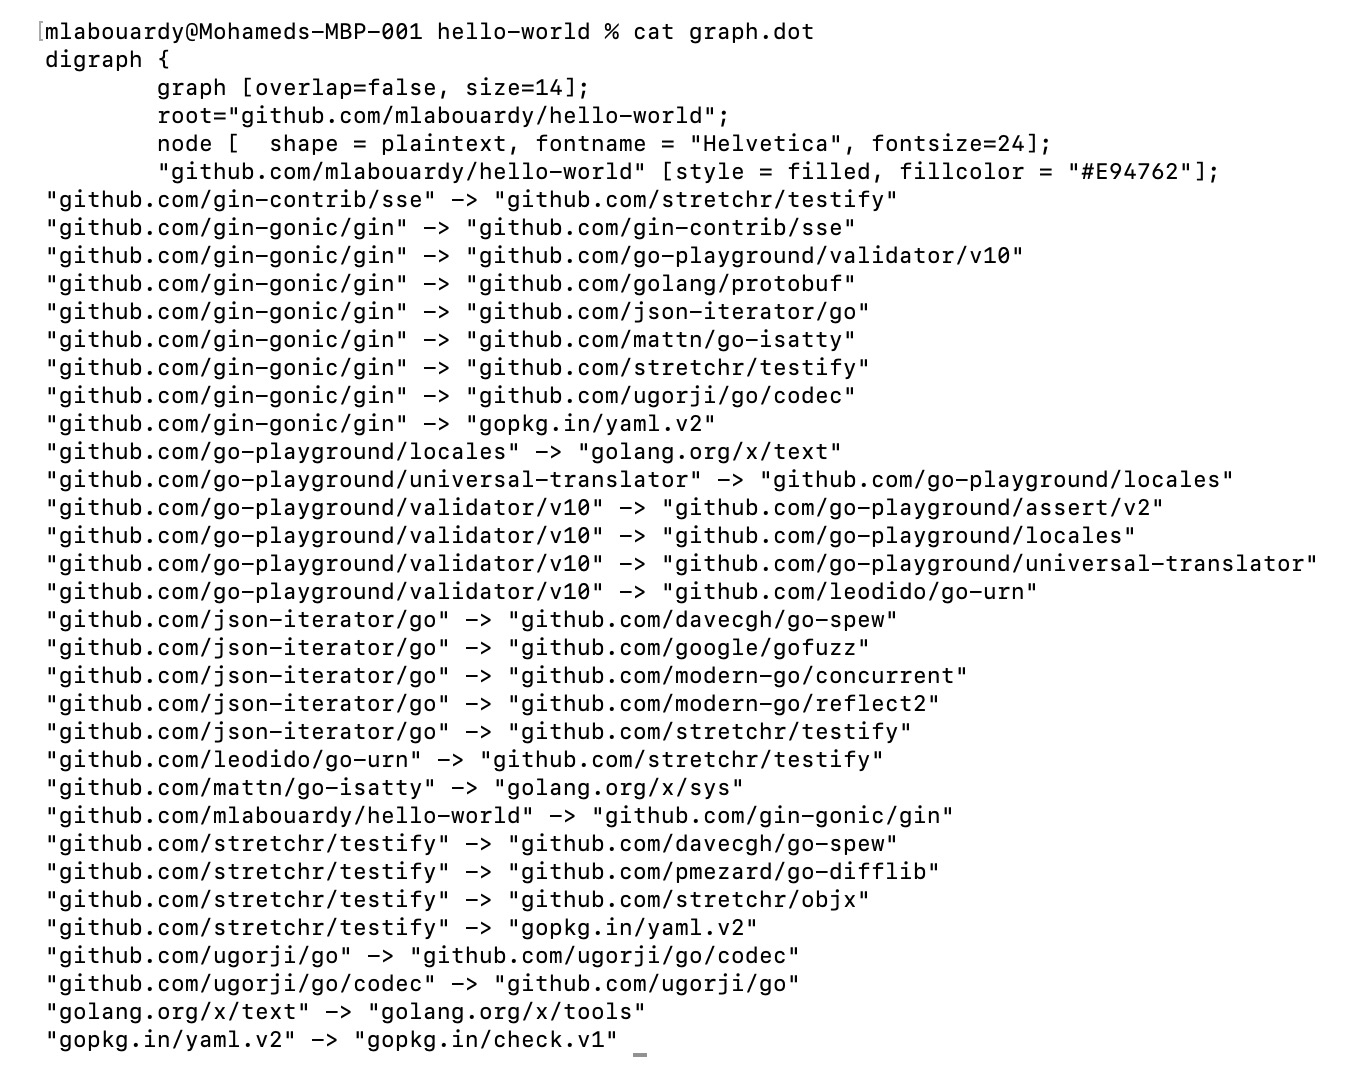
Figure 1.26 – Module dependency graph
We can now render the results with Graphviz. This tool can be installed with the following commands, based on your operation system:
- Linux: You can download the official package based on your package manager. For Ubuntu/Debian, use the following command:
apt-get install graphviz
- MacOS: You can use the Homebrew utility for MacOS:
brew install graphviz
- Windows: You can use the Chocolatey (https://chocolatey.org/install) package manager for Windows:
choco install graphviz.portable
Once Graphviz has been installed, execute the following command to convert the graph.dot file into .svg format:
sfdp -Tsvg -o graph.svg graph.dot
A graph.svg file will be generated. Open the file with the following command:
open graph.svg
This results in the following directed graph:

Figure 1.27 – Visually analyzing module dependencies
This graph perfectly shows the dependencies among the modules/packages of the hello-world project.
Note
Another way of generating a dependencies graph is by using the modgv utility (https://github.com/lucasepe/modgv). This tool converts go mod graph output into GraphViz's DOT language with a single command.
Now that the source code has been versioned in GitHub, we can go further and explore how to write a custom function handler for Gin routes.
Writing a custom HTTP handler
You can create a handler function that takes *gin.Context as an argument and serves a JSON response with a status code of 200. Then, you can register the handler using the router.Get() function:
package main
import "github.com/gin-gonic/gin"
func IndexHandler(c *gin.Context){
   c.JSON(200, gin.H{
       "message": "hello world",
   })
}
func main() {
   router := gin.Default()
   router.GET("/", IndexHandler)
   router.Run()
}
Important note
Separating the handler function from the router will be useful in the advanced chapters of this book, when unit testing is tackled.
The biggest strength of the Gin framework is its ability to extract segments from the request URL. Consider the following example:
/users/john
/hello/mark
This URL has a dynamic segment:
- Username: Mark, John, Jessica, and so on
You can implement dynamic segments with the following :variable pattern:
func main() {
   router := gin.Default()
   router.GET("/:name", IndexHandler)
   router.Run()
}
The last thing we must do is get the data from the variable. The gin package comes with the c.Params.ByName() function, which takes the name of the parameter and returns the value:
func IndexHandler(c *gin.Context) {
   name := c.Params.ByName("name")
   c.JSON(200, gin.H{
       "message": "hello " + name,
   })
}
Rerun the app with the go run command. Hit the http://localhost:8080/mohamed link on your browser; the user will be returned:
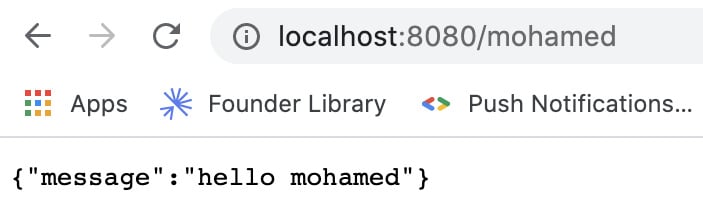
Figure 1.28 – Example of the path parameter
Now, we know that every time we hit the GET /user route, we get a response of "hello user." If we hit any other route, it should respond with a 404 error message:
Figure 1.29 – Error handling in Gin
Gin can also handle HTTP requests and responses in XML format. To do so, define a user struct with firstName and lastName as attributes. Then, use the c.XML() method to render XML:
func main() {
   router := gin.Default()
   router.GET("/", IndexHandler)
   router.Run()
}
type Person struct {
     XMLName xml.Name `xml:"person"`
     FirstName     string   `xml:"firstName,attr"`
     LastName     string   `xml:"lastName,attr"`
}
func IndexHandler(c *gin.Context) {
     c.XML(200, Person{FirstName: "Mohamed",
                       LastName: "Labouardy"})
}
Now, rerun the application. If you navigate to http://localhost:8080, the server will return an XML response, as follows:

Figure 1.30 – XML response
Congratulations! At this point, you have a Go programming workspace set up on your local machine, as well as Gin configured. Now, you can begin a coding project!
Summary
In this chapter, we gave you an introduction to the Go programming language. We learned how to set up the runtime and development environments. We also understood the GOPATH environment variable, which is a workspace definition in Go, and we now know that all packages and projects reside on that path.
Later, we explored the different Go web frameworks and learned why Gin is the most popular for building distributed web applications. Finally, we learned how to write our first hello world project with Gin from scratch.
In the next chapter, we will get our hands dirty and start building a distributed RESTful API with the Gin framework.
Further reading
- Hands-On Serverless Applications with Go, Mohamed Labouardy, by Packt Publishing
- Hands-On RESTful Web Services with Go - Second Edition, Naren Yellavula, by Packt Publishing


