Post Processing Stack
In this chapter, you will learn about the following recipes:
- Installing the Post Processing Stack
- Getting a filmic look using grain, vignetting, and anti-aliasing
- Mimicking real life with bloom and anti-aliasing
- Setting the mood with color grading
- Creating a horror game look with fog
Introduction
It's great to write your own shaders and effects so that you can fine-tune your project to look just the way that you want, and this is what we will be spending the majority of the book looking into. However, it's also good to point out that Unity already comes with some prebuilt ways to get some of the more common effects that users like to have through the use of the Post Processing Stack.
For those who just want to get something up and running, the Post Processing Stack can be an excellent way for you to tweak the appearance of your game without having to write any additional code. Using the Post Processing Stack can also be useful in showing you just what shaders can do and how they can improve your game projects as, behind the scenes, the Post Processing Stack is itself a shader that is applied to the screen, aptly called a screen shader.
Installing the Post Processing Stack
Before we can use the Post Processing Stack, we must first get it from the newly introduced Package Manager. A Unity package is a single file that contains various assets that can be used in Unity in a similar manner to a .zip file. Previously, Unity used the Asset Store to share these files with users, but as time has gone on, the Package Manager has been added to give users an easy way to get free content from Unity. We will actually be using the Package Manager again in Chapter 12, Shader Graph, but right now we will be using it for the Post-Processing package that it contains.
Getting ready
To get started with this recipe, you will need to have Unity running and have created a new project. This chapter also requires you to have an environment to work from. The code files provided with this book will contain a basic scene and content to create the scene Unity's Standard Assets.
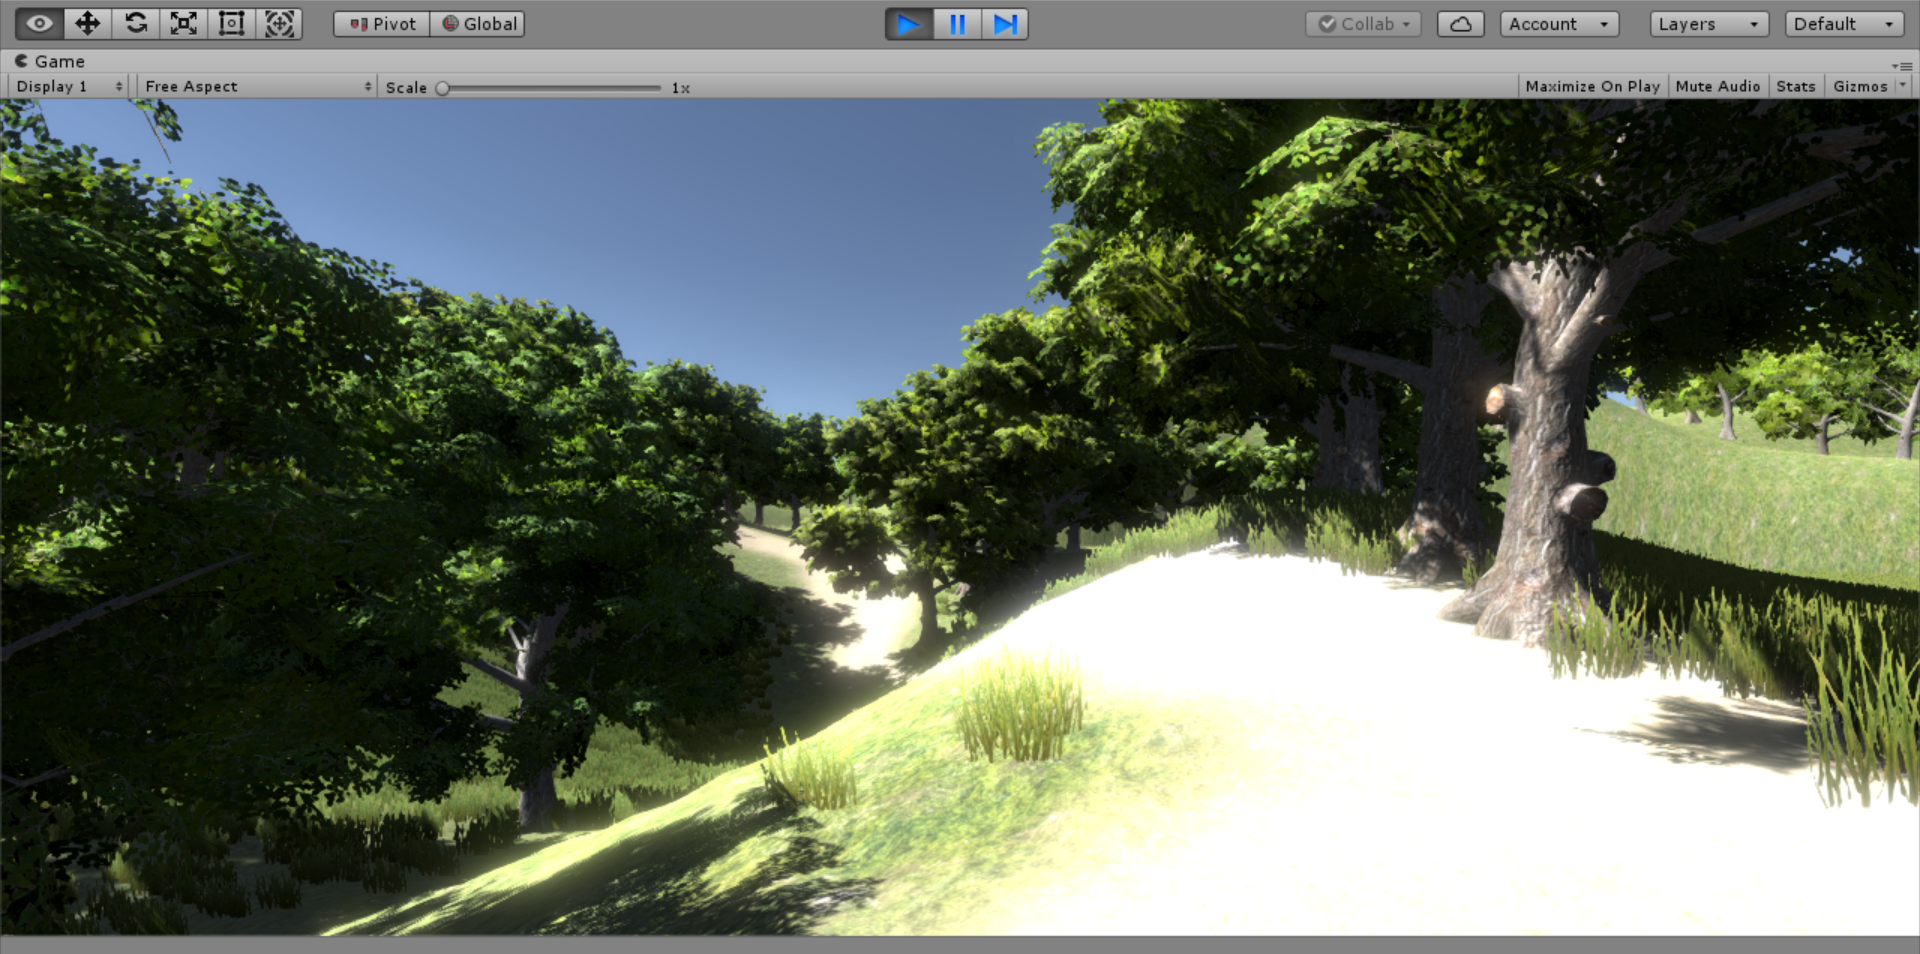
Open the Chapter 1 | Starting Point scene inside of the Asset | Chapter 01 | Scenes folder from the Project browser. If all goes well, you should see something like this from the Game tab:

This is a simple environment that will allow us to easily see how changes made in post-processing effects can modify how things are drawn on the screen.
How to do it...
To begin:
- Open up the Package Manager by going to Window | Package Manager (or by pressing Ctrl + 9):
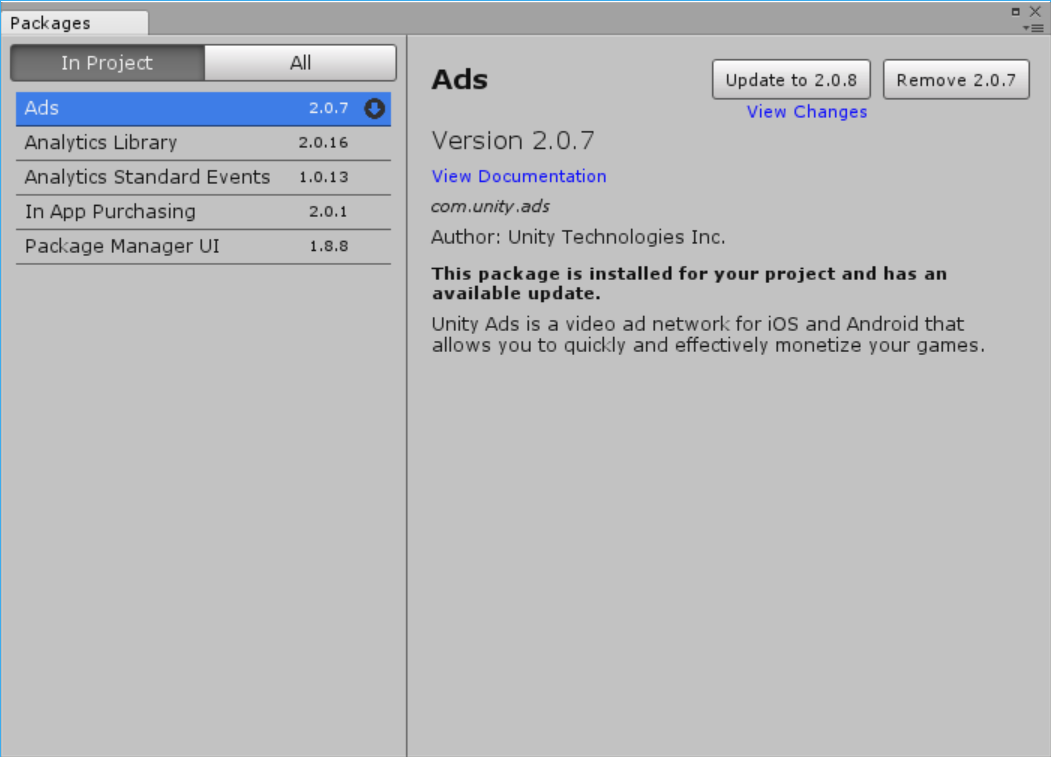
- From the list view, click on the All button to display a list of all of the possible packages that are there. Once the list populates with all of the choices, select the Post-processing option:
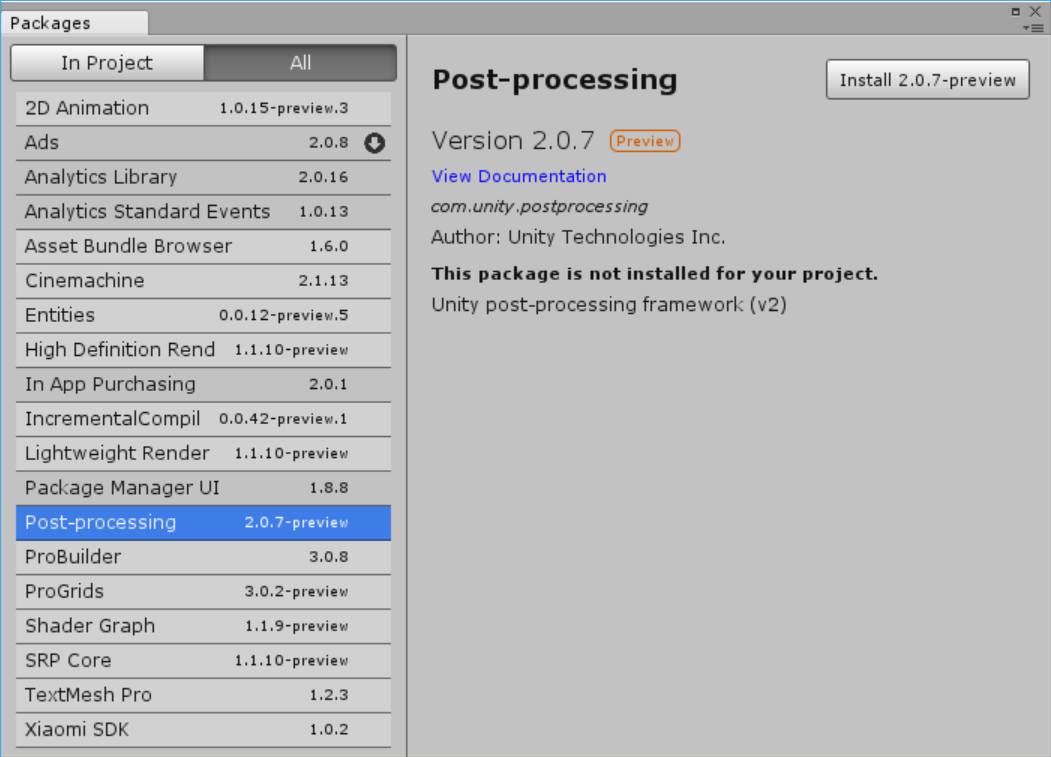
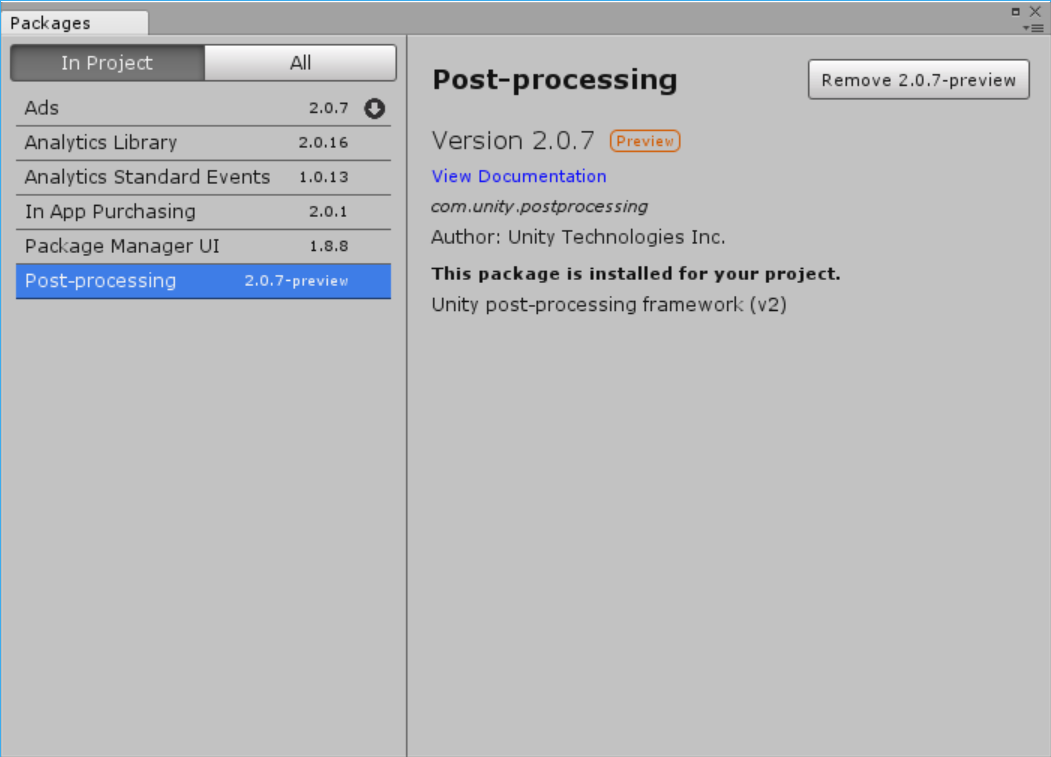
- From there, at the top right of the menu, click on the Install 2.0.7-preview button. You may need to wait for a while for it to complete downloading the content. Once it's completed, you should be brought back to the In Project selection and now you'll see Post-processing added to the list:
- Close out of the Packages tab and go back to the Scene window to see the level. Then, from the Hierarchy window, we want to select the object that has our Camera component attached to it, as the Post Processing Stack needs to know which screen we want to modify. If you are using your own project, you may select the MainCamera object that comes with the default Unity scene, but the example project that is being used has the Camera located as a child of the FPSController object. To select it, click on the arrow next to the name to extend the object's children and then select the FirstPersonCharacter object:
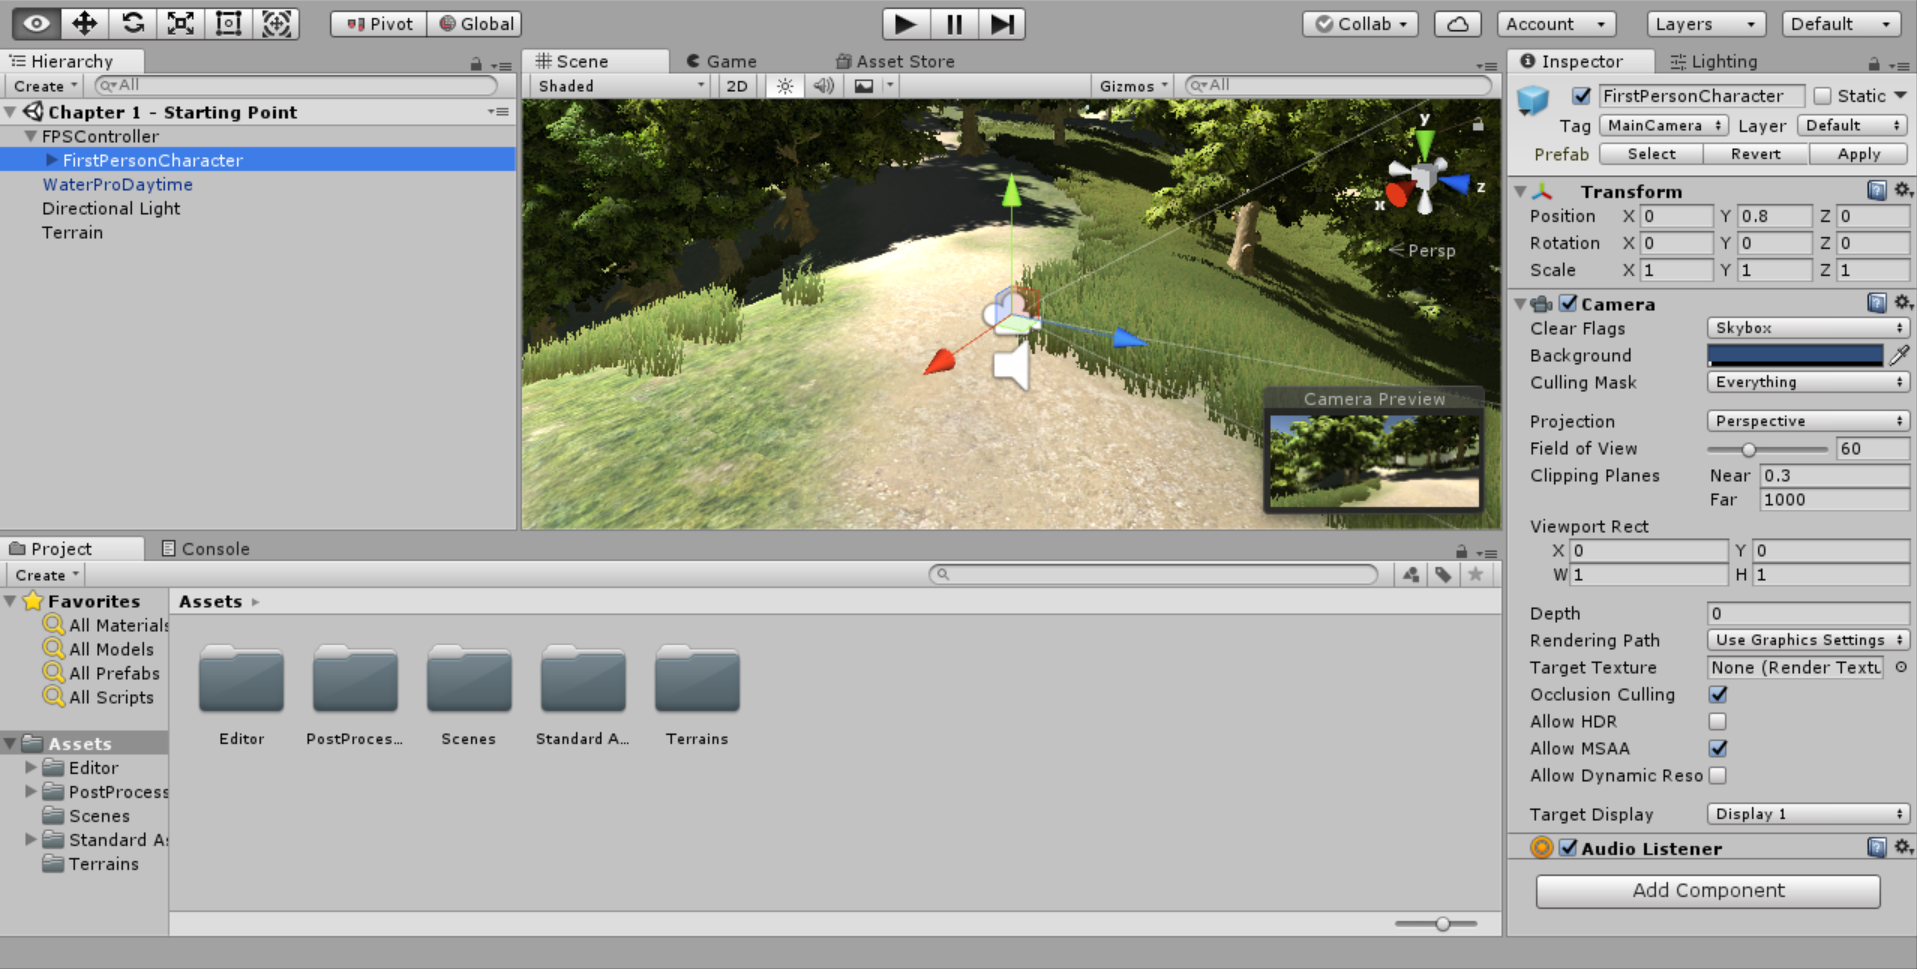
This object has the Camera component on it, which is in charge of drawing what it sees to the Game tab when the game starts.
- With the object selected and our Camera component attached to it, next we need to add the Post-processing Behavior component to the object by going into Component | Rendering | Post-process Layer:
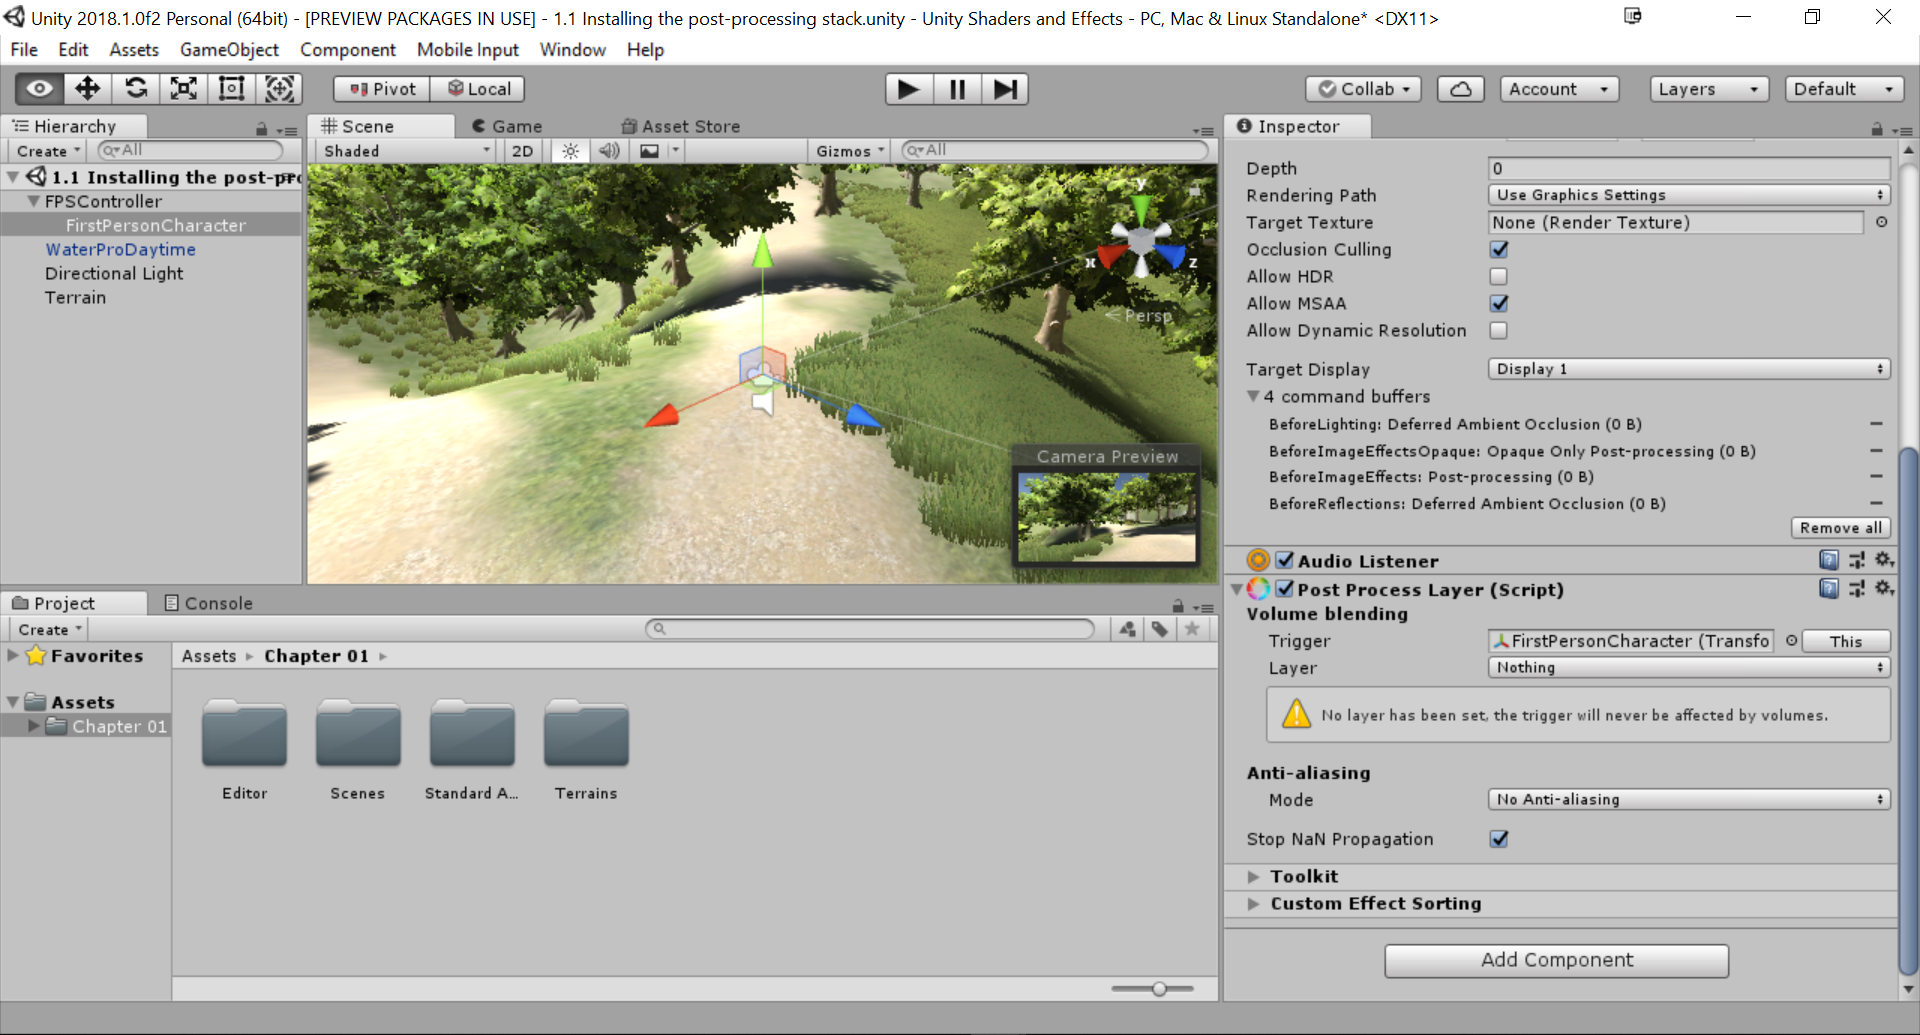
- Once added, from the Inspector tab, scroll down to the Post Process Layer (Script) component and, under Layer, change the dropdown to PostProcessing.
- This tells the component which objects we want to draw on the screen. When setting this, an object must have its Layer property set to PostProcessing in order to be seen.
- To create a Post Process Volume, go to the menu and select GameObject | 3D Object | Post Process Volume. From there, go to the Inspector tab and change the Layer property to PostProcessing. Finally, to make it easier to work with, change the Position to 0, 0, 0 and under the Post Process Volume component, check the Is Global property:
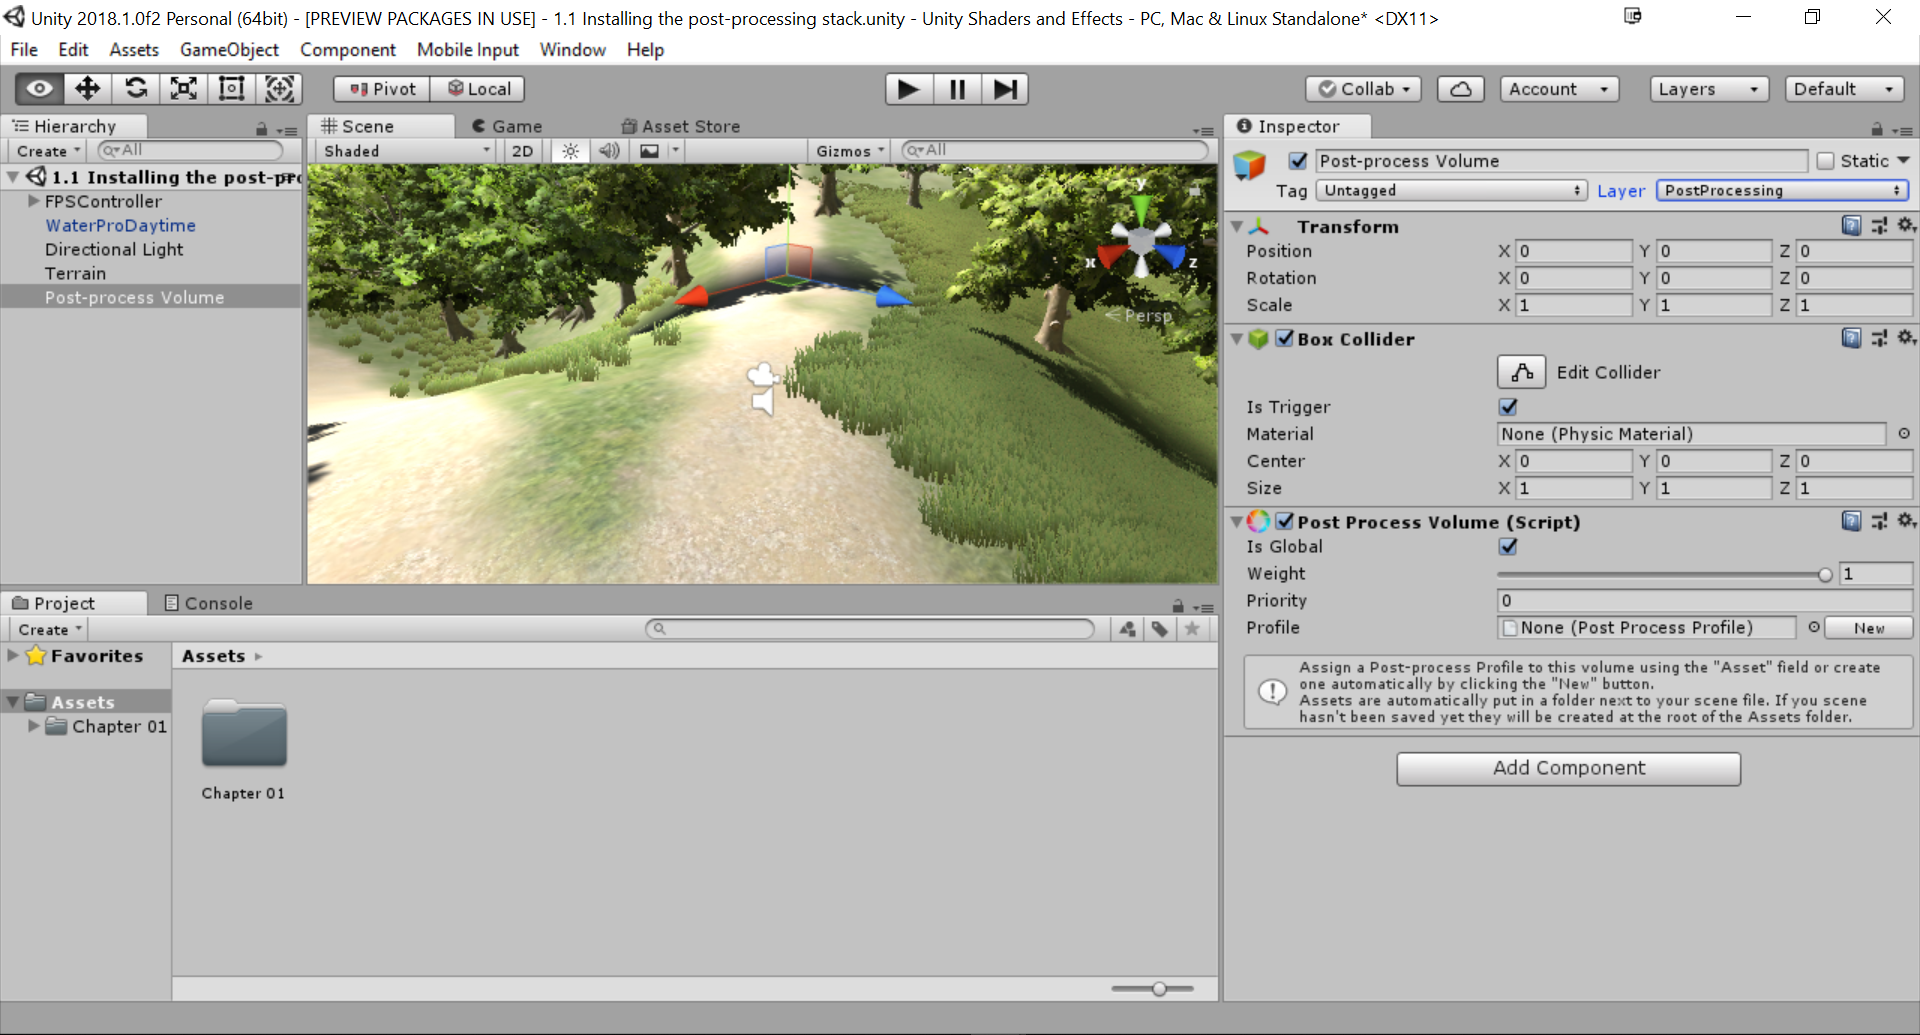
Notice that there is a Profile property to the volume. This property will contain information about how we wish to modify the screen. By checking Is Global, we are saying that this information should always be drawn on an object. By unchecking it, the effects will only be visible from a certain distance from where the volume is placed. Depending on the game, this could allow you to drastically modify how the game appears in certain areas, but we care only about getting the visual effect at this point.
Getting a filmic look using grain, vignetting, and depth of field
Now that we have the Post Processing Stack installed, we can create our first Post-processing Volume. The new Post Processing Stack relies on using volumes that describe how things should be drawn, either globally or within a certain area.
One of the most common appearances people like projects to have is that of a film. This is used quite frequently in titles such as the Uncharted series and Grand Theft Auto V. It's also used quite effectively in the Left 4 Dead series, as its creator are trying to emulate the B-movie zombie films that the games are based on.
Getting ready
Make sure you have completed the Installing the Post Processing Stack recipe before starting this one.
How to do it...
- We first create a new Post Processing Profile by right-clicking within the Assets | Chapter 1 folder in the Project window and then selecting Create | Post Processing Profile. Once selected, it will allow us to rename the item. Go ahead and set the name to FilmicProfile:

- Once created, you should notice that, when selected, the Inspector window will now contain a button that says Add effect... (as you can see in the preceding image), which will allow us to augment what is normally drawn on the screen.
- From the Hierarchy tab, select the Post-process Volume object again and from the Inspector tab go to the Post Process Volume component and assign the Profile property to the FilmicProflie we just created:

Notice that, once the Profile has been set, the Add effect... button shows up here as well. We can use this at either place and the changes will be saved in the file.
- To get started, click on the Add effect... button and select the Unity | Grain option. By default, you'll only see the Grain option with a check, so click on the arrow to expand its contents:

By default, you'll see that everything is greyed out. In order to have it affect anything, you have to click on the checkbox on the left-hand side. You can quickly turn them all on or off by pressing the All or None buttons on the screen.
- In our case, check the Intensity option and set it to 0.2. Then, check the Size property and set it to 0.3. Afterward, switch to the Game tab to see a representation of what our tweaks have done:

- You will notice that the screen has become much fuzzier than before. Decrease the Intensity to 0.2, the Size to 0.3, and uncheck the Colored option.
- The next property we want to tweak is the Vignette property. Note the blackened edges around the screen. Click on Add effect... and select Unity | Vignette. Open up the properties and change the Intensity to 0.5 and the Smoothness to 0.35:

- Next, select Add effect... again and, this time, select Unity | Depth of Field. Check the Depth of Field option. It may be difficult to see a change right off the bat, but change the Focus Distance to 6 and Focal Length to 80 and you should notice the grass in front of the background and the mountain in the distance are now blurred:

- Now, if we go into the game itself, you should see our filmic look in action:

And with that, we now have a scene that looks much more like a film than what we had to begin with!
How it works...
Each time we add an effect to a Post-processing Volume, we are overriding what would normally be put onto the screen.
If you've been to a movie theater that still uses film, you may have noticed how there were little specks in the filmstock while the film was playing. The grain effect simulates this film grain, causing the effect to become more pronounced the more the movie is played. This is often used in horror games to obscure the player's vision.
In the film world, vignetting can be an unintended effect of using the wrong type of lens for the type of shot you are trying to achieve or the aspect ratio that you are shooting for. In game development, we typically use vignetting for dramatic effect or to have players focus on the center of the screen by darkening and/or desaturating the edges of the screen compared to the center.
The depth of field setting basically determines what is blurry and what isn't. The idea is to have items of importance in focus while items in the background are not.
Mimicking real life with bloom and anti-aliasing
The bloom optical effect aims to mimic the imaging effects of real-world cameras, where things in areas with lights will glow along the edges, thus overwhelming the camera. The bloom effect is very distinctive and you've likely seen it employed in areas in a game that are magical or heaven-like.
Getting ready
Make sure you have completed the Installing the Post Processing Stack recipe before starting this one.
How to do it...
- We first create a new Post Processing Profile by right-clicking within the Assets folder in the Project window and then selecting Create | Post Processing Profile. Once selected, it will allow us to rename the item. Go ahead and set the name to BloomProfile.
- Select the Post-process volume object and, from the Inspector window, go to the Post Processing Volume component and assign the Profile property to the BloomProflie we just created.
- Afterward, select the Game tab, if it hasn't been selected already to see the results of the changes we are about to make in the following steps.
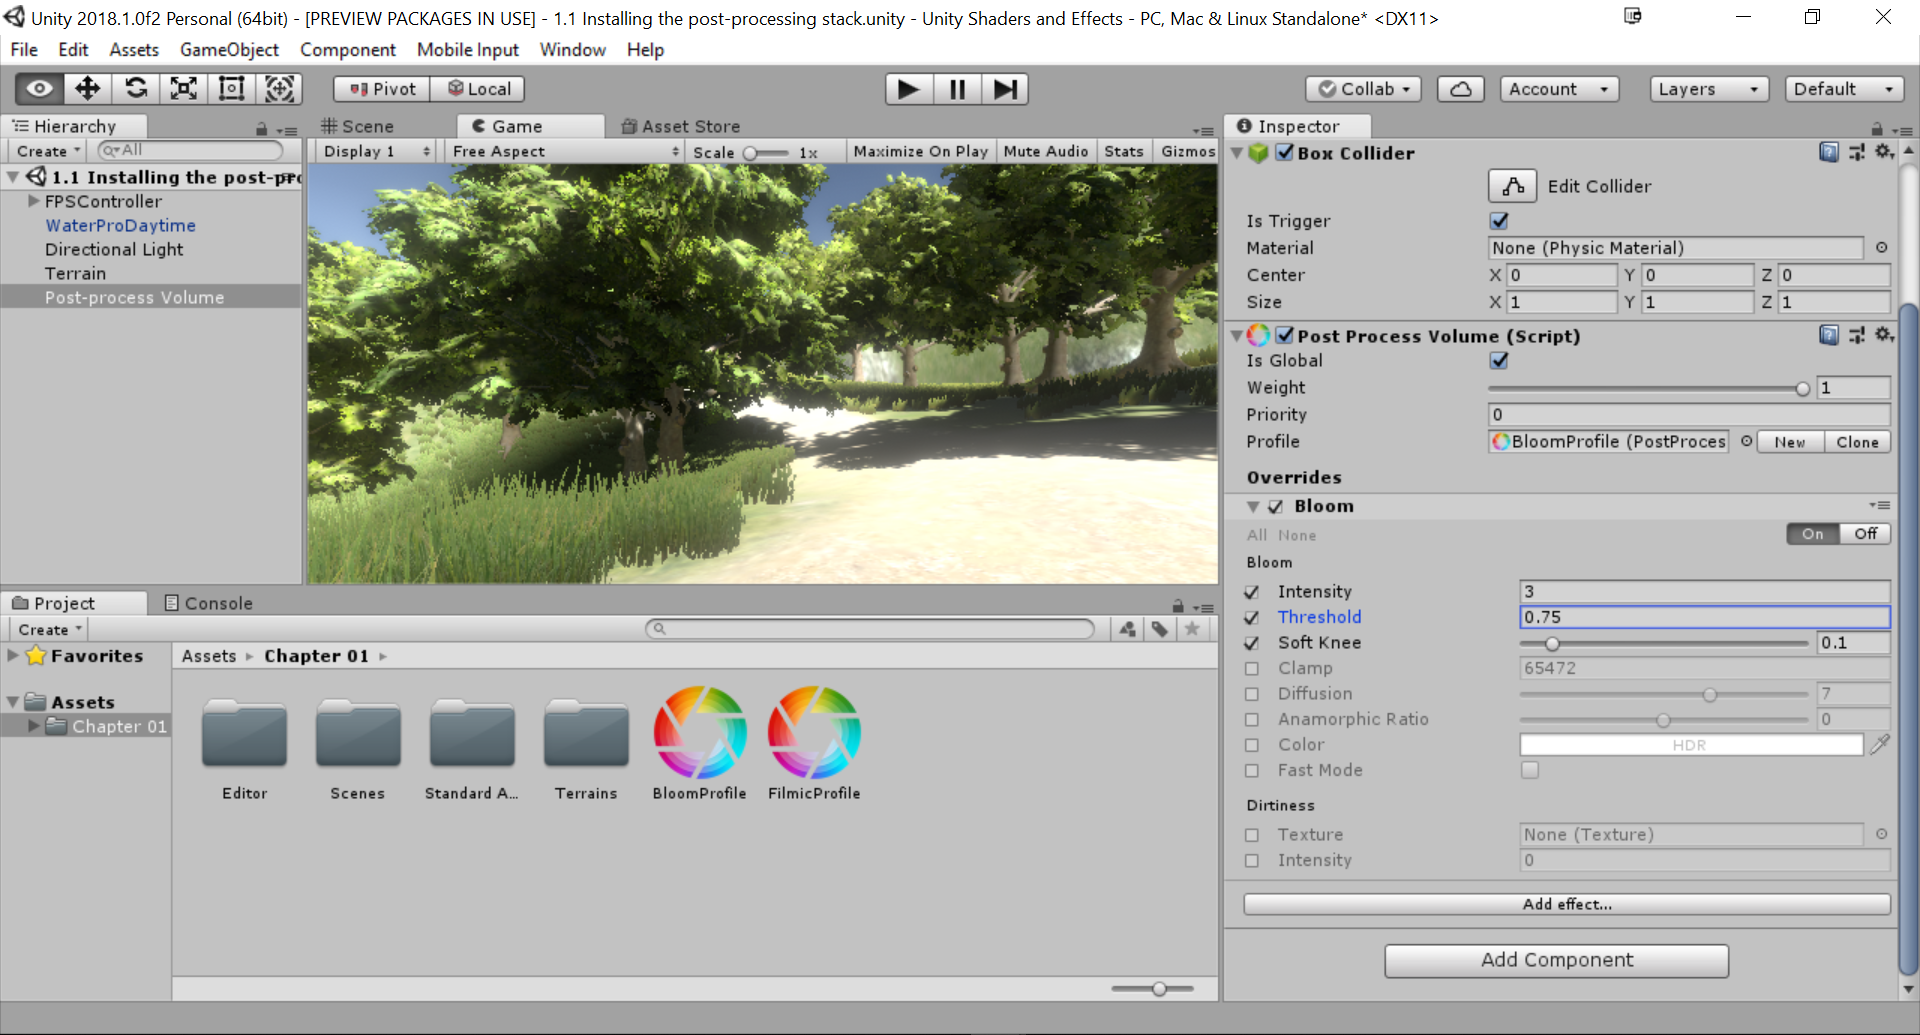
- Select the Add effect... button and select Unity | Bloom. Once the effect has been added to the Overrides section of the Post Processing Volume component, select the arrow to open its properties. Check the Intensity property and set it to 3. Afterward, check and set the Threshold to 0.75, the Soft Knee to 0.1, and the Radius to 3:
- Next, select the object with the Post Process Layer component attached to it (in the example, it is the FPSController | FirstPersonCharacter object) and, from the Inspector tab, scroll down to the Post Process Layer script. From there, change the Anti-aliasing property dropdown to Fast Approximate Anti-aliasing:
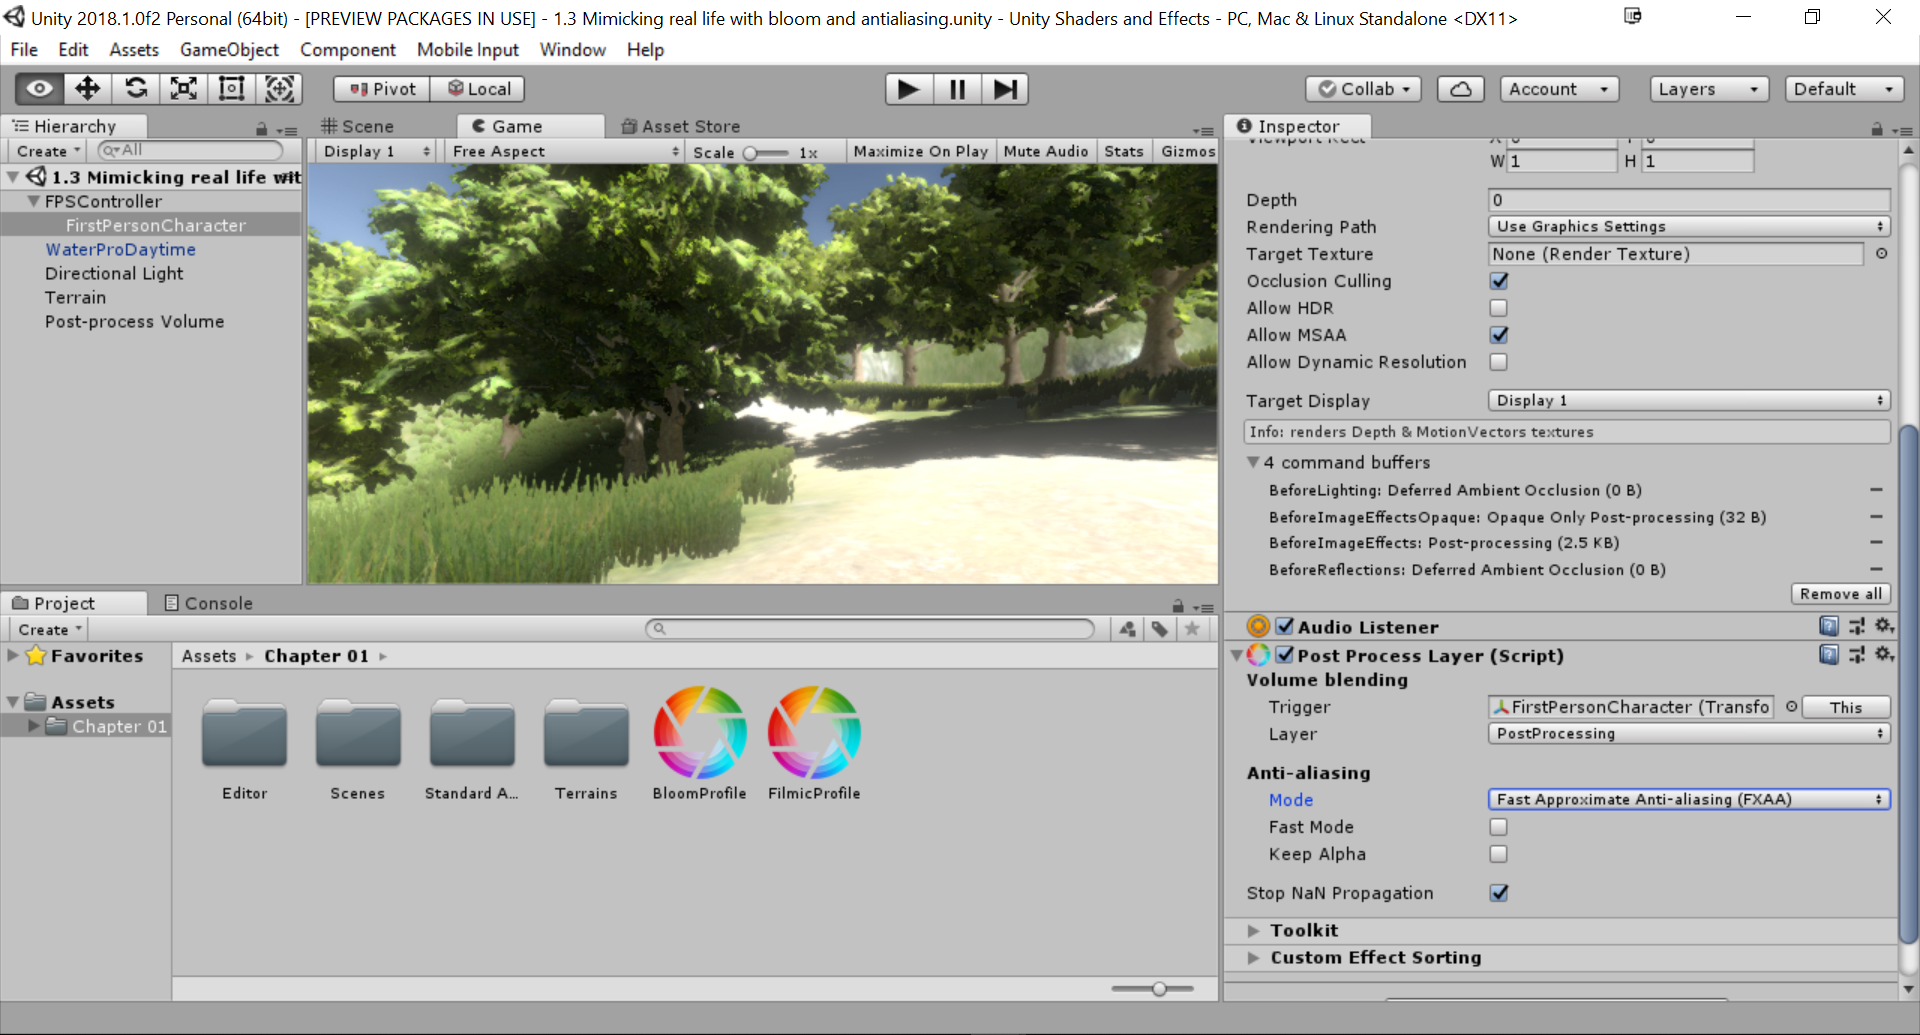
- Afterward, save your scene and hit the Play button to check out your project:
How it works...
As mentioned before, bloom will make bright things even brighter while adding a glow to lighter areas. In this recipe, you may notice that the path is much lighter than it was previously. This can be used in order to ensure that players will follow the path to get to the next section of gameplay.
Anti-aliasing attempts to reduce the appearance of aliasing, which is the effect of lines appearing jagged on the screen. This is typically due to the fact that the display the player is using to play the game doesn't have a high enough resolution to be displayed properly. Anti-aliasing will combine colors with nearby lines in order to remove their prominence, at the cost of the game appearing blurry.
Setting mood with color grading
One of the best ways to easily change the mood of a scene is by changing the colors a scene uses. One of the best examples of this is in the Matrix series of films, where the real world is always blue-tinted, while the computer-generated world of the Matrix is always tinted green. We can emulate this in our games through the use of color grading.
Getting ready
Make sure you have completed the Installing the Post Processing Stack recipe before starting this one.
How to do it...
- We first create a new Post Processing Profile by right-clicking within the Assets folder in the Project window and then selecting Create | Post Processing Profile. Once selected, it will allow us to rename the item. Go ahead and set it to ColorProfile.
- Select the Post-process volume object and, from the Inspector window, go to the Post Processing Volume component and assign the Profile property to the ColorProflie we just created.
- Afterward, select the Game tab, if it hasn't been selected already, to see the results of the changes to be made.
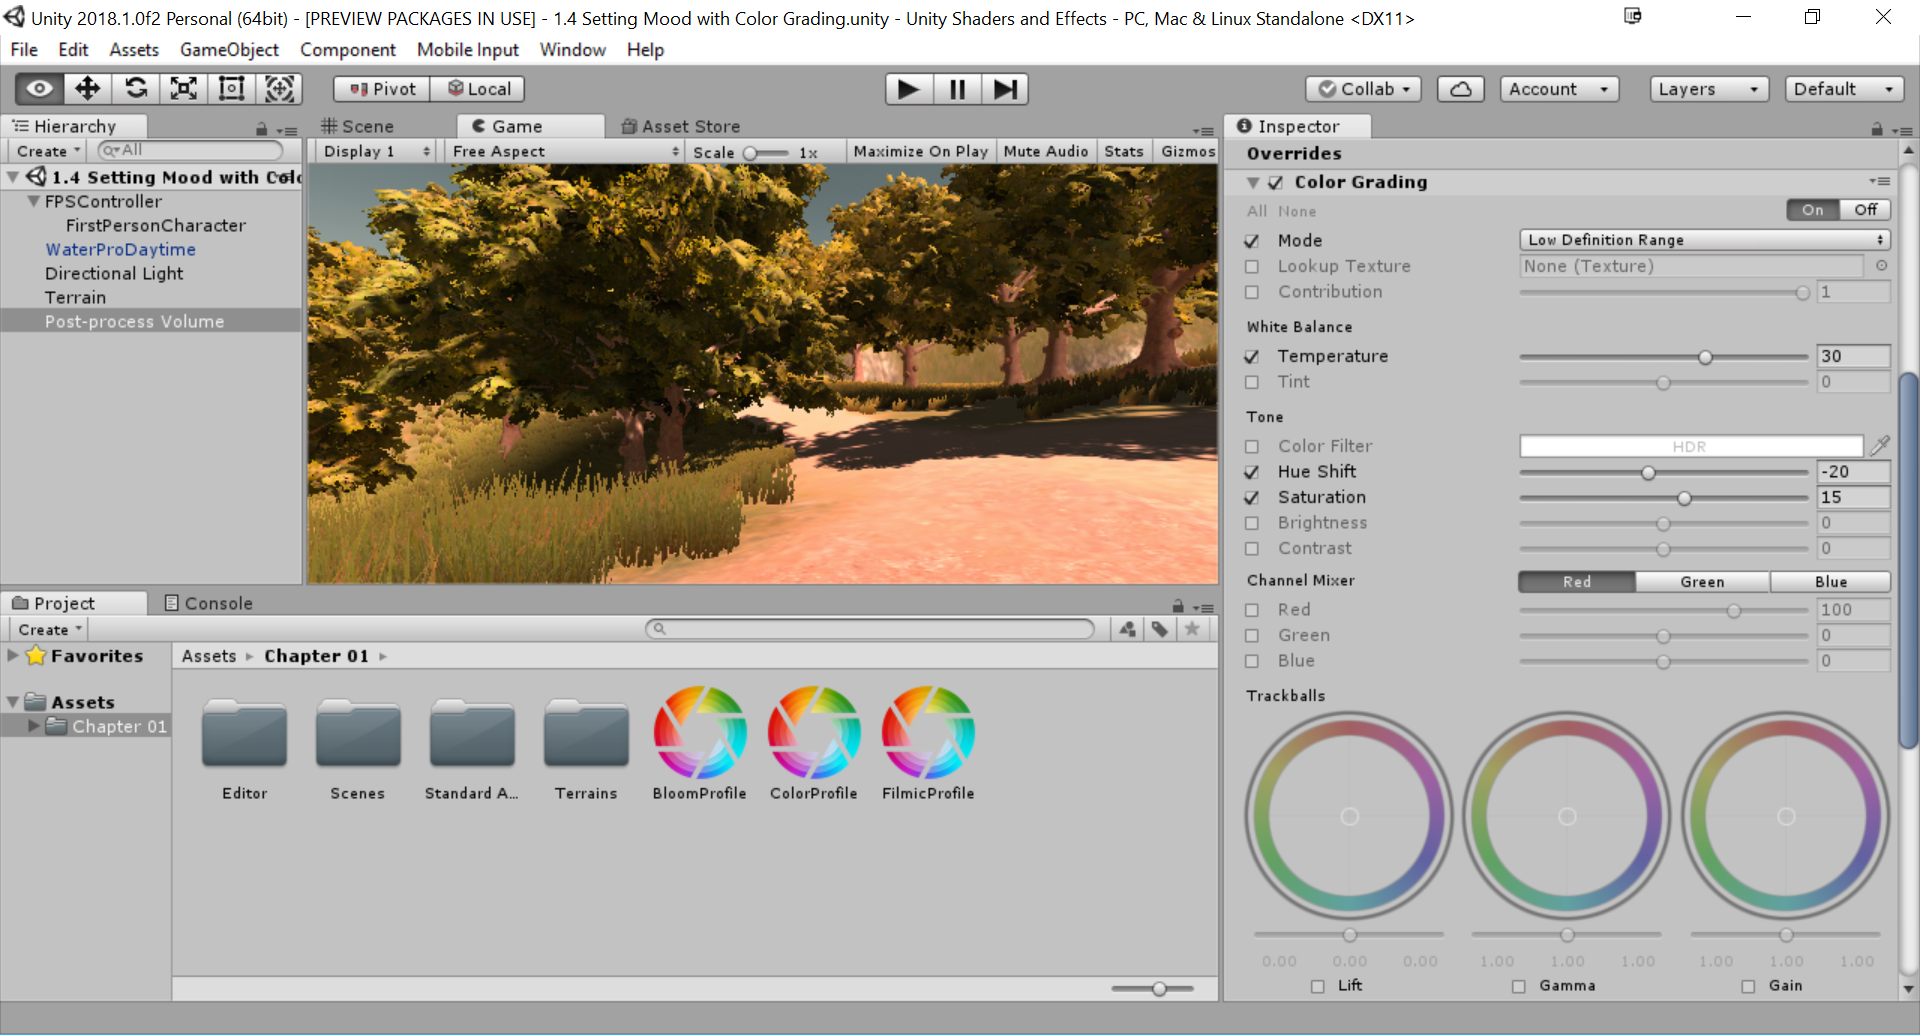
- Select the Add effect... button and select Unity | Color Grading.
- Check the Mode property and set it to Low Definition Range (LDR). From there, you'll see a number of properties that can be used to adjust the colors on the screen in a similar manner to how Photoshop's hue/saturation menu works. Check the Temperature property and set it to 30. Afterward, set the Hue Shift property to -20 and the Saturation to 15:
- After making the changes, dive into the game to see what it looks like when playing:
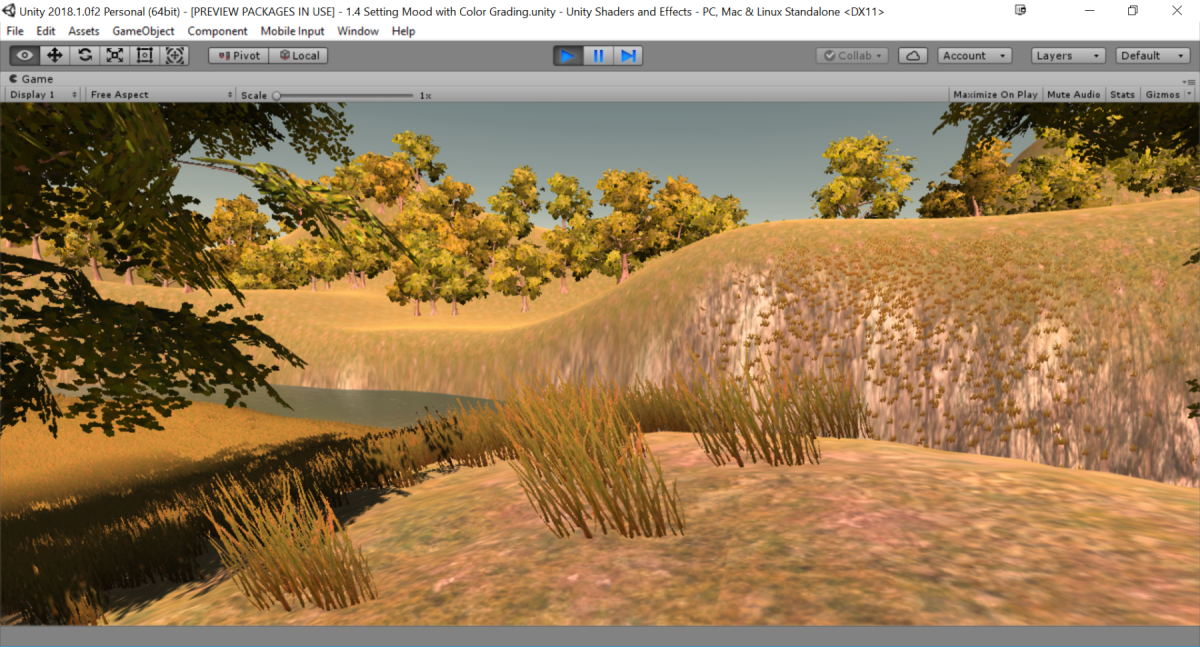
Notice how the previously very green environment is now much warmer and more yellow than before.
Creating a horror game look with fog
One of the types of games that best utilize the features of the Post Processing Stack is the horror genre. Using things such as depth of field to hide scary objects, as well as static to make the screen more menacing, can really help set your game firmly in the right place and provide the mood you are going for.
Getting ready
Make sure you have completed the Installing the Post Processing Stack recipe before starting this one.
How to do it...
- We first create a new Post Processing Profile by right-clicking within the Assets folder in the Project window and then selecting Create | Post Processing Profile. Once selected, it will allow us to rename the item. Go ahead and set the name to HorrorProfile.
- Select the Post-process volume object and, from the Inspector window, go to the Post Processing Volume component and assign the Profile property to the HorrorProflie we just created.
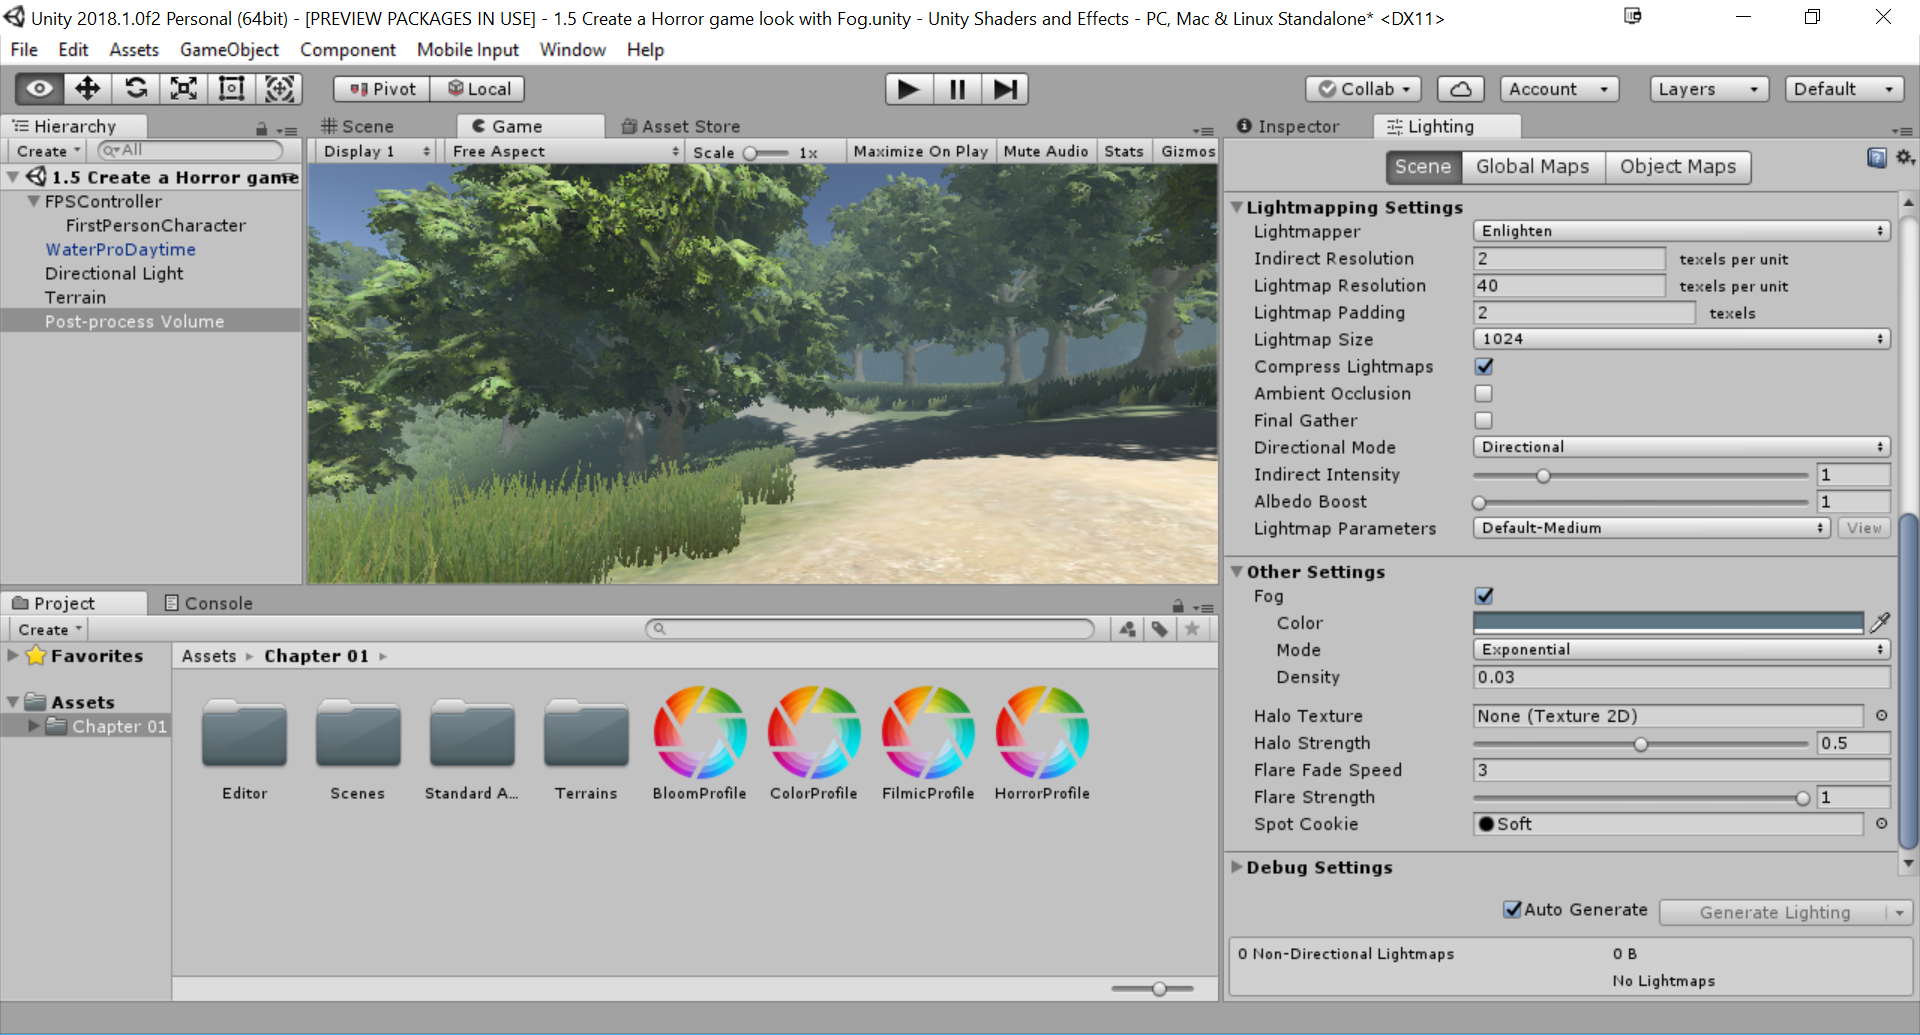
- Unlike previous settings, though, the fog settings are located in the Lighting window, which can be accessed by going into Window | Lighting.
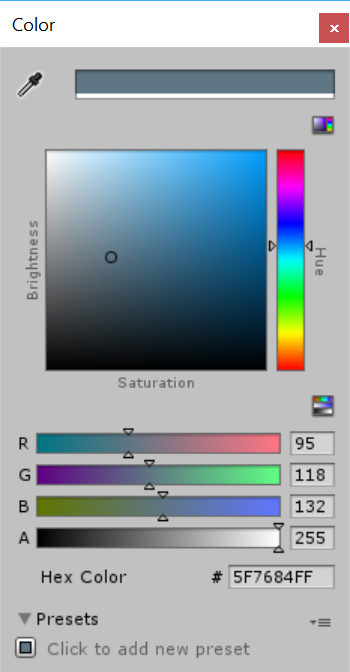
- From there, scroll all the way to the bottom until you reach the Other Settings option. Once there, check Fog and set the color to a value that is close to the skybox. I used the following settings:
- Next, change the Mode to Exponential and the Density to 0.03:
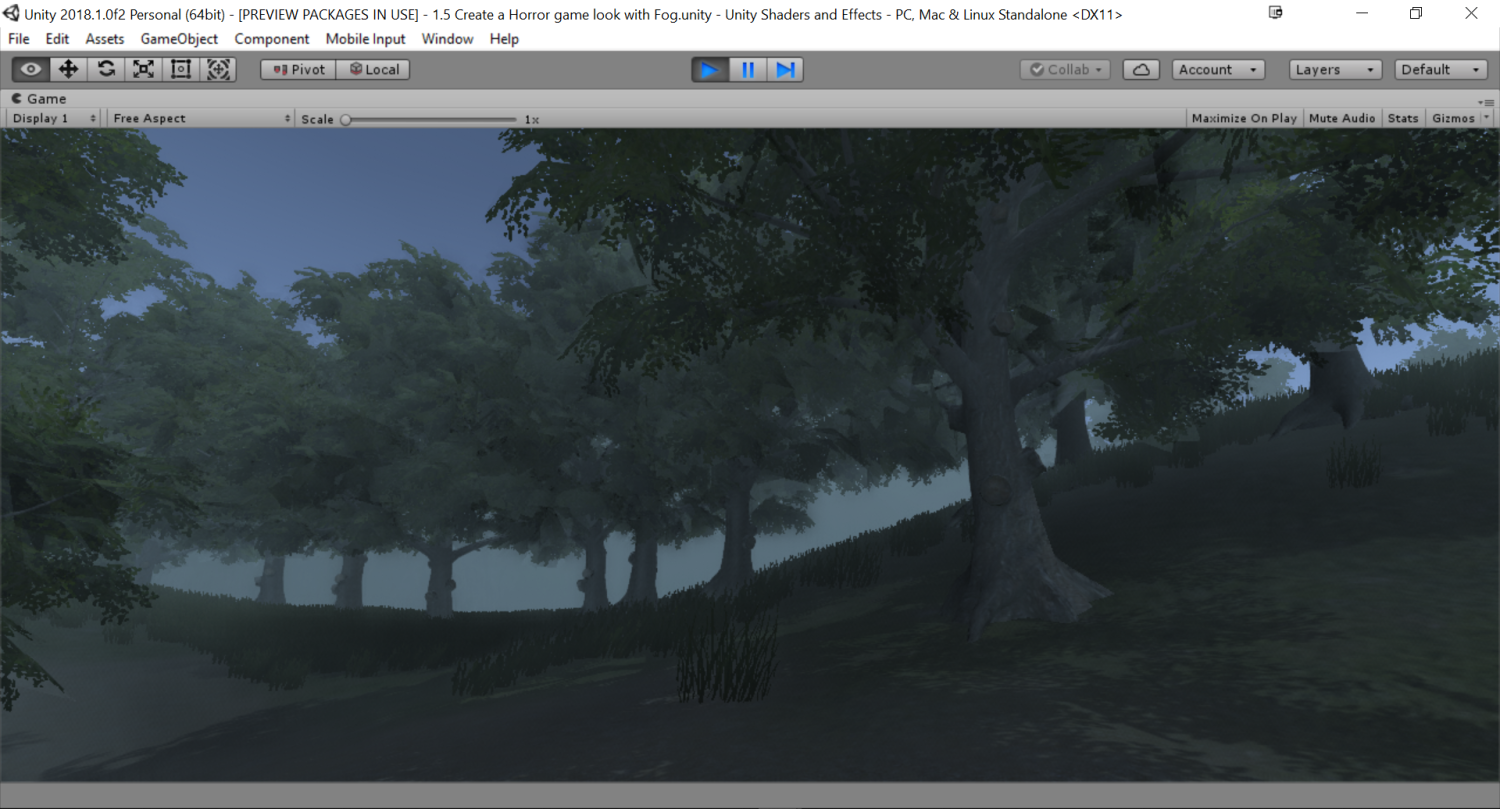
As you can see, it's already much more spooky that it was previously, but there are still more options that we can change.
- Open up the HorrorProfile again and go to the Inspector tab. Press the Add effect... button and select Unity | Ambient Occlusion. Check the Mode option and select Scalable Ambient Obscurance. Afterward, change the Intensity to 2 and the Radius to 20:

- Lastly, lighting often has a big effect on the theme of a scene as well. If you're using the example map, select the Directional Light object in the Hierarchy tab and, from the Inspector tab under the Light component, change the Intensity to 0.5 and then adjust the Color to something darker. (I used the same color as in step 4 with a HEX of 5F7684FF.)
- Save your game and then start it to see the effect of all of the changes:
How it works...
The Ambient Occlusion option will calculate areas that should have additional shadows. Since our scene is filled with trees, this will make the undersides much darker than they were previously.