Before you begin writing iOS Apps, you need to download and install Xcode from the App Store. Perform the following steps:
- Open the App Store on your Mac (it's in the Apple menu).
- In the search field in the top-right corner, type Xcode and press the Return key.
- You should see Xcode in the search results. Click Get and click Install.
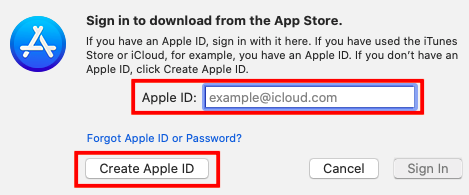
- If you have an Apple ID, type it in the Apple ID text box. If you don't have one, click the Create Apple ID button and follow the step-by-step instructions to create one:
https://support.apple.com/en-us/HT204316#appstore.
- Once Xcode has been installed, launch it. You should see the following Welcome to Xcode screen:
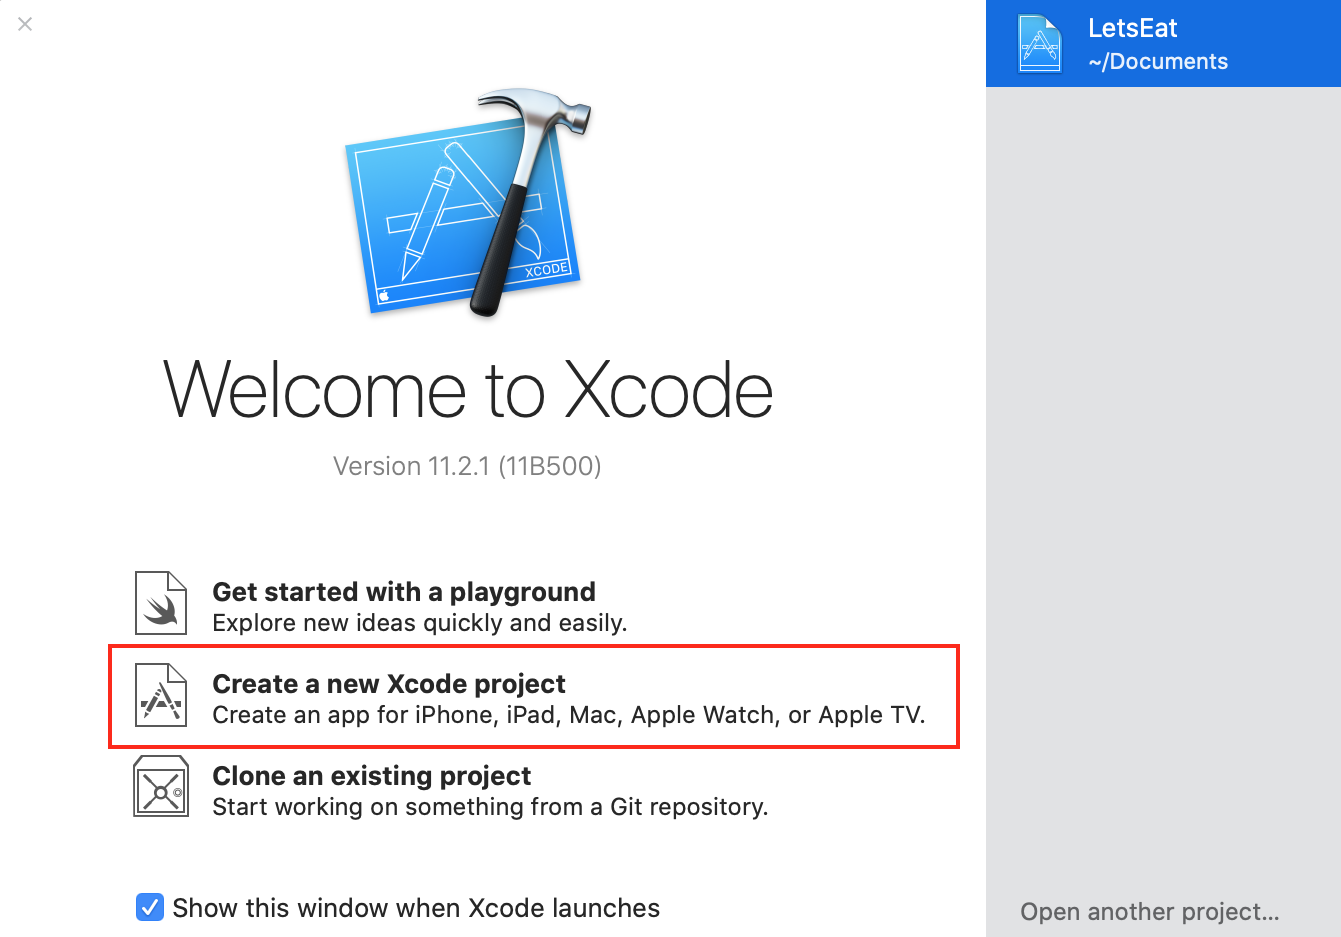
If this is the first time you have launched Xcode, you will see No Recent Projects in the right-hand panel. If you have previously created projects, then you will see them listed in the right-hand panel. Click Create a new Xcode project in the left-hand pane.
- You will see the new project screen as follows:
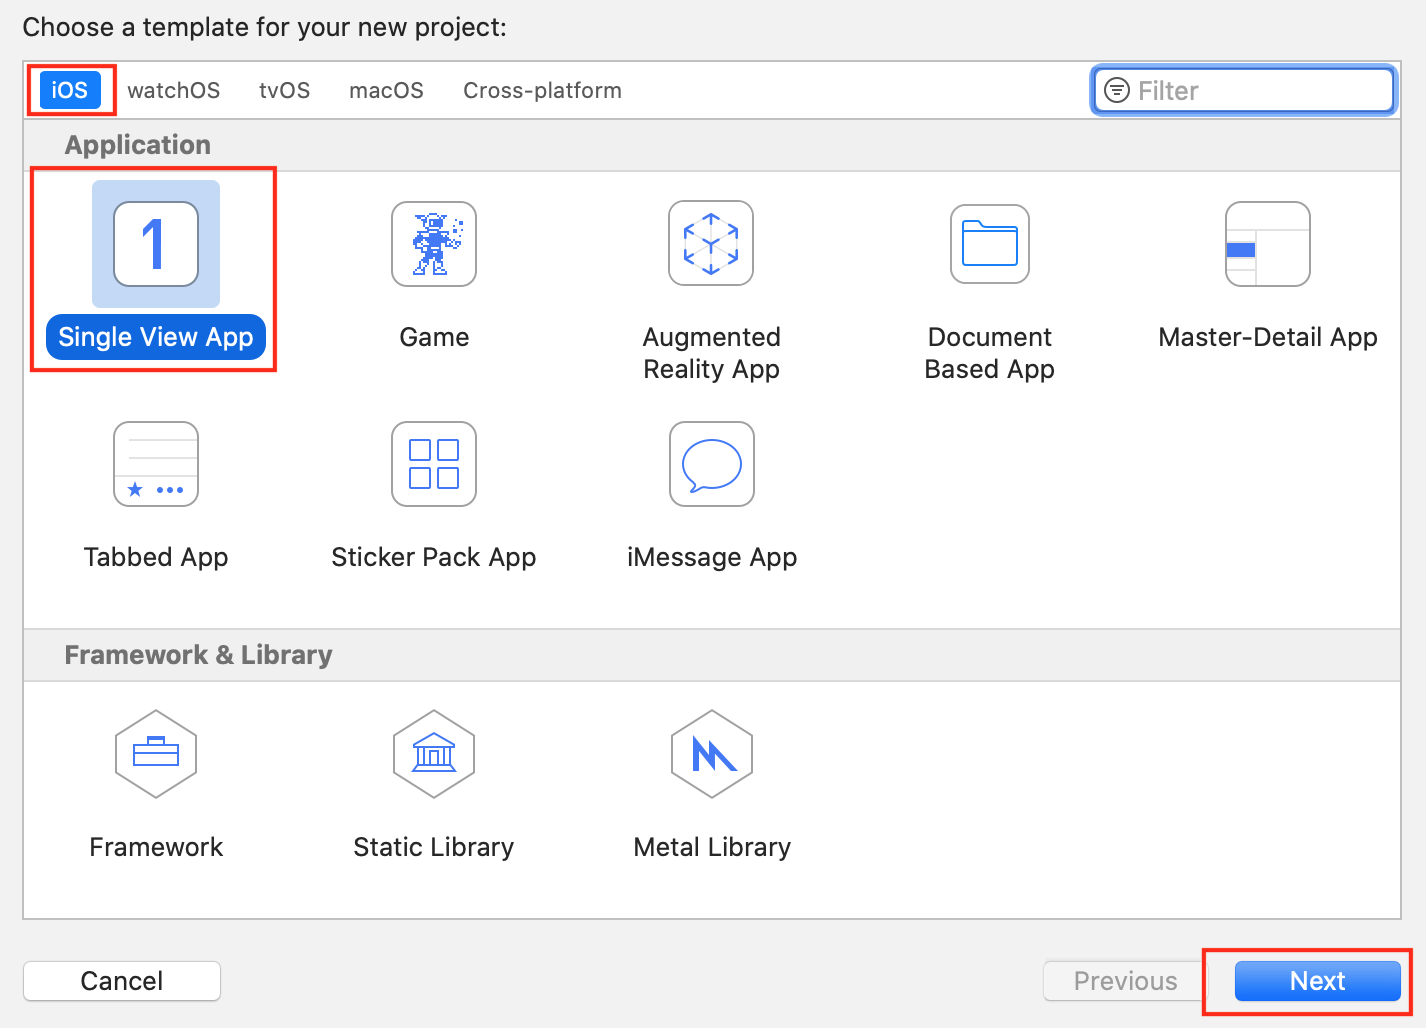
Across the top of this screen, you can select one of the following items: iOS, watchOS, tvOS, macOS, and Cross-platform. iOS should already be selected. Then, choose Single View App and click on Next.
- You will see an options screen for a new project:

This options screen has the following eight items to complete or choose:
- Product Name: The name of your app. Enter ExploringXcode in the text field.
- Team: The Developer Account Team for this project. Leave it as it is for now.
- Organization Name: The name of your company. Just put your own name here for now.
- Organization Identifier: Used in conjunction with the Product Name to create a unique identifier for your app on the App Store. Normally, reverse DNS notation is used. Enter com.myname for now.
- Bundle Identifier: Automatically created by combining your Product Name and your Organization Identifier. Used to uniquely identify your app on the App Store.
- Language: The programming language to be used. Set this to Swift.
- User Interface: Set this to Storyboard.
- Checkboxes: These checkboxes are used to include code for core data, unit tests, and UI tests. Leave them unchecked for now.
Click Next when you're done.
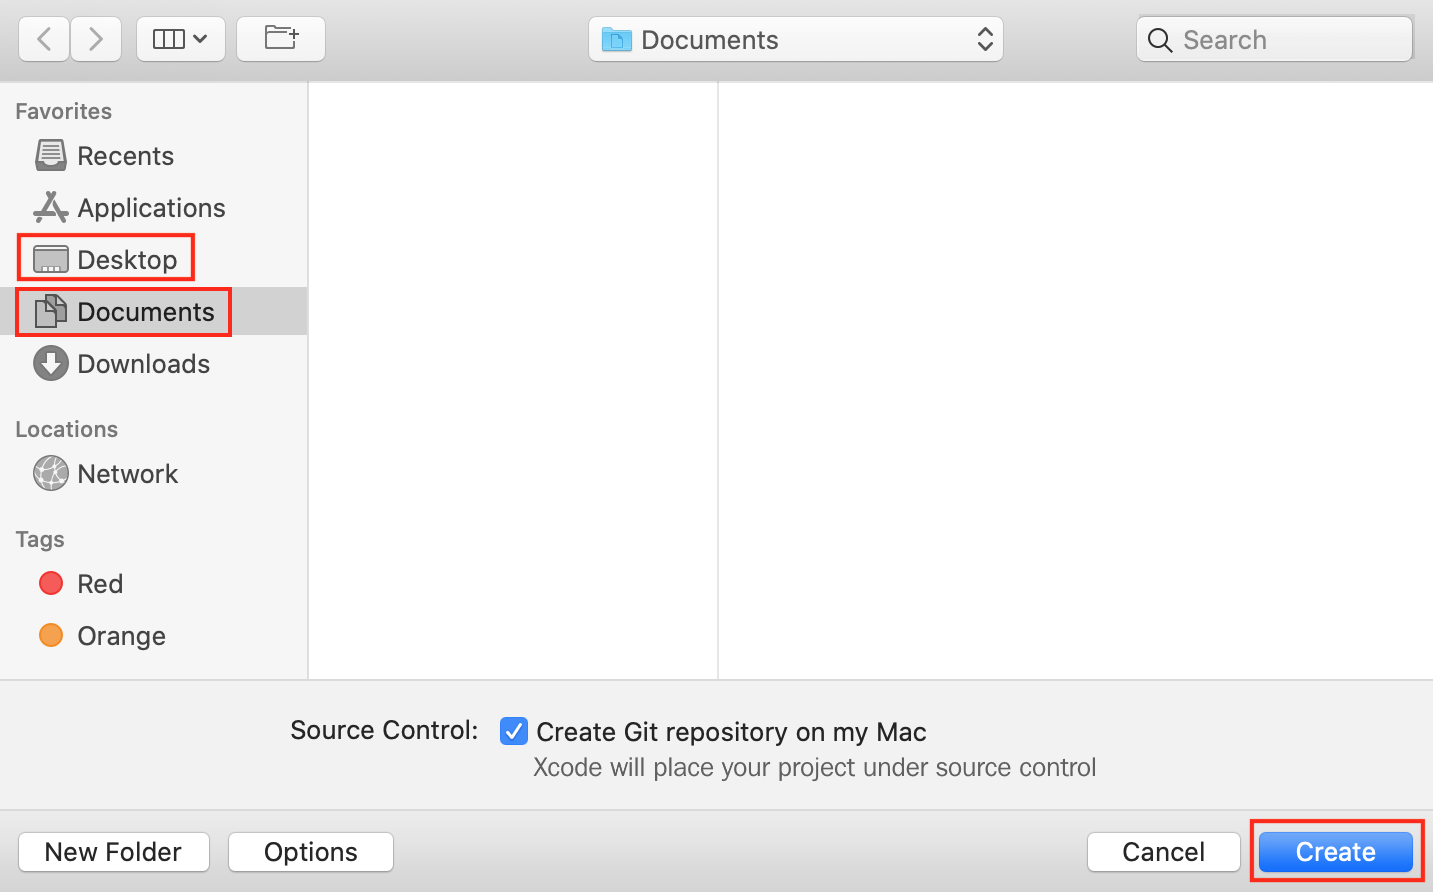
- Choose a location to save your project, such as the Desktop or Documents folder, and click Create:
- If you see a dialog box saying No author information was supplied by the version control system, click Fix.
- You will see the Source Control preference screen as follows:
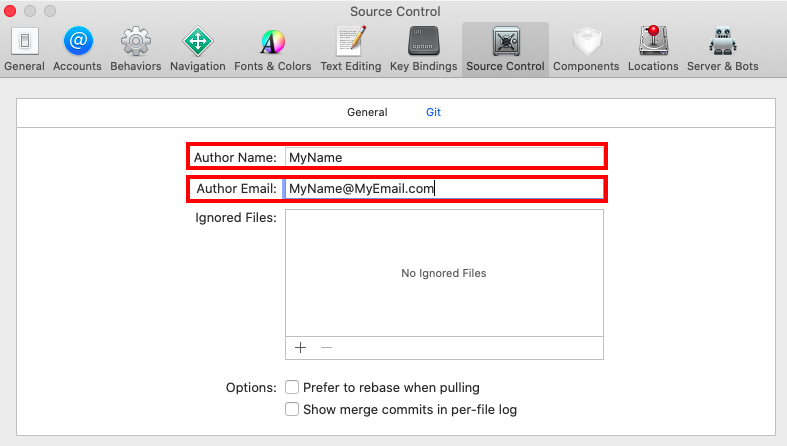
Enter the following information:
- Author Name: Your own name
- Author Email: Your email address
- The Xcode main window will appear.
Fantastic! You have now successfully downloaded and installed Xcode, and in the next section, we will study the Xcode user interface.