search
left
All Products
Best Sellers
New Releases
Books
Videos
Audiobooks
Learning Hub
Newsletters
Free Learning
right
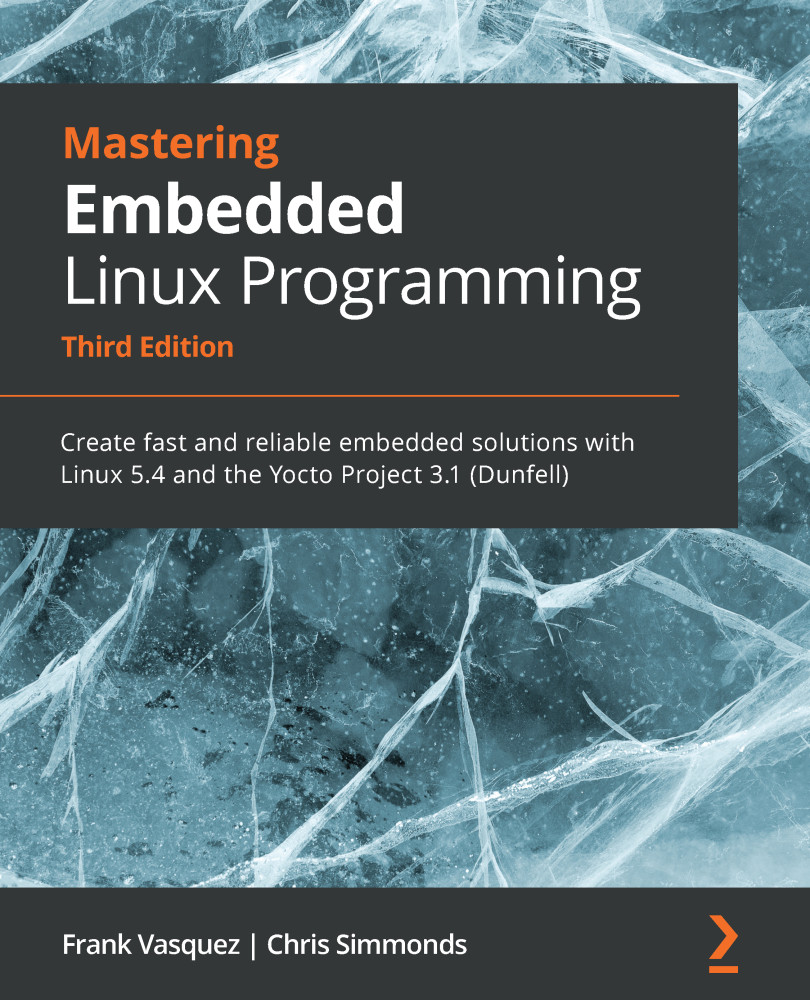
Mastering Embedded Linux Programming - Third Edition

Mastering Embedded Linux Programming: Create fast and reliable embedded solutions with Linux 5.4 and the Yocto Project 3.1 (Dunfell), Third Edition

By Frank Vasquez , Chris Simmonds
NZ$‎80.99
Book May 2021 758 pages 3rd Edition
eBook
NZ$‎64.99 NZ$‎44.99
Print
NZ$‎80.99
Subscription
Free Trial
eBook
NZ$‎64.99 NZ$‎44.99
Print
NZ$‎80.99
Subscription
Free Trial

What do you get with Print?

Feature icon Instant access to your digital eBook copy whilst your Print order is Shipped
Feature icon Black & white paperback book shipped to your address
Feature icon Download this book in EPUB and PDF formats
Feature icon Access this title in our online reader with advanced features
Feature icon DRM FREE - Read whenever, wherever and however you want
Buy Now

Product Details


Publication date : May 14, 2021
Length 758 pages
Edition : 3rd Edition
Language : English
ISBN-13 : 9781789530384
Category :
toc View table of contents toc Preview Book

Mastering Embedded Linux Programming - Third Edition

Chapter 1: Starting Out

You are about to begin working on your next project, and this time it is going to be running Linux. What should you think about before you put finger to keyboard? Let's begin with a high-level look at embedded Linux and see why it is popular, what are the implications of open source licenses, and what kind of hardware you will need to run Linux.

Linux first became a viable choice for embedded devices around 1999. That was when Axis (https://www.axis.com) released their first Linux-powered network camera and TiVo (https://business.tivo.com) their first Digital Video Recorder (DVR). Since 1999, Linux has become ever more popular, to the point that today it is the operating system of choice for many classes of product. In 2021, there were over two billion devices running Linux. That includes a large number of smartphones running Android, which uses a Linux kernel, and hundreds of millions of set-top boxes, smart TVs, and Wi-Fi routers, not to mention a very diverse range of devices such as vehicle diagnostics, weighing scales, industrial devices, and medical monitoring units that ship in smaller volumes.

In this chapter, we will cover the following topics:

  • Choosing Linux
  • When not to choose Linux
  • Meeting the players
  • Moving through the project life cycle
  • Navigating open source
  • Selecting hardware for embedded Linux
  • Obtaining the hardware for this book
  • Provisioning your development environment

Choosing Linux

Why is Linux so pervasive? And why does something as simple as a TV need to run something as complex as Linux just to display streaming video on a screen?

The simple answer is Moore's Law: Gordon Moore, co-founder of Intel, observed in 1965 that the density of components on a chip will double approximately every 2 years. That applies to the devices that we design and use in our everyday lives just as much as it does to desktops, laptops, and servers. At the heart of most embedded devices is a highly integrated chip that contains one or more processor cores and interfaces with main memory, mass storage, and peripherals of many types. This is referred to as a System on Chip, or SoC, and SoCs are increasing in complexity in accordance with Moore's Law. A typical SoC has a technical reference manual that stretches to thousands of pages. Your TV is not simply displaying a video stream as the old analog sets used to do.

The stream is digital, possibly encrypted, and it needs processing to create an image. Your TV is (or soon will be) connected to the internet. It can receive content from smartphones, tablets, and home media servers. It can be (or soon will be) used to play games and so on. You need a full operating system to manage this degree of complexity.

Here are some points that drive the adoption of Linux:

  • Linux has the necessary functionality. It has a good scheduler, a good network stack, support for USB, Wi-Fi, Bluetooth, many kinds of storage media, good support for multimedia devices, and so on. It ticks all the boxes.
  • Linux has been ported to a wide range of processor architectures, including some that are very commonly found in SoC designs – Arm, MIPS, x86, and PowerPC.
  • Linux is open source, so you have the freedom to get the source code and modify it to meet your needs. You, or someone working on your behalf, can create a board support package for your particular SoC board or device. You can add protocols, features, and technologies that may be missing from the mainline source code. You can remove features that you don't need to reduce memory and storage requirements. Linux is flexible.
  • Linux has an active community; in the case of the Linux kernel, very active. There is a new release of the kernel every 8 to 10 weeks, and each release contains code from more than 1,000 developers. An active community means that Linux is up to date and supports current hardware, protocols, and standards.
  • Open source licenses guarantee that you have access to the source code. There is no vendor tie-in.

For these reasons, Linux is an ideal choice for complex devices. But there are a few caveats I should mention here. Complexity makes it harder to understand. Coupled with the fast-moving development process and the decentralized structures of open source, you have to put some effort into learning how to use it and to keep on re-learning as it changes. I hope that this book will help in the process.

When not to choose Linux

Is Linux suitable for your project? Linux works well where the problem being solved justifies the complexity. It is especially good where connectivity, robustness, and complex user interfaces are required. However, it cannot solve every problem, so here are some things to consider before you jump in:

  • Is your hardware up to the job? Compared to a traditional real-time operating system (RTOS) such as VxWorks or QNX, Linux requires a lot more resources. It needs at least a 32-bit processor and lots more memory. I will go into more detail in the section on typical hardware requirements.
  • Do you have the right skill set? The early parts of a project, board bring-up, require detailed knowledge of Linux and how it relates to your hardware. Likewise, when debugging and tuning your application, you will need to be able to interpret the results. If you don't have the skills in-house, you may want to outsource some of the work. Of course, reading this book helps!
  • Is your system real-time? Linux can handle many real-time activities so long as
    you pay attention to certain details, which I will cover in detail in Chapter 21,
    Real-Time Programming.
  • Will your code require regulatory approval (medical, automotive, aerospace, and so on)? The burden of regulatory verification and validation might make another OS a better choice. Even if you do choose Linux for use in these environments, it may make sense to purchase a commercially available distribution from a company that has supplied Linux for existing products, like the one you are building.

Consider these points carefully. Probably the best indicator of success is to look around for similar products that run Linux and see how they have done it; follow best practice.

Meeting the players

Where does open source software come from? Who writes it? In particular, how does this relate to the key components of embedded development—the toolchain, bootloader, kernel, and basic utilities found in the root filesystem?

The main players are as follows:

  • The open source community: This, after all, is the engine that generates the software you are going to be using. The community is a loose alliance of developers, many of whom are funded in some way, perhaps by a not-for-profit organization, an academic institution, or a commercial company. They work together to further the aims of the various projects. There are many of them—some small, some large. Some that we will be making use of in the remainder of this book are Linux itself, U-Boot, BusyBox, Buildroot, the Yocto Project, and the many projects under the GNU umbrella.
  • CPU architects: These are the organizations that design the CPUs we use. The important ones here are Arm/Linaro (Arm Cortex-A), Intel (x86 and x86_64), SiFive (RISC-V), and IBM (PowerPC). They implement or, at the very least, influence support for the basic CPU architecture.
  • SoC vendors (Broadcom, Intel, Microchip, NXP, Qualcomm, TI, and many others): They take the kernel and toolchain from the CPU architects and modify them to support their chips. They also create reference boards: designs that are used by the next level down to create development boards and working products.
  • Board vendors and OEMs: These people take the reference designs from SoC vendors and build them in to specific products, for instance, set-top boxes or cameras, or create more general-purpose development boards, such as those from Advantech and Kontron. An important category are the cheap development boards such as BeagleBoard/BeagleBone and Raspberry Pi that have created their own ecosystems of software and hardware add-ons.
  • Commercial Linux vendors: Companies such as Siemens (Mentor), Timesys, and Wind River offer commercial Linux distributions that have undergone strict regulatory verification and validation across multiple industries (medical, automotive, aerospace, and so on).

These form a chain, with your project usually at the end, which means that you do not have a free choice of components. You cannot simply take the latest kernel from https://www.kernel.org/, except in a few rare cases, because it does not have support for the chip or board that you are using.

This is an ongoing problem with embedded development. Ideally, the developers at each link in the chain would push their changes upstream, but they don't. It is not uncommon to find a kernel that has many thousands of patches that are not merged. In addition, SoC vendors tend to actively develop open source components only for their latest chips, meaning that support for any chip more than a couple of years old will be frozen and not receive any updates.

The consequence is that most embedded designs are based on old versions of software. They do not receive security fixes, performance enhancements, or features that are in newer versions. Problems such as Heartbleed (a bug in the OpenSSL libraries) and ShellShock (a bug in the bash shell) go unfixed. I will talk more about this later in this chapter under the topic of security.

What can you do about it? First, ask questions of your vendors (NXP, Texas Instruments, and Xilinx, to name just a few): what is their update policy, how often do they revise kernel versions, what is the current kernel version, what was the one before that, and what is their policy for merging changes upstream? Some vendors are making great strides in this way. You should prefer their chips.

Secondly, you can take steps to make yourself more self-sufficient. The chapters in Section 1 explain the dependencies in more detail and show you where you can help yourself. Don't just take the package offered to you by the SoC or board vendor and use it blindly without considering the alternatives.

Moving through the project life cycle

This book is divided into four sections that reflect the phases of a project. The phases are not necessarily sequential. Usually, they overlap and you will need to jump back to revisit things that were done previously. However, they are representative of a developer's preoccupations as the project progresses:

  • Elements of Embedded Linux (Chapters 1 to 8) will help you set up the development environment and create a working platform for the later phases. It is often referred to as the board bring-up phase.
  • System Architecture and Design Choices (Chapters 9 to 15) will help you to look at some of the design decisions you will have to make concerning the storage of programs and data, how to divide work between kernel device drivers and applications, and how to initialize the system.
  • Writing Embedded Applications (Chapters 16 to 18) shows how to package and deploy Python applications, make effective use of the Linux process and thread model, and how to manage memory in a resource-constrained device.
  • Debugging and Optimizing Performance (Chapters 19 to 21) describes how to trace, profile, and debug your code in both the applications and the kernel. The last chapter explains how to design for real-time behavior when required.

Now, let's focus on the four basic elements of embedded Linux that comprise the first section of the book.

The four elements of embedded Linux

Every project begins by obtaining, customizing, and deploying these four elements: the toolchain, the bootloader, the kernel, and the root filesystem. This is the topic of the first section of this book.

  • Toolchain: The compiler and other tools needed to create code for your
    target device.
  • Bootloader: The program that initializes the board and loads the Linux kernel.
  • Kernel: This is the heart of the system, managing system resources and interfacing with hardware.
  • Root filesystem: Contains the libraries and programs that are run once the kernel has completed its initialization.

Of course, there is also a fifth element, not mentioned here. That is the collection of programs specific to your embedded application that make the device do whatever it is supposed to do, be it weigh groceries, display movies, control a robot, or fly a drone.

Typically, you will be offered some or all of these elements as a package when you buy your SoC or board. But, for the reasons mentioned in the preceding paragraph, they may not be the best choices for you. I will give you the background to make the right selections in the first eight chapters and I will introduce you to two tools that automate the whole process for you: Buildroot and the Yocto Project.

Navigating open source

The components of embedded Linux are open source, so now is a good time to consider what that means, why open sources work the way they do, and how this affects the often proprietary embedded device you will be creating from it.

Licenses

When talking about open source, the word free is often used. People new to the subject often take it to mean nothing to pay, and open source software licenses do indeed guarantee that you can use the software to develop and deploy systems for no charge. However, the more important meaning here is freedom, since you are free to obtain the source code, modify it in any way you see fit, and redeploy it in other systems. These licenses give you this right. Compare that with freeware licenses, which allow you to copy the binaries for no cost but do not give you the source code, or other licenses that allow you to use the software for free under certain circumstances, for example, for personal use, but not commercial. These are not open source.

I will provide the following comments in the interest of helping you understand the implications of working with open source licenses, but I would like to point out that I am an engineer and not a lawyer. What follows is my understanding of the licenses and the way they are interpreted.

Open source licenses fall broadly into two categories: copyleft licenses, such as the GNU General Public License (GPL), and permissive licenses, such as the BSD and MIT licenses.

The permissive licenses say, in essence, that you may modify the source code and use it in systems of your own choosing so long as you do not modify the terms of the license in any way. In other words, with that one restriction, you can do with it what you want, including building it into possibly proprietary systems.

The GPL licenses are similar but have clauses that compel you to pass the rights to obtain and modify the software on to your end users. In other words, you share your source code. One option is to make it completely public by putting it onto a public server. Another is to offer it only to your end users by means of a written offer to provide the code when requested. The GPL goes further to say that you cannot incorporate GPL code into proprietary programs. Any attempt to do so would make the GPL apply to the whole. In other words, you cannot combine a GPL and proprietary code in one program. Aside from the Linux kernel, the GNU Compiler Collection and GNU Debugger as well as many other freely available tools associated with the GNU project fall under the umbrella of the GPL.

So, what about libraries? If they are licensed with the GPL, any program linked with them becomes GPL also. However, most libraries are licensed under the GNU Lesser General Public License (LGPL). If this is the case, you are allowed to link with them from a proprietary program.

Important note

All of the preceding description relates specifically to GPL v2 and LGPL v2.1. I should mention the latest versions of GPL v3 and LGPL v3. These are controversial, and I will admit that I don't fully understand the implications. However, the intention is to ensure that the GPL v3 and LGPL v3 components in any system can be replaced by the end user, which is in the spirit of open source software for everyone.

The GPL v3 and LGPL v3 have their problems though. There are issues with security. If the owner of a device has access to the system code, then so might an unwelcome intruder. Often the defense is to have kernel images that are signed by an authority such as the vendor, so that unauthorized updates are not possible. Is that an infringement of my right to modify my device? Opinions differ.

Important note

The TiVo set-top box is an important part of this debate. It uses a Linux kernel, which is licensed under GPL v2. TiVo have released the source code of their version of the kernel and so comply with the license. TiVo also has a bootloader that will only load a kernel binary that is signed by them. Consequently, you can build a modified kernel for a TiVo box, but you cannot load it on the hardware. The Free Software Foundation (FSF) takes the position that this is not in the spirit of open source software and refers to this procedure as Tivoization. The GPL v3 and LGPL v3 were written to explicitly prevent this from happening. Some projects, the Linux kernel in particular, have been reluctant to adopt the GPL version 3 licenses because of the restrictions they would place on device manufacturers.

Selecting hardware for embedded Linux

If you are designing or selecting hardware for an embedded Linux project, what do you look out for?

First, a CPU architecture that is supported by the kernel—unless you plan to add a new architecture yourself, of course! Looking at the source code for Linux 5.4, there are 25 architectures, each represented by a sub-directory in the arch/ directory. They are all
32- or 64-bit architectures, most with an MMU, but some without. The ones most often found in embedded devices are Arm, MIPS, PowerPC, and x86, each in 32 and 64-bit variants, all of which have memory management units (MMUs).

Most of this book is written with this class of processor in mind. There is another group that doesn't have an MMU and that runs a subset of Linux known as microcontroller Linux or uClinux. These processor architectures include ARC (Argonaut RISC Core), Blackfin, MicroBlaze, and Nios. I will mention uClinux from time to time, but I will not go into detail because it is a rather specialized topic.

Second, you will need a reasonable amount of RAM. 16 MiB is a good minimum, although it is quite possible to run Linux using half that. It is even possible to run Linux with 4 MiB if you are prepared to go to the trouble of optimizing every part of the system. It may even be possible to get lower, but there comes a point at which it is no longer Linux.

Third, there is non-volatile storage, usually flash memory. 8 MiB is enough for a simple device such as a webcam or a simple router. As with RAM, you can create a workable Linux system with less storage if you really want to, but the lower you go, the harder it becomes. Linux has extensive support for flash storage devices, including raw NOR and NAND flash chips, and managed flash in the form of SD cards, eMMC chips, USB flash memory, and so on.

Fourth, a serial port is very useful, preferably a UART-based serial port. It does not have to be fitted on production boards, but makes board bring-up, debugging, and development much easier.

Fifth, you need some means of loading software when starting from scratch. Many microcontroller boards are fitted with a Joint Test Action Group (JTAG) interface for this purpose. Modern SoCs also have the ability to load boot code directly from removable media, especially SD and micro SD cards, or serial interfaces such as UART or USB.

In addition to these basics, there are interfaces to the specific bits of hardware your device needs to get its job done. Mainline Linux comes with open source drivers for many thousands of different devices, and there are drivers (of variable quality) from the SoC manufacturer and from the OEMs of third-party chips that may be included in the design, but remember my comments on the commitment and ability of some manufacturers. As a developer of embedded devices, you will find that you spend quite a lot of time evaluating and adapting third-party code, if you have it, or liaising with the manufacturer if you don't. Finally, you will have to write the device support for interfaces that are unique to the device or find someone to do it for you.

Obtaining the hardware for this book

The examples in this book are intended to be generic, but to make them relevant and easy to follow, I have had to choose specific hardware. I have chosen three exemplar devices: the Raspberry Pi 4, the BeagleBone Black, and QEMU. The first is by far the most popular Arm-based single board computer on the market. The second is a widely available and cheap development board that can be used in serious embedded hardware. The third is a machine emulator that can be used to create a range of systems that are typical of embedded hardware. It was tempting to use QEMU exclusively, but, like all emulations, it is not quite the same as the real thing. Using the Raspberry Pi 4 and BeagleBone Black, you have the satisfaction of interacting with real hardware and seeing real LEDs flash. While the BeagleBone Black is several years old now, it remains open source hardware (unlike the Raspberry Pi). This means that the board design materials are freely available for anyone to build a BeagleBone Black or derivative into their products.

In any case, I encourage you to try out as many of the examples as you can, using either of these three platforms, or indeed any embedded hardware you may have to hand.

The Raspberry Pi 4

At the time of writing, the Raspberry Pi 4 Model B is the flagship tiny, dual-display, desktop computer produced by the Raspberry Pi Foundation. Their website is
https://raspberrypi.org/. The Pi 4's technical specs include the following:

  • A Broadcom BCM2711 1.5 GHz quad-core Cortex-A72 (Arm® v8) 64-bit SoC
  • 2, 4, or 8 GiB DDR4 RAM
  • 2.4 GHz and 5.0 GHz 802.11ac wireless, Bluetooth 5.0, BLE
  • A serial port for debug and development
  • A MicroSD slot, which can be used as the boot device
  • A USB-C connector that is used to power the board
  • 2 × full size USB 3.0 and 2 × full size USB 2.0 host ports
  • A Gigabit Ethernet port
  • 2 × micro-HDMI ports for video and audio output

In addition, there is a 40-pin expansion header for which there are a great variety of daughter boards, known as HATs (Hardware Attached on Top), that allow you to adapt the board to do many different things. However, you will not need any HATs for the examples in this book. Instead, you will make use of the Pi 4's built-in Wi-Fi and Bluetooth (which the BeagleBone Black lacks).

In addition to the board itself, you will require the following:

  • A 5V USB-C power supply capable of delivering 3 A or more
  • A USB to TTL serial cable with 3.3V logic-level pins like the Adafruit 954
  • A MicroSD card and a means of writing to it from your development PC or laptop, which will be needed to load software onto the board
  • An Ethernet cable and a router to connect it to, as some of the examples require network connectivity

Next is the BeagleBone Black.

The BeagleBone Black

The BeagleBone and the later BeagleBone Black are open hardware designs for a small, credit card-sized development board produced by CircuitCo LLC. The main repository of information is at https://beagleboard.org/. The main points of the specifications are as follows:

  • A TI AM335x 1 GHz Arm® Cortex-A8 Sitara SoC
  • 512 MiB DDR3 RAM
  • 2 or 4 GiB 8-bit eMMC onboard flash storage
  • A serial port for debug and development
  • A MicroSD slot, which can be used as the boot device
  • A Mini-USB OTG client/host port that can also be used to power the board
  • A full size USB 2.0 host port
  • A 10/100 Ethernet port
  • An HDMI port for video and audio output

In addition, there are two 46-pin expansion headers for which there are a great variety of daughter boards, known as capes, which allow you to adapt the board to do many different things. However, you do not need to fit any capes for the examples in this book.

In addition to the board itself, you will require the following:

  • A Mini-USB to USB-A cable (supplied with the board).
  • A serial cable that can interface with the 6-pin 3.3V TTL level signals provided by the board. The BeagleBoard website has links to compatible cables.
  • A MicroSD card and a means of writing to it from your development PC or laptop, which will be needed to load software onto the board.
  • An Ethernet cable and a router to connect it to, as some of the examples require network connectivity.
  • A 5V power supply capable of delivering 1 A or more.

In addition to the above, Chapter 12, Prototyping with Breakout Boards, also requires
the following:

  • A SparkFun model GPS-15193 Breakout board.
  • A Saleae Logic 8 logic analyzer. This apparatus will be used to probe pins for SPI communications between the BeagleBone Black and NEO-M9N.

QEMU

QEMU is a machine emulator. It comes in a number of different flavors, each of which can emulate a processor architecture and a number of boards built using that architecture. For example, we have the following:

  • qemu-system-arm: 32-bit Arm
  • qemu-system-mips: MIPS
  • qemu-system-ppc: PowerPC
  • qemu-system-x86: x86 and x86_64

For each architecture, QEMU emulates a range of hardware, which you can see by using the -machine help option. Each machine emulates most of the hardware that would normally be found on that board. There are options to link hardware to local resources, such as using a local file for the emulated disk drive.

Here is a concrete example:

$ qemu-system-arm -machine vexpress-a9 -m 256M -drive file=rootfs.ext4,sd -net nic -net use -kernel zImage -dtb vexpress- v2p-ca9.dtb -append "console=ttyAMA0,115200 root=/dev/mmcblk0" -serial stdio -net nic,model=lan9118 -net tap,ifname=tap0

The options used in the preceding command line are as follows:

  • -machine vexpress-a9: Creates an emulation of an Arm Versatile Express development board with a Cortex A-9 processor
  • -m 256M: Populates it with 256 MiB of RAM
  • -drive file=rootfs.ext4,sd: Connects the SD interface to the local file rootfs.ext4 (which contains a filesystem image)
  • -kernel zImage: Loads the Linux kernel from the local file named zImage
  • -dtb vexpress-v2p- ca9.dtb: Loads the device tree from the local file vexpress-v2p-ca9.dtb
  • -append "...": Appends this string as the kernel command line
  • -serial stdio: Connects the serial port to the terminal that launched QEMU, usually so that you can log on to the emulated machine via the serial console
  • -net nic,model=lan9118: Creates a network interface
  • -net tap,ifname=tap0: Connects the network interface to the virtual network interface, tap0

To configure the host side of the network, you need the tunctl command from the User Mode Linux (UML) project; on Debian and Ubuntu, the package is named uml-utilites:

$ sudo tunctl -u $(whoami) -t tap0

This creates a network interface named tap0 that is connected to the network controller in the emulated QEMU machine. You configure tap0 in exactly the same way as any other interface.

All of these options are described in detail in the following chapters. I will be using Versatile Express for most of my examples, but it should be easy to use a different machine or architecture.

Provisioning your development environment

I have only used open source software, both for the development tools and the target operating system and applications. I assume that you will be using Linux on your development system. I tested all the host commands using Ubuntu 20.04 LTS, and so there is a slight bias toward that particular version, but any modern Linux distribution is likely to work just fine.

Summary

Embedded hardware will continue to get more complex, following the trajectory set by Moore's Law. Linux has the power and the flexibility to make use of hardware in an efficient way. Together we will learn how to harness that power so we can build robust products that delight our users. This book will take you through the five phases of the embedded project's life cycle, beginning with the four elements of embedded Linux.

The sheer variety of embedded platforms and the fast pace of development lead to isolated pools of software. In many cases, you will become dependent on this software, especially the Linux kernel that is provided by your SoC or board vendor, and, to a lesser extent, the toolchain. Some SoC manufacturers are getting better at pushing their changes upstream and the maintenance of these changes is getting easier. Despite these improvements, selecting the right hardware for your embedded Linux project is still an exercise fraught with peril. Open source license compliance is another topic you need to be aware when building products atop the embedded Linux ecosystem.

In this chapter, you were introduced to the hardware and some of the software you will use throughout this book (namely QEMU). Later on, we will examine some powerful tools that can help you create and maintain the software for your device. We cover Buildroot and dig deep into the Yocto Project. Before I describe these build tools, I will describe the four elements of embedded Linux, which you can apply to all embedded Linux projects, however they are created.

The next chapter is all about the first of these, the toolchain, which you need in order to compile code for your target platform.

left arrow right arrow
toc Download Code

Key benefits

  • Learn how to develop and configure robust embedded Linux devices
  • Explore the new features of Linux 5.4 and the Yocto Project 3.1 (Dunfell)
  • Discover different ways to debug and profile your code in both user space and the Linux kernel

Description

If you’re looking for a book that will demystify embedded Linux, then you’ve come to the right place. Mastering Embedded Linux Programming is a fully comprehensive guide that can serve both as means to learn new things or as a handy reference. The first few chapters of this book will break down the fundamental elements that underpin all embedded Linux projects: the toolchain, the bootloader, the kernel, and the root filesystem. After that, you will learn how to create each of these elements from scratch and automate the process using Buildroot and the Yocto Project. As you progress, the book will show you how to implement an effective storage strategy for flash memory chips and install updates to a device remotely once it’s deployed. You’ll also learn about the key aspects of writing code for embedded Linux, such as how to access hardware from apps, the implications of writing multi-threaded code, and techniques to manage memory in an efficient way. The final chapters demonstrate how to debug your code, whether it resides in apps or in the Linux kernel itself. You’ll also cover the different tracers and profilers that are available for Linux so that you can quickly pinpoint any performance bottlenecks in your system. By the end of this Linux book, you’ll be able to create efficient and secure embedded devices using Linux.

What you will learn

Use Buildroot and the Yocto Project to create embedded Linux systems Troubleshoot BitBake build failures and streamline your Yocto development workflow Update IoT devices securely in the field using Mender or balena Prototype peripheral additions by reading schematics, modifying device trees, soldering breakout boards, and probing pins with a logic analyzer Interact with hardware without having to write kernel device drivers Divide your system up into services supervised by BusyBox runit Debug devices remotely using GDB and measure the performance of systems using tools such as perf, ftrace, eBPF, and Callgrind

What do you get with Print?

Feature icon Instant access to your digital eBook copy whilst your Print order is Shipped
Feature icon Black & white paperback book shipped to your address
Feature icon Download this book in EPUB and PDF formats
Feature icon Access this title in our online reader with advanced features
Feature icon DRM FREE - Read whenever, wherever and however you want
Buy Now

Product Details


Publication date : May 14, 2021
Length 758 pages
Edition : 3rd Edition
Language : English
ISBN-13 : 9781789530384
Category :

Table of Contents

27 Chapters
Preface Packt Packt
Section 1: Elements of Embedded Linux Packt Packt
Chapter 1: Starting Out Packt Packt
Chapter 2: Learning about Toolchains Packt Packt
Chapter 3: All about Bootloaders Packt Packt
Chapter 4: Configuring and Building the Kernel Packt Packt
Chapter 5: Building a Root Filesystem Packt Packt
Chapter 6: Selecting a Build System Packt Packt
Chapter 7: Developing with Yocto Packt Packt
Chapter 8: Yocto Under the Hood Packt Packt
Section 2: System Architecture and Design Decisions Packt Packt
Chapter 9: Creating a Storage Strategy Packt Packt
Chapter 10: Updating Software in the Field Packt Packt
Chapter 11: Interfacing with Device Drivers Packt Packt
Chapter 12: Prototyping with Breakout Boards Packt Packt
Chapter 13: Starting Up – The init Program Packt Packt
Chapter 14: Starting with BusyBox runit Packt Packt
Chapter 15: Managing Power Packt Packt
Section 3: Writing Embedded Applications Packt Packt
Chapter 16: Packaging Python Packt Packt
Chapter 17: Learning about Processes and Threads Packt Packt
Chapter 18: Managing Memory Packt Packt
Section 4: Debugging and Optimizing Performance Packt Packt
Chapter 19: Debugging with GDB Packt Packt
Chapter 20: Profiling and Tracing Packt Packt
Chapter 21: Real-Time Programming Packt Packt
Other Books You May Enjoy Packt Packt

Customer reviews

filter Filter
Top Reviews
Rating distribution
star-icon star-icon star-icon star-icon star-icon 5
(2 Ratings)
5 star 100%
4 star 0%
3 star 0%
2 star 0%
1 star 0%

Filter reviews by


Ian Boswell Feb 6, 2024
star-icon star-icon star-icon star-icon star-icon 5
Feefo Verified review Feefo image
Ilija Poznić Nov 21, 2023
star-icon star-icon star-icon star-icon star-icon 5
Everything you need to create custom embedded Linux distribution.
Feefo Verified review Feefo image
Get free access to Packt library with over 7500+ books and video courses for 7 days!
Start Free Trial

FAQs

What is the delivery time and cost of print book? Packt Packt

Shipping Details

USA:

'

Economy: Delivery to most addresses in the US within 10-15 business days

Premium: Trackable Delivery to most addresses in the US within 3-8 business days

UK:

Economy: Delivery to most addresses in the U.K. within 7-9 business days.
Shipments are not trackable

Premium: Trackable delivery to most addresses in the U.K. within 3-4 business days!
Add one extra business day for deliveries to Northern Ireland and Scottish Highlands and islands

EU:

Premium: Trackable delivery to most EU destinations within 4-9 business days.

Australia:

Economy: Can deliver to P. O. Boxes and private residences.
Trackable service with delivery to addresses in Australia only.
Delivery time ranges from 7-9 business days for VIC and 8-10 business days for Interstate metro
Delivery time is up to 15 business days for remote areas of WA, NT & QLD.

Premium: Delivery to addresses in Australia only
Trackable delivery to most P. O. Boxes and private residences in Australia within 4-5 days based on the distance to a destination following dispatch.

India:

Premium: Delivery to most Indian addresses within 5-6 business days

Rest of the World:

Premium: Countries in the American continent: Trackable delivery to most countries within 4-7 business days

Asia:

Premium: Delivery to most Asian addresses within 5-9 business days

Disclaimer:
All orders received before 5 PM U.K time would start printing from the next business day. So the estimated delivery times start from the next day as well. Orders received after 5 PM U.K time (in our internal systems) on a business day or anytime on the weekend will begin printing the second to next business day. For example, an order placed at 11 AM today will begin printing tomorrow, whereas an order placed at 9 PM tonight will begin printing the day after tomorrow.


Unfortunately, due to several restrictions, we are unable to ship to the following countries:

  1. Afghanistan
  2. American Samoa
  3. Belarus
  4. Brunei Darussalam
  5. Central African Republic
  6. The Democratic Republic of Congo
  7. Eritrea
  8. Guinea-bissau
  9. Iran
  10. Lebanon
  11. Libiya Arab Jamahriya
  12. Somalia
  13. Sudan
  14. Russian Federation
  15. Syrian Arab Republic
  16. Ukraine
  17. Venezuela
What is custom duty/charge? Packt Packt

Customs duty are charges levied on goods when they cross international borders. It is a tax that is imposed on imported goods. These duties are charged by special authorities and bodies created by local governments and are meant to protect local industries, economies, and businesses.

Do I have to pay customs charges for the print book order? Packt Packt

The orders shipped to the countries that are listed under EU27 will not bear custom charges. They are paid by Packt as part of the order.

List of EU27 countries: www.gov.uk/eu-eea:

A custom duty or localized taxes may be applicable on the shipment and would be charged by the recipient country outside of the EU27 which should be paid by the customer and these duties are not included in the shipping charges been charged on the order.

How do I know my custom duty charges? Packt Packt

The amount of duty payable varies greatly depending on the imported goods, the country of origin and several other factors like the total invoice amount or dimensions like weight, and other such criteria applicable in your country.

For example:

  • If you live in Mexico, and the declared value of your ordered items is over $ 50, for you to receive a package, you will have to pay additional import tax of 19% which will be $ 9.50 to the courier service.
  • Whereas if you live in Turkey, and the declared value of your ordered items is over € 22, for you to receive a package, you will have to pay additional import tax of 18% which will be € 3.96 to the courier service.
How can I cancel my order? Packt Packt

Cancellation Policy for Published Printed Books:

You can cancel any order within 1 hour of placing the order. Simply contact customercare@packt.com with your order details or payment transaction id. If your order has already started the shipment process, we will do our best to stop it. However, if it is already on the way to you then when you receive it, you can contact us at customercare@packt.com using the returns and refund process.

Please understand that Packt Publishing cannot provide refunds or cancel any order except for the cases described in our Return Policy (i.e. Packt Publishing agrees to replace your printed book because it arrives damaged or material defect in book), Packt Publishing will not accept returns.

What is your returns and refunds policy? Packt Packt

Return Policy:

We want you to be happy with your purchase from Packtpub.com. We will not hassle you with returning print books to us. If the print book you receive from us is incorrect, damaged, doesn't work or is unacceptably late, please contact Customer Relations Team on customercare@packt.com with the order number and issue details as explained below:

  1. If you ordered (eBook, Video or Print Book) incorrectly or accidentally, please contact Customer Relations Team on customercare@packt.com within one hour of placing the order and we will replace/refund you the item cost.
  2. Sadly, if your eBook or Video file is faulty or a fault occurs during the eBook or Video being made available to you, i.e. during download then you should contact Customer Relations Team within 14 days of purchase on customercare@packt.com who will be able to resolve this issue for you.
  3. You will have a choice of replacement or refund of the problem items.(damaged, defective or incorrect)
  4. Once Customer Care Team confirms that you will be refunded, you should receive the refund within 10 to 12 working days.
  5. If you are only requesting a refund of one book from a multiple order, then we will refund you the appropriate single item.
  6. Where the items were shipped under a free shipping offer, there will be no shipping costs to refund.

On the off chance your printed book arrives damaged, with book material defect, contact our Customer Relation Team on customercare@packt.com within 14 days of receipt of the book with appropriate evidence of damage and we will work with you to secure a replacement copy, if necessary. Please note that each printed book you order from us is individually made by Packt's professional book-printing partner which is on a print-on-demand basis.

What tax is charged? Packt Packt

Currently, no tax is charged on the purchase of any print book (subject to change based on the laws and regulations). A localized VAT fee is charged only to our European and UK customers on eBooks, Video and subscriptions that they buy. GST is charged to Indian customers for eBooks and video purchases.

What payment methods can I use? Packt Packt

You can pay with the following card types:

  1. Visa Debit
  2. Visa Credit
  3. MasterCard
  4. PayPal
What is the delivery time and cost of print books? Packt Packt

Shipping Details

USA:

'

Economy: Delivery to most addresses in the US within 10-15 business days

Premium: Trackable Delivery to most addresses in the US within 3-8 business days

UK:

Economy: Delivery to most addresses in the U.K. within 7-9 business days.
Shipments are not trackable

Premium: Trackable delivery to most addresses in the U.K. within 3-4 business days!
Add one extra business day for deliveries to Northern Ireland and Scottish Highlands and islands

EU:

Premium: Trackable delivery to most EU destinations within 4-9 business days.

Australia:

Economy: Can deliver to P. O. Boxes and private residences.
Trackable service with delivery to addresses in Australia only.
Delivery time ranges from 7-9 business days for VIC and 8-10 business days for Interstate metro
Delivery time is up to 15 business days for remote areas of WA, NT & QLD.

Premium: Delivery to addresses in Australia only
Trackable delivery to most P. O. Boxes and private residences in Australia within 4-5 days based on the distance to a destination following dispatch.

India:

Premium: Delivery to most Indian addresses within 5-6 business days

Rest of the World:

Premium: Countries in the American continent: Trackable delivery to most countries within 4-7 business days

Asia:

Premium: Delivery to most Asian addresses within 5-9 business days

Disclaimer:
All orders received before 5 PM U.K time would start printing from the next business day. So the estimated delivery times start from the next day as well. Orders received after 5 PM U.K time (in our internal systems) on a business day or anytime on the weekend will begin printing the second to next business day. For example, an order placed at 11 AM today will begin printing tomorrow, whereas an order placed at 9 PM tonight will begin printing the day after tomorrow.


Unfortunately, due to several restrictions, we are unable to ship to the following countries:

  1. Afghanistan
  2. American Samoa
  3. Belarus
  4. Brunei Darussalam
  5. Central African Republic
  6. The Democratic Republic of Congo
  7. Eritrea
  8. Guinea-bissau
  9. Iran
  10. Lebanon
  11. Libiya Arab Jamahriya
  12. Somalia
  13. Sudan
  14. Russian Federation
  15. Syrian Arab Republic
  16. Ukraine
  17. Venezuela