Search icon CANCEL
Subscription
0
Cart icon
Your Cart (0 item)
Close icon
You have no products in your basket yet
Arrow left icon
Explore Products
Best Sellers
New Releases
Books
Events
Videos
Audiobooks
Packt Hub
Free Learning
Arrow right icon
timer SALE ENDS IN
0 Days
:
00 Hours
:
00 Minutes
:
00 Seconds
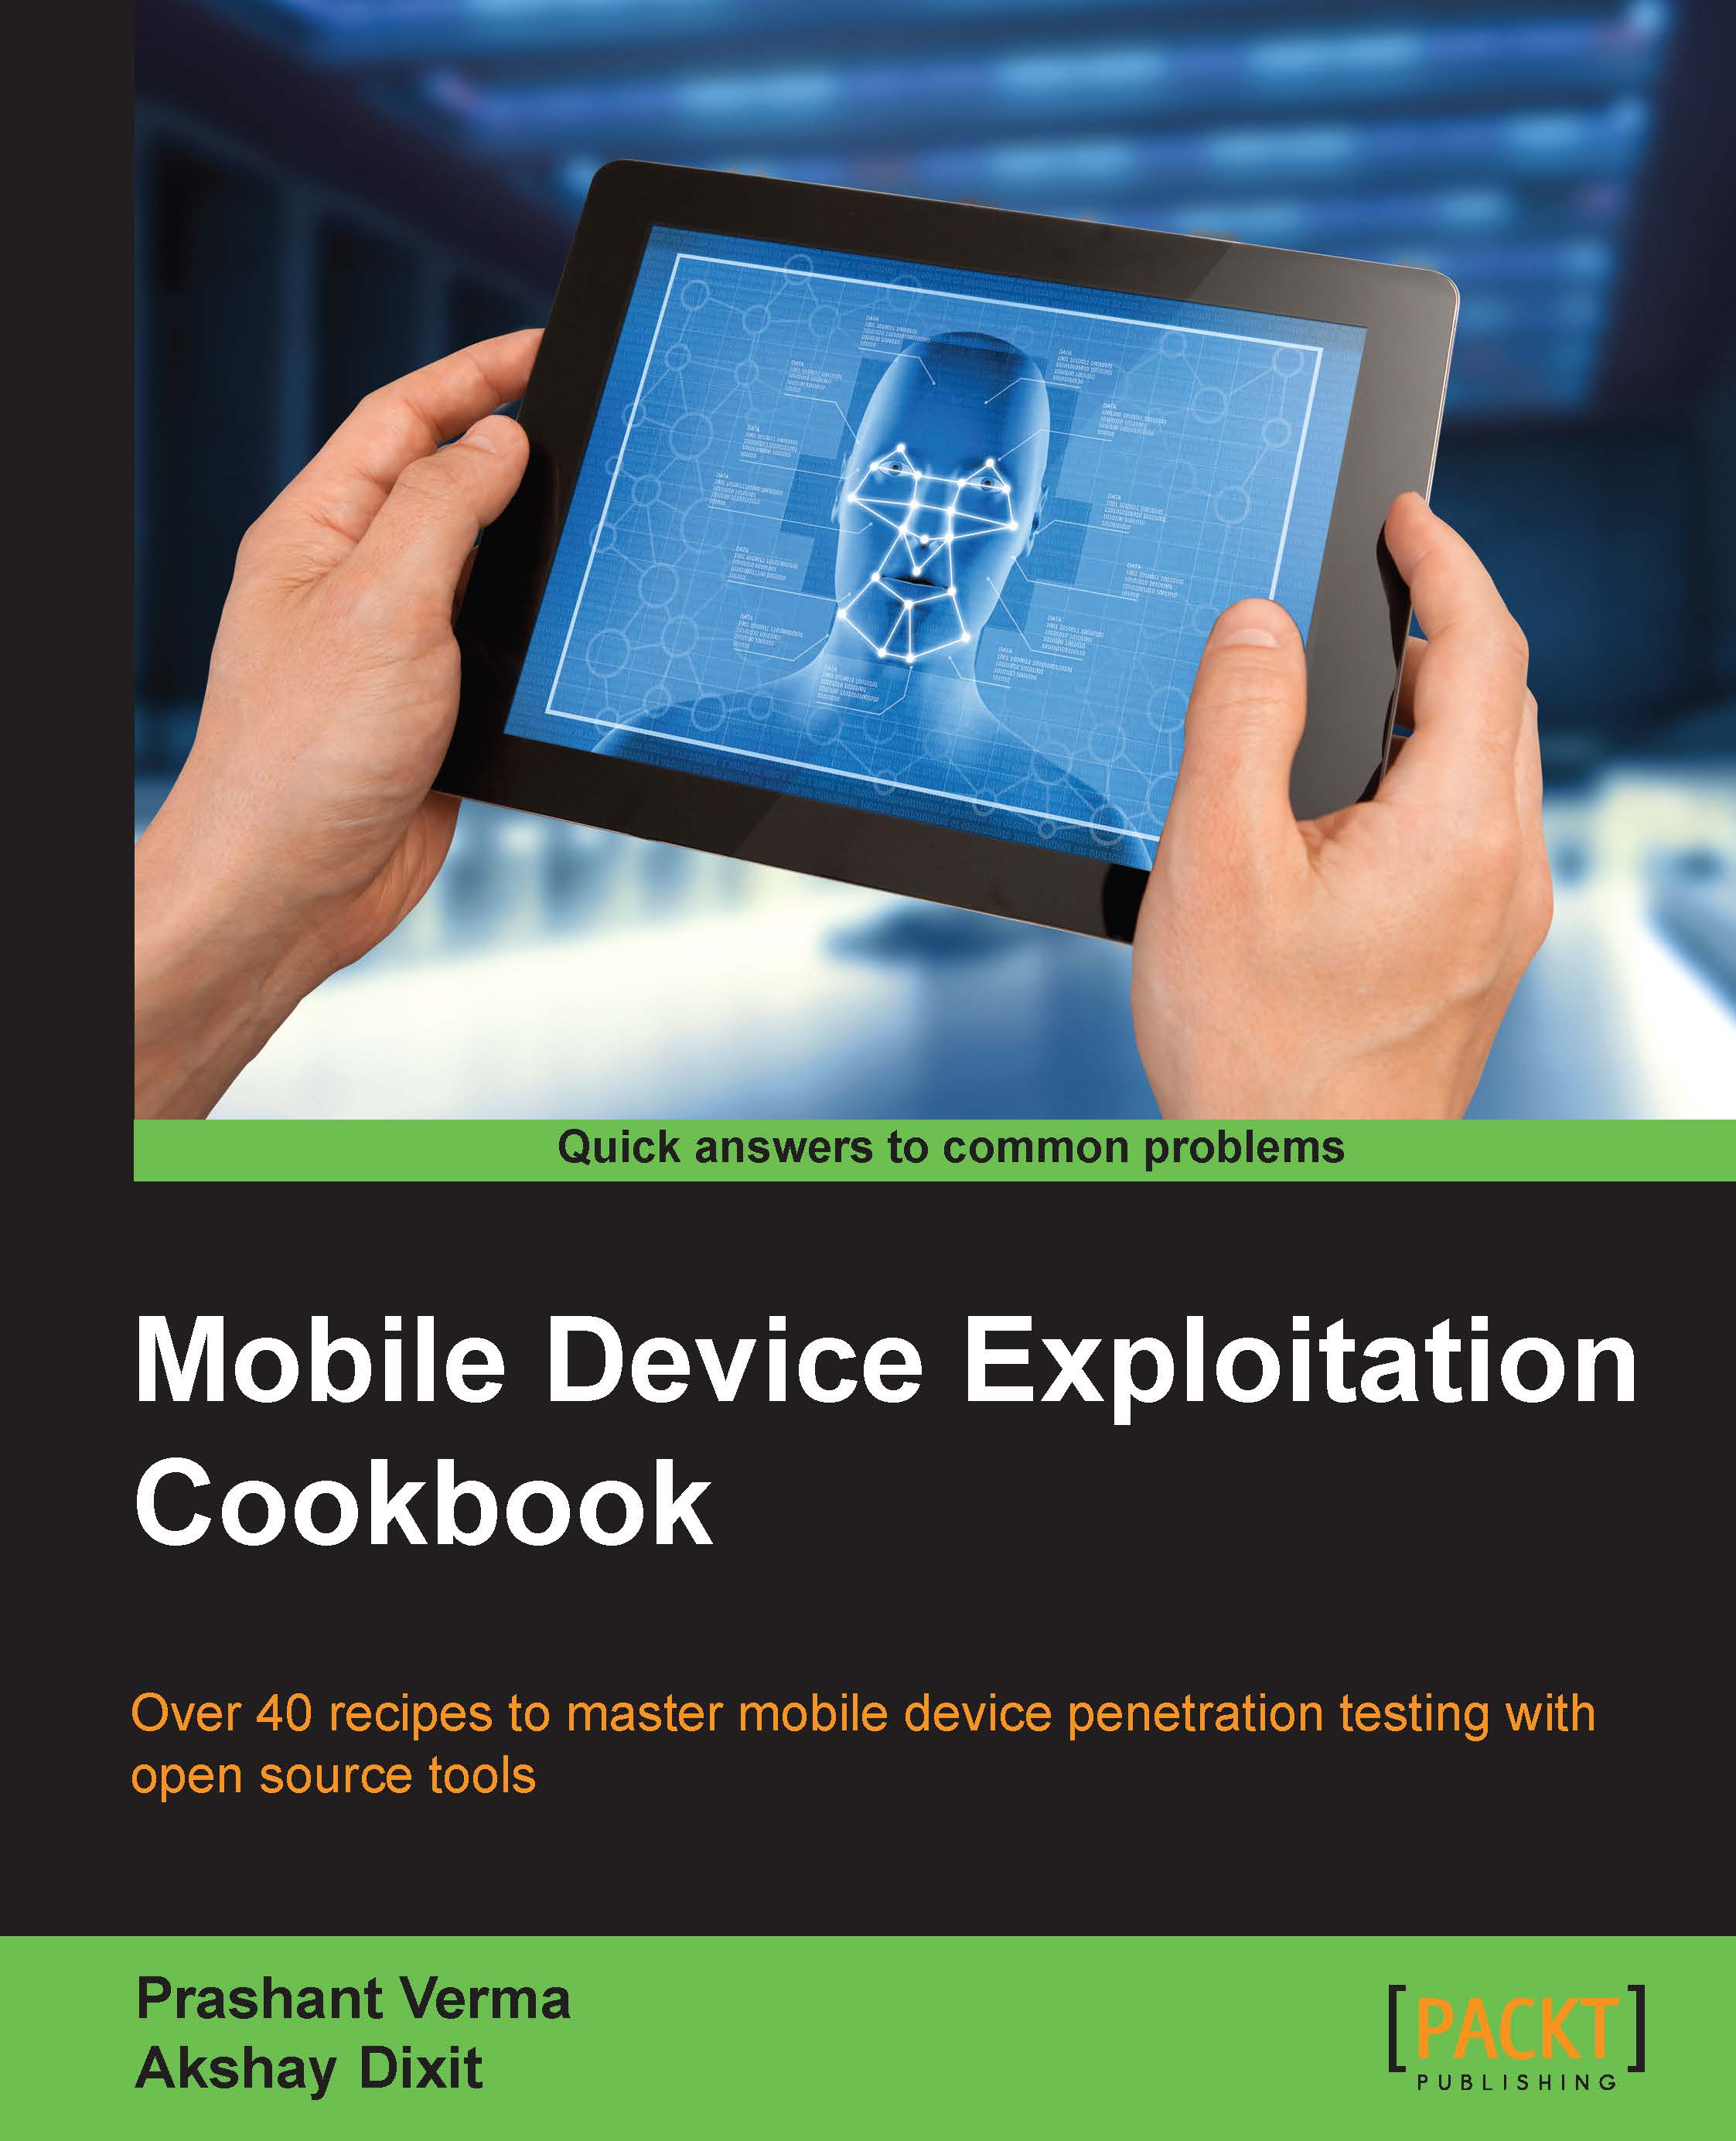
Mobile Device Exploitation Cookbook

Mobile Device Exploitation Cookbook: Over 40 recipes to master mobile device penetration testing with open source tools

Arrow left icon
Profile Icon Prashant Verma Profile Icon Akshay Dixit
Arrow right icon
₹3276.99
Full star icon Full star icon Full star icon Full star icon Full star icon 5 (2 Ratings)
Paperback Jun 2016 230 pages 1st Edition
eBook
₹999.99 ₹2621.99
Paperback
₹3276.99
Arrow left icon
Profile Icon Prashant Verma Profile Icon Akshay Dixit
Arrow right icon
₹3276.99
Full star icon Full star icon Full star icon Full star icon Full star icon 5 (2 Ratings)
Paperback Jun 2016 230 pages 1st Edition
eBook
₹999.99 ₹2621.99
Paperback
₹3276.99
eBook
₹999.99 ₹2621.99
Paperback
₹3276.99

What do you get with Print?

Product feature icon Instant access to your digital copy whilst your Print order is Shipped
Product feature icon Paperback book shipped to your preferred address
Product feature icon Redeem a companion digital copy on all Print orders
Product feature icon Access this title in our online reader with advanced features
Product feature icon DRM FREE - Read whenever, wherever and however you want
Modal Close icon
Payment Processing...
tick Completed

Shipping Address

Billing Address

Shipping Methods
Table of content icon View table of contents Preview book icon Preview Book

Mobile Device Exploitation Cookbook

Chapter 1.  Introduction to Mobile Security

In this chapter, we will cover the following recipes:

  • Installing and configuring Android SDK and ADB
  • Creating a simple Android app and running it in an emulator
  • Analyzing the Android permission model using ADB
  • Bypassing Android lock screen protection
  • Setting up the iOS development environment - Xcode and iOS simulator
  • Creating a simple iOS app and running it in the simulator
  • Setting up the Android pentesting environment
  • Setting up the iOS pentesting environment
  • Introduction to rooting and jailbreaking

Introduction

Today, smartphone usage is a much talked about subject. The world is quickly moving towards smartphone ownership, rather than traditional feature phones. Various studies and surveys have predicted increasing future usage of smartphones and tablets. There are incentives to do so; a lot of things are doable with these smartphones.

With increasing mobility comes risk. Attackers or cyber criminals look at all possible ways to attack users in order to obtain their personal data, credit card details, passwords, and other secrets. There have been threat reports from various security vendors on the increase in mobile attacks that comes with increased usage. Today, corporations are worried about data confidentiality and the resultant financial and reputational losses.

In this book, we introduce readers to some mobile device exploitation recipes, to let everyone understand the kind of attacks that are possible. Once people understand this, they will be more aware of such attack vectors and be better prepared to deal with them and secure their stuff.

This chapter will give the reader an idea about the basic security models of the two most popular mobile device platforms, Android and iOS. We will cover an introduction to their development environments and basic security models. We will set up a penetration testing environment and will introduce you to rooting and jailbreaking. This chapter builds the foundation for what is to be covered in the upcoming chapters, and is a pre-requisite for exploitation.

Installing and configuring Android SDK and ADB

The very first step in Android development and security testing is to learn to install and configure the Android SDK and ADB. The software development kit (SDK) for Android comes in two installable versions; Android Studio and the standalone SDK tools. This recipe primarily uses Android Studio and later provides additional information about standalone SDK tools.

Android Debug Bridge (ADB) is a very useful tool, which can connect to Android devices and emulators and is used to perform debugging and security testing for mobile applications.

Note

Whenever we use the words "Android devices" in this book, this means Android smartphones and tablets.

Getting ready

Navigate to https://developer.android.com and download either Android Studio or standalone SDK tools. You will also require JDK v7 or newer.

How to do it...

Let's set up using the first method, Android Studio:

  1. Go to http://developer.android.com/sdk/index.html and download the latest Android Studio.
  2. Once you have downloaded the Android Studio installer file, the installer guides you through the next steps and you just have to follow the instructions.

Note

As of writing this, the installer file used is android-studio-bundle-135.1740770-windows.exe.

Android SDK and ABD are installed as part of the default installation. Unless you deselect these, they will be installed.

Note

AVD stands for Android Virtual Device, which in turn refers to the Android emulator. Emulators provide a virtualized setup to test, run, and debug Android applications. These are especially useful in cases where hardware devices are not available. Most development testing works using emulators. We will use an emulator in the next recipe.

Note the Android Studio and SDK installation paths. You will need them repeatedly in setup:

How to do it...

Once Android Studio is installed, run it. It will guide you through the next set of instructions. It downloads the Android SDK tools, which may take up to 4 hours depending upon the Internet speed.

How it works...

The development environment is ready. Take a moment to make yourself familiar with the SDK installation directory (the path shown in the preceding screenshot). There are a few quick things you must know:

  • SDK Manager: This is used to manage Android packages and can be used to install or uninstall newer/older versions as required.

    How it works...

  • AVD Manager: This is used to manage AVD. Use it to create a few emulators that we will use at the appropriate time.

    How it works...

    Now run one of the emulators to test whether the installed setup is working well. An emulator takes 2-3 minutes to start up, so be patient and if the installation has gone well, the emulator should be up and running. (Please refer to the next recipe if you want to look at the emulator screenshot now.)

  • platform-tools: This folder contains useful tools such as ADB, SQLite3, and so on. We will use these tools in various recipes throughout this book.
  • tools: This folder contains batch files and other executables. We will mostly use emulator.exe, as well as other .exe files in this folder.

There's more...

There is an alternative way to develop in Android, as many people prefer other IDEs. In such cases, the standalone SDK tools can be downloaded. This provides the SDK tools required for application development and these tools can be invoked from the command line.

These standalone tools are also useful for pentesters and black hats, for quick analysis of underlying, application-related stuff. A lot of the time, application development is not needed and there is a need to debug; in such cases, the standalone SDK tools can be used.

See also

  • Analyzing the Android permission model using ADB

Creating a simple Android app and running it in an emulator

Now that we are ready with the Android SDK, let's write our first Android application. A little bit of coding skill is needed to get started. However, don't worry if source code scares you. There is a lot of sample code available in the Internet communities for you to use to get started.

Getting ready

To get ready to code the Android application, you need the SDK to be working well. If you have followed the first recipe and know a little bit of Java programming, the rest is easy and you are all set to code your very first Android application.

How to do it...

Let's write a very simple program to add two numbers together. I used the Eclipse IDE and created an Android application project called Addition:

  1. Create the graphical layout. Drag and drop three text fields (one each for the first number and the second number, and the last one to print the sum of the first two numbers), two TextView boxes to display text so that the user knows to enter two numbers, and finally a button for the addition action.
    • The activity_main.xml file is autogenerated. Edit it to look like the following code:

    <RelativeLayout xmlns:android="http://schemas.android.com/apk/res/android"
        xmlns:tools="http://schemas.android.com/tools"
        android:layout_width="match_parent"
        android:layout_height="match_parent"
        android:paddingBottom="@dimen/activity_vertical_margin"
        android:paddingLeft="@dimen/activity_horizontal_margin"
        android:paddingRight="@dimen/activity_horizontal_margin"
        android:paddingTop="@dimen/activity_vertical_margin"
        tools:context=".MainActivity" >
    
        <TextView>
            android:id="@+id/textView1"
            android:layout_width="wrap_content"
            android:layout_height="match_parent"
            android:text="First Number"
    Text displayed to guide user to input first number
        </TextView>
    
        <EditText>
            android:layout_width="wrap_content"
            android:layout_height="wrap_content"
            android:text=""
            android:id="@+id/e1"
    Variable e1 is declared to be referenced in java file.
            android:inputType="textPassword"
        </EditText>
    
        <TextView>
            android:id="@+id/textView2"
            android:layout_width="wrap_content"
            android:layout_height="wrap_content"
            android:text="Second Number"
        </TextView>
    
        <EditText>
            android:layout_width="wrap_content"
            android:layout_height="wrap_content"
            android:text=""
            android:id="@+id/e2"
            android:inputType="textPassword"
        </EditText>
    
        <Button>
            android:id="@+id/add"
            android:layout_width="wrap_content"
            android:layout_height="wrap_content"
            android:layout_alignParentBottom="true"
            android:layout_alignParentLeft="true"
            android:layout_marginBottom="122dp"
            android:text="Add"
    
    • Add the declared button:
        </Button>   
        <EditText>
            android:text=""
            android:id="@+id/t3" 
    
    • Finally, the third variable, which will contain the sum of the two numbers, is declared:
            android:layout_width="wrap_content"
            android:layout_height="wrap_content"
            android:inputType="textPassword"
        </EditText>
    </RelativeLayout>
    
  2. Now we have to write Java code to input and add the numbers, and output the sum. At this point, don't worry if you do not know Activity, Intent, and so on. Just focus on getting the code error-free. Eclipse guides you at each step. We start our program with MainActivity, coded like this:
    package com.android.addition;
     
    import android.os.Bundle;
    import android.app.Activity;
    import android.widget.EditText;
    import android.widget.TextView;
    import android.widget.Button;
    import android.view.View;
     
    public class MainActivity extends Activity {
        EditText e1;
        EditText e2;
        TextView t3;
        Button add;
        protected void onCreate(Bundle savedInstanceState) {
            super.onCreate(savedInstanceState);
            setContentView(R.layout.activity_main);
            add=(Button)findViewById(R.id.action_settings);
            add.setOnClickListener(new Button.OnClickListener()
                {
            public void onClick
            (View v){Sum();}});
        }
            private void Sum(){
              int s1=Integer.parseInt(e1.getText().toString());
              int s2=Integer.parseInt(e2.getText().toString());
              int s3=s1+s2;
              t3.setText(Integer.toString(s3));
             }
    }


    See how straightforward this program is; it just takes two numbers, adds them together, and provides the result.

  3. Debug and run the program. The emulator opens up and the program runs.

See also

  • Android In Action, Ableson, Sen, King, Manning Publications Co.

Analyzing the Android permission model using ADB

Having set up the development environment and coded your first Android application, now it's time to understand the underlying permission model of the Android operating system. The underlying operating system is Linux; the Android operating system is built using Linux as the basis. Applications in Linux run with a specific user ID and group ID. Android uses the same Linux model to set permissions for applications; this separates and protects Android applications from each other.

Getting ready

Make sure you have ADB installed. You also need an Android emulator or an Android device to connect to ADB.

A device or emulator that has been used frequently is best for this purpose (as a newly created emulator or device may not contain much data to view using ADB). Furthermore, for learning purposes, a rooted phone is preferred.

How to do it...

Follow the steps given here for analyzing the Android permission model using ADB:

  1. Enable USB debugging mode on your Android device and connect it via a data cable to a computer on which ADB is running. ADB is a very powerful tool and can be used to run various useful commands, which can help us with the following tasks:
    • Pushing data into the phone/emulator
    • Pulling data from the phone/emulator
    • Obtaining a shell in the phone/emulator
    • Installing and removing applications
    • Navigating the filesystem
    • Stealing key system files
    • Stealing application-related files such as preferences and SQLite files
    • Viewing device logs

  2. Use ADB to analyze the application permissions. To do this, we will have to first obtain the shell in the device using the adb shell command and then we will have to run the ps command to find the details of the process that is running.

The following screenshot depicts this process for a phone connected to the Linux machine on which ADB was run:

How to do it...

How it works...

Take a while to analyze the preceding screenshot. Make a note of the first, second, and last columns which show USER, PID, and application NAME respectively. Note that each application has a unique PID and is run from a specific user. Only a few privileged processes run with the user root. Other applications run via specific users. For example, the com.android.datapass application with PID 299 runs as user app_47. Also, com.svox.pico runs with user app_28.

Each application in Android runs in its own sandbox. A sandbox is a virtual environment where the application runs within its limited context and is not allowed access to, or to be accessed from, other applications. The permissions model in Android (applications running with specific users) helps create a sandbox, thereby restricting applications within their own context and allowing no or limited interaction (as chosen by the application developer) with other applications. This also secures applications against data theft or other attacks from rogue applications and malware.

There's more...

The Android permissions model and sandbox implementation attempts to build in security by design. This has been the target of attackers and evangelists. Android sandbox bypass attacks and attacks originating from insecure code implementation are a couple of the types of attack against this security feature. Nevertheless, security by design is implemented in the Android OS itself in the form of the permissions model.

See also

Bypassing Android lock screen protection

Android users are advised to protect their devices by setting up a password, pin, or lock screen (graphical pattern). When users talk about lock screen bypass, they usually mean they have locked their phone or forgotten their pattern, not how to bypass the screen and get into the device. We are approaching the topic in a more aggressive fashion, as this book is about mobile device exploitation. As an attacker, how could we bypass a victim's lock screen? Now, this topic is widely spoken about and there is already a wide range of tricks to do it; various exploits/methods may work in specific Android or device versions but may not work with others.

Getting ready

We are going to take a case where we reset the lock pattern in a phone via ADB. So for this recipe, you need ADB ready. We learned about ADB in the previous recipe. Let's now use that what we learnt, to hack. Apart from ADB, you need to obtain an Android device with USB debugging enabled, and has a that password needs to be reset.

How to do it...

Follow these steps to bypass the lock screen protection:

  1. Connect to the target Android device using ADB. If we have obtained a phone with USB debugging enabled and the phone is rooted, things are much easier. If the phone is not rooted, then there are hacks to do so as well. For this recipe, let's consider a rooted phone.
  2. Now that you are connected via ADB, type the following command:
    adb shell
    
  3. This gives you the shell in a connected Android device.
  4. Next, change the current working directory to /data/system, which is where keys are located. To do this, we have to type the following command to change the directory:
    cd /data/system
    
  5. Then finally you need to delete the relevant key. Simply run the remove command to delete it:
    rm *.key
    
  6. It can also be run as follows:
    rm <correct-filename>.key
    
  7. In case you are prompted for superuser permissions, you can run the su command. The preceding commands delete the key files containing lock screen information.
  8. Next, do a device reboot and the lock screen should have gone.

How it works...

This works because the key files in the /data/system folder contain system information, such as the lock screen's password information. If these key files are deleted, on reboot the device is not able to locate a lock screen setting, so effectively it allows access without a password.

Note

A device already in USB debugging mode, and rooted as well, allows this recipe to work quite easily.

There's more...

The key message is; this is not the only way to bypass the lock screen, nor is this method guaranteed to work in all cases. Hackers have come up with multiple ways to bypass Android lock screens. To further complicate matters, not all methods work for all Android versions. So you may have to spend a lot of effort in certain cases to figure out how to bypass the Android lock screen.

Setting up the iOS development environment - Xcode and iOS simulator

By now, you have got the hang of Android development. Now it's time to be introduced to the iOS development environment. Apple's iPhone and iPad run on the iOS operating system. Application development for iOS requires the Xcode IDE, which runs on Mac OS X. Xcode, together with iOS simulator, can be used to develop and test iOS applications.

Note

Note we say emulators when we talk about Android, and we say simulators when talk about iOS. These two are similar to each other, but with one major difference. An emulator can use some OS features to test specific applications.

For example, an Emulator can use a laptop's webcam to run an application that requires a camera, whereas such application testing will be limited in an iOS simulator. Emulators can also send an SMS to other emulators.

Some people say that emulators are smarter than simulators. However, generalizing that much may not be fair, as long as both serve the job they are designed for.

Getting ready

Xcode is the IDE for developing iOS applications. Xcode runs on Mac OS X, so a MacBook is required for iOS application development. So get a MacBook, install Xcode, install the iOS SDK, and start coding in iOS.

Note

Note that there are useful guidelines at https://developer.apple.com/programs/ios/gettingstarted/ to help you out with this.

How to do it...

Follow these steps for setting up Xcode and iOS simulator:

  1. Locate App Store on your MacBook. Now use App Store to download Xcode (this is just like any other App download on mobile phones). You will need an Apple ID to download from the App Store. Note that Xcode is free to download from Apple's App Store.
  2. Once Xcode is installed, you can explore the IDE. It can be used to develop Mac OS X applications. Xcode is a common IDE for both OS X applications and iOS application development. To be able to develop an iOS application, you also need to install the iOS SDK. The latest versions of Xcode include both OS X and the iOS SDK. Simulators and instruments are also part of Xcode now.
    • Thankfully this is not complicated and the installation of Xcode takes care of everything.
    • Once you have everything set up, create a new project. Note that if things are properly installed, you get the option to create an iOS and OS X application, as shown here:

    How to do it...

How it works...

Let's make ourselves familiar with the Xcode IDE.

From the preceding screenshot, let's create a project. We will choose the Single View Application template for simplicity's sake. This action opens up the Choose options for your new project window. Provide a name for your project, which appends the organization identifier to create a bundle identifier.

How it works...

Note we selected Swift, which is a new language introduced in iOS 8. There is another option, to choose traditional Objective-C.

Note

Swift is new programming language for iOS and OS X. It is interactive and is intended to make coding fun. Swift makes app development easier and can work alongside traditional Objective-C.

Some people say that emulators are smarter than simulators. However, generalizing that may not be fair, as long as both serve the job they are designed for.

Finally, it is also important that the appropriate device option is selected from iPhone, iPad, or Universal. We select iPhone, just for the sake of this demonstration.

Once you select Next and Create, we see our project window:

How it works...

The left-hand pane is the project navigator. You can find all your project files in this area. The center part of the workspace is the editor area. Depending on the type of file, Xcode shows different interfaces in the editing area.

The right-hand pane is the utility area. This area displays the properties of files, and allows you to access Quick Help.

There's more...

Up to now we have written zero lines of code. Even so, we can run our app using the built-in simulator. In the toolbar, we can see the run button (top left, the one resembling the traditional play music icon):

There's more...

When we hit the run button, Xcode automatically builds the app and runs it on the default iPhone 6 simulator. Of course, since we haven't programmed our app to do anything, it will just display a white screen with nothing inside:

There's more...

The stop button next to the run button terminates the app.

See also

  • Setting up the iOS pentesting environment

Creating a simple iOS app and running it in the simulator

Having introduced you to Xcode and the simulator, now we will create our first iOS application.

Getting ready

To get ready to code the iOS application, you need Xcode and iOS Simulator in your MacBook and working. If you have followed the previous recipe, and know a little bit of Objective-C, you are all set to code your very first iOS application.

How to do it...

Now that we have a basic idea of Xcode, let's start by building the user interface:

  1. In the project navigator, select Main.storyboard. Xcode then brings up a visual editor for storyboards, called interface builder.

    How to do it...

    A storyboard is used to lay out views and transition between different views. As we use a single-view application, the storyboard already includes a View Controller.

  2. Next, we will add a button to the view. The bottom part of the utility area shows the Object Library, as shown in the following screenshot:

    How to do it...

  3. Drag the Button object from the Object Library to the view:

    How to do it...

  4. Stop dragging and move the button to the area of your choice. Double-click on the button and rename it Click Me.
  5. Next we will add a few lines of code to display our message. In the project navigator, you should find the ViewController.swift file. We will be adding a method to the already present ViewController class. When this method is called, our code will tell iOS to display a certain message.

    How to do it...

  6. Now let's code our method. This is what our method looks like:
    @IBAction func showMessage(){ 
    let alertController = UIAlertController(title: "My First App", message: "Hello World", preferredStyle: UIAlertControllerStyle.Alert) 
    alertController.addAction(UIAlertAction(title: "OK", style: UIAlertActionStyle.Default, handler:nil)) 
    self.presentViewController(alertController, animated: true, completion: nil) 
    } 
    
  7. This is what the finished work will look like:

    How to do it...

  8. Now we need to connect our Click Me button in the storyboard to our showMessage method. This part is easy; we click on Main.storyboard, where we have displayed our screen.
  9. Press and hold the Ctrl key on your keyboard, click the Click Me button, and drag it to the View Controller icon.
  10. Release both buttons, and we see a pop-up message with the showMessage option. Select it to make a connection between the button and our function:

    How to do it...

  11. That's it! If everything is correct, we can now run our app perfectly when we click on the run button:

    How to do it...

How it works...

The @IBAction attribute, introduced in Swift, is used to connect storyboard actions to the code. Here, we wanted to connect the click of a button to a message being displayed. So, we defined the function showMessage as func.

Note

Starting from iOS 8, UIActionSheet and UIAlertView were replaced by the new UIAlertController.

In our function, we call UIAlertController and ask it to display an alert popup, with the title My First App and the message Hello World. We also add an action:

alertController.addAction(UIAlertAction(title: "OK", style: UIAlertActionStyle.Default, handler:nil)) 

This essentially means we add an option to close the popup when OK is clicked on.

When we dragged our button to the ViewController and selected our showMessage function, we essentially linked the clicking of the button to the calling of our function.

There's more...

You can experiment by trying different styles of button, or using table views, links, and so on. Add more functionality to experiment in ways of learning iOS app development.

A good starting place would be the documentation from the creators of iOS:

See also

Setting up the Android pentesting environment

By this time, you will be familiar with the Android development environment, ADB, and emulators. You have also coded your first application. Now let's get into penetration testing. Penetration testing for mobile applications can be broadly classified under four categories:

  • Mobile application traffic-related attacks
  • Mobile device storage-related attacks
  • Mobile application source code-related attacks
  • Attacks involving mobile OS features used by mobile applications

This is the most complicated category. There are various Android OS features that applications interact with, such as Bluetooth, NFC, intents, broadcast receivers, and so on. These also need to be covered in an offensive penetration test.

Getting ready

We have to set up a lab for Android pentesting, which should be sufficiently well equipped to be able to conduct testing for test cases that fall into the four categories listed previously.

To get going, we need the following:

  • The Android SDK, emulators, and ADB
  • Emulators with different Android versions configured
  • One or two Android handsets or tablets (rooted)
  • Proxy tools such as Charles, Burp Suite, and Fiddler
  • A Wi-Fi network
  • Tools such as SQLite browser, text editors, and XML viewers
  • A data cable
  • Tools such as a DEX to JAR convertor, jdgui, or Java decompilers
  • Tools such as DroidProxy or Autoproxy for Android

How to do it...

Let's look at each of these tools:

  • Android SDK, emulators, and ADB

    We already learned about these in previous recipes in this chapter.

  • Emulators with different Android versions configured

    Refer to the AVD Manager screenshot shown in a previous recipe. There, we used API level 21 and created an emulator for Android version 5.0.1. Using the new option there, we can create more emulators for different API levels and for different Android versions.

    These different versions will come in handy when applications to be pentested are developed for specific versions. They also come in handy when specific mobile application features are present in specific Android versions.

  • One or two Android handsets or tablets (rooted)

    It is optional to have physical devices, but they do come in handy. Sometimes we see that applications crash, emulators are slow, or proxy tools in combination with emulators are too slow/crash often, making it difficult to test the application with emulators. Having a physical mobile device comes in handy in such cases.

  • Proxy tools such as Charles, Burp Suite, and Fiddler

    Various proxy tools can be downloaded from their websites. These are quite straightforward and there are guides and help forums about them as well. The installation of such tools is outside the scope of this book, but we will cover their configuration for mobile applications.

    Here are some links to the most common proxy tools:

  • A Wi-Fi network

    We need a Wi-Fi network to intercept Wi-Fi traffic. We will later set up a proxy for a mobile device to a laptop running a proxy tool, both on the same Wi-Fi network.

    You can either use a Wi-Fi router to set up your personal Wi-Fi network, or you can use one of the free tools available to create a hotspot from your laptop. In our experience, it is sometimes difficult to work with the latter option, so we prefer using the former.

  • Tools such as SQLite browser, text editors, and XML viewers

    These are additional tools to read the data extracted from phones. Again, these are free downloads or you may already have them.

  • A data cable

    It is also important to own a data cable. Later we will use it to connect the phone in order to read its data and conduct attacks that originate via USB.

  • Tools such as a DEX to JAR convertor, jdgui, or Java decompilers

    It is also important that these tools are ready in our lab. These small tools help us in the decompilation of Android applications.

  • Tools such as DroidProxy or Autoproxy for Android

    Since previous versions of Android did not have a feature to direct the OS to set a proxy, we need such tools to be downloaded from Google Play Store.

How it works...

With the tools ready in our pentesting lab, let's see how we can link the penetration testing use cases to different categories while using the tools:

  • Mobile application traffic-related attacks: This is where Wi-Fi network and proxy tools are going to come in handy. A laptop with a Charles or Burp proxy installed is connected to Wi-Fi. A mobile device running the application is directed to the laptop proxy, using the proxy configuration on the device. Since both the laptop and the mobile device are on the same Wi-Fi network, application traffic gets routed via the Charles or Burp proxy tool. Use tools like DroidProxy or Autoproxy for Android devices to set a proxy if required.

    Effectively, this whole process makes application traffic readable and editable via proxy tools so we can conduct various attacks, which will be seen in another chapter.

    • Mobile device storage-related attacks: We have a data cable to connect the phone to the laptop. We have the emulator on the laptop. Both of them can run mobile applications. We also have a very powerful tool, ADB, with us; it can connect to, and steal data from, devices or emulators, as well as performing many other possible attacks.
  • Mobile application source code-related attacks: Decompiling the Android application can be broken into two steps: APK to DEX conversion and DEX to JAR conversion.

    APK is the Android application package. Once the Android application is developed and packed, the resulting file format is .apk. Mobile applications are named <filename>.apk.

    APK to DEX conversion is quite straightforward; it just involves renaming and unzipping the archived files.

    .dex to .jar conversion is achieved via tools such as DEX to JAR converters.

There's more...

  • Attacks involving mobile OS features used by mobile applications

Setting up the iOS pentesting environment

Now that you are well acquainted with the iOS development environment and simulators, and have coded your first application as well, it is time to learn about penetration testing for iOS applications. Penetration testing for mobile applications can be broadly classified into four categories, as we saw in the previous recipe:

  • Mobile application traffic-related attacks
  • Mobile device storage-related attacks
  • Mobile application source code-related attacks
  • Attacks involving mobile OS features used by mobile applications

Getting ready

We have to set up a lab for iOS pentesting, which should be sufficiently well equipped to be able to conduct testing for test cases that fall into the four categories listed previously.

To get going, we need a minimum of the following tools. The list is not very different from Android, but includes some specific tools:

  • iOS simulators
  • Xcode
  • iExplorer
  • One or two iPhones or iPads (jailbroken)
  • Proxy tools such as Charles, Burp Suite, and Fiddler
  • A Wi-Fi network
  • Tools such as SQLite browser, text editors, XML viewers, and plist editors
  • A data cable
  • Tools such as otool and classdump

How to do it...

Let's look at each of these tools:

  • iOS simulators

    We will use iOS Simulators to run iOS applications where we have the application code available to us. In such cases, testing can be conducted from just one MacBook with all the tools installed (no need for Wi-Fi or mobile handsets).

  • Xcode

    Xcode is the IDE for iOS applications. It is not only helpful for reviewing the source code of an iOS application, but also comes in handy in terms of viewing certain files, which open in Xcode only.

  • iExplorer

    iExplorer can be downloaded on a MacBook from the Apple App Store. A Windows version of this can also be downloaded when working with iPhones or iPads connected to a Windows machine via a data cable.

    iExplorer, like Windows Explorer, helps to navigate the filesystem. It can be used to explore, read files, and steal data from iOS devices.

  • One or two iPhones or iPads (jailbroken)

    A jailbroken iOS device comes in handy. The applications installed on these devices can be pentested from the device itself, eliminating the requirement for Simulators.

  • Proxy tools such as Charles, Burp Suite, and Fiddler

    Various proxy tools can be downloaded from their websites. These are quite straightforward and there are guides and help forums about them as well. The installation of such tools is outside the scope of this book, but we will cover the configuration of them for mobile applications.

    Here are links to the most common proxy tools:

  • A Wi-Fi network

    We need a Wi-Fi network to intercept Wi-Fi traffic. We will later set up a proxy for a mobile device to a laptop running a proxy tool, with both on the same Wi-Fi network.

    Either you can use a Wi-Fi router to set up your personal Wi-Fi network, or you can use one of the free tools available to create a hotspot from your laptop. In our experience, it is sometimes difficult to work with the latter option, so we prefer using the former.

  • Tools such as SQLite browser, text editors, XML viewers, and plist editors

    These are additional tools for reading the data extracted from phones. Again these are free to download, or you may already have them.

    plist files are used in iOS applications to store data, and plist editors are useful in reading such files.

  • A data cable

    It is also important to own a data cable. Later, we will use it to connect to the phone in order to read data and conduct attacks that originate via USB.

  • Tools such as otool and classdump

    These tools are decompilation tools for iOS applications.

How it works...

With the tools ready in our pentesting lab, let's see how we can link the penetration testing use cases to different categories while using these tools:

  • Mobile application traffic-related attacks: This is where a Wi-Fi network and proxy tools are going to come in handy. A laptop with a Charles or Burp proxy installed is connected to Wi-Fi. An iOS device running the application is directed to the laptop proxy, using the proxy configuration on the device. Since both the laptop and the mobile device are on the same Wi-Fi network, application traffic is routed via the Charles or Burp proxy tool. This setup does not require a MacBook (any other laptop will do), but an iOS device is needed.

    Another possibility is that we can use a MacBook but not an iOS device. In this case, we will run the application via Xcode and the Simulator. The proxy is set to localhost on the MacBook, where we are running a proxy tool such as Burp or Charles.

    Effectively, both approaches make application traffic readable and editable via proxy tools, and we can conduct various attacks, which will be seen in another chapter.

  • Mobile device storage-related attacks: We have a data cable to connect the iPhone or iPad to the laptop. We can use the iExplorer tool on the laptop to read and steal files and other data.
  • Mobile application source code-related attacks: We discussed the otool and classdump tools. Only a limited decompilation is possible in the case of iOS applications, and these tools can help only up to a certain point. This will be covered in detail in one of the later chapters.

There's more...

  • Attacks involving mobile OS features used by mobile applications

This is the most complicated category and becomes further complicated in the case of the iOS platform. There are various iOS features that applications interact with, such as screenshot backgrounding, Bluetooth, NFC, and so on. The interaction of these features with the application, along with the insecure implementation of these features in the application, results in vulnerabilities. A popular example is the screenshot backgrounding vulnerability in iOS applications.

Introduction to rooting and jailbreaking

Fundamentally, rooting is obtaining root access to the underlying Linux system, in order to perform operations such as mounting/unmounting filesystems; running SSH, HTTP, DHCP, DNS or proxy daemons; killing system processes; and so on.

Being able to run commands as the root user allows us to do anything on Linux and thus, by extension, on an Android system.

Jailbreaking is the process of privilege escalation, by which we can remove the hardware level restrictions imposed by Apple on iOS devices. Jailbreaking permits root access to the iOS filesystem and manager, allowing the downloading of additional applications, extensions, and themes that are unavailable through the official Apple App Store.

Getting ready

All that is needed to root an Android device is a USB cable; an unrooted Android device; and an exploit code to be run on the device, either through ADB, one-click-root programs/apps, or a modified ROM that can be flashed onto the device.

The requirements for an iOS jailbreak are a USB Cable, an iOS device, and a jailbreaking program.

How to do it...

Here we will go through two steps; rooting and jailbreaking.

Rooting

The actual rooting process itself should only take a single click. However, you'll need to do a few quick things first:

  1. Download and install the Java JDK and Android SDK on your computer before continuing. Java must be installed before the Android SDK.
  2. Enable USB debugging on your Android. On the device, go into the Settings screen, tap Applications, tap Development, and enable the USB debugging checkbox:

    Rooting

    After this, the rooting process essentially involves finding tested rooting methods for your specific device by searching the Internet. The rooting processes for most Android devices can be categorized into the following:

    • Using a rooting application: In this process you perform the following tasks:
      1. Install the rooting application on your machine
      2. Connect the Android device with USB debugging enabled
      3. Follow the simple instructions to root your device

    • Using rooting apps: In this process you perform the following tasks:
      1. Download the rooting APK
      2. Enable USB debugging mode and allow installation from unknown sources, from the development settings of the Android device
      3. Install the rooting APK using adb install /path/to/apk
      4. Follow the onscreen instructions to root the Android device

    • Flashing a custom ROM: In this process you perform the following tasks:
      1. Copy the modified ROM to the SD card of the Android device (as a .zip file)
      2. Reboot the device in recovery mode
      3. Head to the install or install zip from sdcard section of the recovery menu
      4. Navigate to the .zip file, and select it from the list to flash it

Jailbreaking

Before performing a jailbreak, you should back up your device. If for any reason the jailbreak fails, you can restore the backup.

The jailbreaking process involves downloading the program to a Mac/Windows machine, connecting our iOS device to our machine via a USB cable, and running the tool. One such tool is evasi0n:

Jailbreaking

The instructions are mentioned along with the tool, and should be followed methodically.

As a part of the jailbreaking process, the tool installs Cydia on the target iOS device.

Cydia is an alternative App store containing iOS apps other than ones provided and usually approved by Apple. Most of these apps are developed by the jailbreaking community, such as tools for using custom themes and widgets, changing default apps, and so on.

Jailbreaking

How it works...

Let's take a look at the details with reference to the processes individually.

Rooting

Being able to run commands as the root user allows us to do anything on Linux and thus, by extension, on an Android system.

The process for rooting an Android device typically involves two steps:

  1. Find an exploit that allows the execution of arbitrary code as root.
  2. Use the exploit to install su.

If the target device has an unlocked bootloader, the process is pretty easy. An unpackaged bootloader allows the flashing of arbitrary ROMs, so su can be added to a stock ROM and repackaged into a modified ROM. All the user needs to do is to reboot the device into flashing mode by pressing a combination of keys during bootup, and use the device's utilities to flash the modified ROM onto the device.

But, what about devices that have locked bootloaders? You can only interact with unprivileged programs on the system and they cannot help you execute any privileged code.

Many programs, such as system services, run as root on Android, to be able to access underlying hardware resources.

All one-click-root methods exploit vulnerabilities in one of these system processes running in privileged mode to execute a particular piece of code that mounts the system in read-write mode and installs the su binary on the system, thus gaining privileged access to the system.

Jailbreaking

The jailbreaking process differs from tool to tool, and different procedures are followed for different iOS versions. Here, we analyze the anatomy of one such tool, used to jailbreak an iPhone 5.

The jailbreaking program begins by running libimobiledevice to exploit a bug in iOS's mobile backup system in order to gain access to a normally restricted file containing the time zone settings.

Note

libimobiledevice is a cross-platform software library which "talks" the protocols that support iOS devices. It allows other software to easily access the device's filesystem; retrieve information about the device and its internals; back up and restore the device; manage installed applications; retrieve address books, calendars, notes and bookmarks; and synchronize music and video to the device.

More information can be found at http://www.libimobiledevice.org/.

It then inserts a "symbolic link" to a certain altered "socket," which allows programs to communicate with launchd, a master process which is loaded whenever an iOS device boots up and can launch applications that require "root" privileges.

So now, whenever an iOS mobile backup runs, all programs will automatically be granted access to the time zone file, and therefore access to launchd.

Pretty neat, huh?

iOS implements code-signing as a safeguard to prevent any "untrusted" application from gaining access to launchd.

So to defeat code signing, the jailbreaking tool launches a new, unsigned, seemingly benign app. But when the user is prompted to tap the app's icon, the app uses a technique called shebang to call up code from another signed application, which in this case was launchd.

A shebang is a character sequence consisting of the hash symbol and exclamation mark characters (that is, #!) at the beginning of a script.

In Unix, when a script with a shebang is run as a program, the program loader parses the rest of the script's initial line as an interpreter directive; the specified interpreter program is run instead, passing to it as an argument the path that was initially used when attempting to run the script.

For example, if a code has the path path/to/code, and it starts with #!/bin/sh, then the program loader is instructed to run the program /bin/sh instead, passing path/to/code as the first argument.

launchd is then used to run the remount command, which changes the memory settings of the read-only root file system to be writable.

To make the jailbreak "persistent", the launchd.conf file is called to alter the launchd configurations. The user now does not need to re-run the program on every reboot.

The jailbreaking tool then moves on to its last feat, removing restrictions at the kernel level. The iOS kernel uses Apple Mobile File Integrity Daemon (AMFID) to run unapproved apps from using a process. The jailbreaking program leverages launchd once again, to load a library of functions into AMFID in order to always approve all apps.

The second restriction posed by the kernel is Address Space Layout Randomization (ASLR), used to prevent the alteration of memory by randomizing or "hiding" the device's code every time it boots. This would prevent someone from write over a particular part of the code.

The jailbreaking tool then uses a neat trick to locate one particular area in memory; the ARM exception vector. This part handles app crashes, indicating the part of memory where the crash occurred.

A crash is simulated by the jailbreaking tool, checking the ARM exception vector to see where the crash occurred and collecting minimal information, enough to map out the rest of the kernel.

The tool, as its final step, uses a bug in iOS's USB interface that passes an address in the kernel's memory to a program and expects the program to return it untampered.

This allows the tool to write to the part of the kernel that restricts code changes, thus taking complete control, and fulfilling its purpose successfully!

Left arrow icon Right arrow icon
Download code icon Download Code

Key benefits

  • Learn application exploitation for popular mobile platforms
  • Improve the current security level for mobile platforms and applications
  • Discover tricks of the trade with the help of code snippets and screenshots

Description

Mobile attacks are on the rise. We are adapting ourselves to new and improved smartphones, gadgets, and their accessories, and with this network of smart things, come bigger risks. Threat exposure increases and the possibility of data losses increase. Exploitations of mobile devices are significant sources of such attacks. Mobile devices come with different platforms, such as Android and iOS. Each platform has its own feature-set, programming language, and a different set of tools. This means that each platform has different exploitation tricks, different malware, and requires a unique approach in regards to forensics or penetration testing. Device exploitation is a broad subject which is widely discussed, equally explored by both Whitehats and Blackhats. This cookbook recipes take you through a wide variety of exploitation techniques across popular mobile platforms. The journey starts with an introduction to basic exploits on mobile platforms and reverse engineering for Android and iOS platforms. Setup and use Android and iOS SDKs and the Pentesting environment. Understand more about basic malware attacks and learn how the malware are coded. Further, perform security testing of Android and iOS applications and audit mobile applications via static and dynamic analysis. Moving further, you'll get introduced to mobile device forensics. Attack mobile application traffic and overcome SSL, before moving on to penetration testing and exploitation. The book concludes with the basics of platforms and exploit tricks on BlackBerry and Windows Phone. By the end of the book, you will be able to use variety of exploitation techniques across popular mobile platforms with stress on Android and iOS.

Who is this book for?

This book is intended for mobile security enthusiasts and penetration testers who wish to secure mobile devices to prevent attacks and discover vulnerabilities to protect devices.

What you will learn

  • *Install and configure Android SDK and ADB
  • *Analyze Android Permission Model using ADB and bypass Android Lock Screen Protection
  • *Set up the iOS Development Environment - Xcode and iOS Simulator
  • *Create a Simple Android app and iOS app and run it in Emulator and Simulator respectively
  • *Set up the Android and iOS Pentesting Environment
  • *Explore mobile malware, reverse engineering, and code your own malware
  • *Audit Android and iOS apps using static and dynamic analysis
  • *Examine iOS App Data storage and Keychain security vulnerabilities
  • *Set up the Wireless Pentesting Lab for Mobile Devices
  • *Configure traffic interception with Android and intercept Traffic using Burp Suite and Wireshark
  • *Attack mobile applications by playing around with traffic and SSL certificates
  • *Set up the Blackberry and Windows Phone Development Environment and Simulator
  • *Setting up the Blackberry and Windows Phone Pentesting Environment
  • *Steal data from Blackberry and Windows phones applications
Estimated delivery fee Deliver to India

Premium delivery 5 - 8 business days

₹630.95
(Includes tracking information)

Product Details

Country selected
Publication date, Length, Edition, Language, ISBN-13
Publication date : Jun 30, 2016
Length: 230 pages
Edition : 1st
Language : English
ISBN-13 : 9781783558728
Category :

What do you get with Print?

Product feature icon Instant access to your digital copy whilst your Print order is Shipped
Product feature icon Paperback book shipped to your preferred address
Product feature icon Redeem a companion digital copy on all Print orders
Product feature icon Access this title in our online reader with advanced features
Product feature icon DRM FREE - Read whenever, wherever and however you want
Modal Close icon
Payment Processing...
tick Completed

Shipping Address

Billing Address

Shipping Methods
Estimated delivery fee Deliver to India

Premium delivery 5 - 8 business days

₹630.95
(Includes tracking information)

Product Details

Publication date : Jun 30, 2016
Length: 230 pages
Edition : 1st
Language : English
ISBN-13 : 9781783558728
Category :

Packt Subscriptions

See our plans and pricing
Modal Close icon
₹800 billed monthly
Feature tick icon Unlimited access to Packt's library of 7,000+ practical books and videos
Feature tick icon Constantly refreshed with 50+ new titles a month
Feature tick icon Exclusive Early access to books as they're written
Feature tick icon Solve problems while you work with advanced search and reference features
Feature tick icon Offline reading on the mobile app
Feature tick icon Simple pricing, no contract
₹4500 billed annually
Feature tick icon Unlimited access to Packt's library of 7,000+ practical books and videos
Feature tick icon Constantly refreshed with 50+ new titles a month
Feature tick icon Exclusive Early access to books as they're written
Feature tick icon Solve problems while you work with advanced search and reference features
Feature tick icon Offline reading on the mobile app
Feature tick icon Choose a DRM-free eBook or Video every month to keep
Feature tick icon PLUS own as many other DRM-free eBooks or Videos as you like for just ₹400 each
Feature tick icon Exclusive print discounts
₹5000 billed in 18 months
Feature tick icon Unlimited access to Packt's library of 7,000+ practical books and videos
Feature tick icon Constantly refreshed with 50+ new titles a month
Feature tick icon Exclusive Early access to books as they're written
Feature tick icon Solve problems while you work with advanced search and reference features
Feature tick icon Offline reading on the mobile app
Feature tick icon Choose a DRM-free eBook or Video every month to keep
Feature tick icon PLUS own as many other DRM-free eBooks or Videos as you like for just ₹400 each
Feature tick icon Exclusive print discounts

Frequently bought together


Stars icon
Total 12,735.97
Mobile Device Exploitation Cookbook
₹3276.99
Kali Linux 2:  Windows Penetration Testing
₹4319.99
Advanced Penetration Testing for Highly-Secured Environments
₹5138.99
Total 12,735.97 Stars icon

Table of Contents

5 Chapters
1. Introduction to Mobile Security Chevron down icon Chevron up icon
2. Mobile Malware-Based Attacks Chevron down icon Chevron up icon
3. Auditing Mobile Applications Chevron down icon Chevron up icon
4. Attacking Mobile Application Traffic Chevron down icon Chevron up icon
5. Working with Other Platforms Chevron down icon Chevron up icon

Customer reviews

Rating distribution
Full star icon Full star icon Full star icon Full star icon Full star icon 5
(2 Ratings)
5 star 100%
4 star 0%
3 star 0%
2 star 0%
1 star 0%
Amazon Customer Aug 19, 2016
Full star icon Full star icon Full star icon Full star icon Full star icon 5
Its a good cookbook for mobile exploitation having all the insight on latest technology considering in-depth Android and other operating systems. Code suggested in this book is also working flawlessly. Awesome book to start off with Mobile hacking.
Amazon Verified review Amazon
Gregory Casamento Jul 30, 2016
Full star icon Full star icon Full star icon Full star icon Full star icon 5
I loved reading this book. It's full of great, easy to follow and informative examples.
Amazon Verified review Amazon
Get free access to Packt library with over 7500+ books and video courses for 7 days!
Start Free Trial

FAQs

What is the digital copy I get with my Print order? Chevron down icon Chevron up icon

When you buy any Print edition of our Books, you can redeem (for free) the eBook edition of the Print Book you’ve purchased. This gives you instant access to your book when you make an order via PDF, EPUB or our online Reader experience.

What is the delivery time and cost of print book? Chevron down icon Chevron up icon

Shipping Details

USA:

'

Economy: Delivery to most addresses in the US within 10-15 business days

Premium: Trackable Delivery to most addresses in the US within 3-8 business days

UK:

Economy: Delivery to most addresses in the U.K. within 7-9 business days.
Shipments are not trackable

Premium: Trackable delivery to most addresses in the U.K. within 3-4 business days!
Add one extra business day for deliveries to Northern Ireland and Scottish Highlands and islands


EU:

Premium: Trackable delivery to most EU destinations within 4-9 business days.

Australia:

Economy: Can deliver to P. O. Boxes and private residences.

Trackable service with delivery to addresses in Australia only.
Delivery time ranges from 7-9 business days for VIC and 8-10 business days for Interstate metro
Delivery time is up to 15 business days for remote areas of WA, NT & QLD.

Premium: Delivery to addresses in Australia only
Trackable delivery to most P. O. Boxes and private residences in Australia within 4-5 days based on the distance to a destination following dispatch.

India:

Premium: Delivery to most Indian addresses within 5-6 business days

Rest of the World:

Premium: Countries in the American continent: Trackable delivery to most countries within 4-7 business days

Asia:

Premium: Delivery to most Asian addresses within 5-9 business days

Disclaimer:
All orders received before 5 PM U.K time would start printing from the next business day. So the estimated delivery times start from the next day as well. Orders received after 5 PM U.K time (in our internal systems) on a business day or anytime on the weekend will begin printing the second to next business day. For example, an order placed at 11 AM today will begin printing tomorrow, whereas an order placed at 9 PM tonight will begin printing the day after tomorrow.


Unfortunately, due to several restrictions, we are unable to ship to the following countries:

  1. Afghanistan
  2. American Samoa
  3. Belarus
  4. Brunei Darussalam
  5. Central African Republic
  6. The Democratic Republic of Congo
  7. Eritrea
  8. Guinea-bissau
  9. Iran
  10. Lebanon
  11. Libiya Arab Jamahriya
  12. Somalia
  13. Sudan
  14. Russian Federation
  15. Syrian Arab Republic
  16. Ukraine
  17. Venezuela
What is custom duty/charge? Chevron down icon Chevron up icon

Customs duty are charges levied on goods when they cross international borders. It is a tax that is imposed on imported goods. These duties are charged by special authorities and bodies created by local governments and are meant to protect local industries, economies, and businesses.

Do I have to pay customs charges for the print book order? Chevron down icon Chevron up icon

The orders shipped to the countries that are listed under EU27 will not bear custom charges. They are paid by Packt as part of the order.

List of EU27 countries: www.gov.uk/eu-eea:

A custom duty or localized taxes may be applicable on the shipment and would be charged by the recipient country outside of the EU27 which should be paid by the customer and these duties are not included in the shipping charges been charged on the order.

How do I know my custom duty charges? Chevron down icon Chevron up icon

The amount of duty payable varies greatly depending on the imported goods, the country of origin and several other factors like the total invoice amount or dimensions like weight, and other such criteria applicable in your country.

For example:

  • If you live in Mexico, and the declared value of your ordered items is over $ 50, for you to receive a package, you will have to pay additional import tax of 19% which will be $ 9.50 to the courier service.
  • Whereas if you live in Turkey, and the declared value of your ordered items is over € 22, for you to receive a package, you will have to pay additional import tax of 18% which will be € 3.96 to the courier service.
How can I cancel my order? Chevron down icon Chevron up icon

Cancellation Policy for Published Printed Books:

You can cancel any order within 1 hour of placing the order. Simply contact customercare@packt.com with your order details or payment transaction id. If your order has already started the shipment process, we will do our best to stop it. However, if it is already on the way to you then when you receive it, you can contact us at customercare@packt.com using the returns and refund process.

Please understand that Packt Publishing cannot provide refunds or cancel any order except for the cases described in our Return Policy (i.e. Packt Publishing agrees to replace your printed book because it arrives damaged or material defect in book), Packt Publishing will not accept returns.

What is your returns and refunds policy? Chevron down icon Chevron up icon

Return Policy:

We want you to be happy with your purchase from Packtpub.com. We will not hassle you with returning print books to us. If the print book you receive from us is incorrect, damaged, doesn't work or is unacceptably late, please contact Customer Relations Team on customercare@packt.com with the order number and issue details as explained below:

  1. If you ordered (eBook, Video or Print Book) incorrectly or accidentally, please contact Customer Relations Team on customercare@packt.com within one hour of placing the order and we will replace/refund you the item cost.
  2. Sadly, if your eBook or Video file is faulty or a fault occurs during the eBook or Video being made available to you, i.e. during download then you should contact Customer Relations Team within 14 days of purchase on customercare@packt.com who will be able to resolve this issue for you.
  3. You will have a choice of replacement or refund of the problem items.(damaged, defective or incorrect)
  4. Once Customer Care Team confirms that you will be refunded, you should receive the refund within 10 to 12 working days.
  5. If you are only requesting a refund of one book from a multiple order, then we will refund you the appropriate single item.
  6. Where the items were shipped under a free shipping offer, there will be no shipping costs to refund.

On the off chance your printed book arrives damaged, with book material defect, contact our Customer Relation Team on customercare@packt.com within 14 days of receipt of the book with appropriate evidence of damage and we will work with you to secure a replacement copy, if necessary. Please note that each printed book you order from us is individually made by Packt's professional book-printing partner which is on a print-on-demand basis.

What tax is charged? Chevron down icon Chevron up icon

Currently, no tax is charged on the purchase of any print book (subject to change based on the laws and regulations). A localized VAT fee is charged only to our European and UK customers on eBooks, Video and subscriptions that they buy. GST is charged to Indian customers for eBooks and video purchases.

What payment methods can I use? Chevron down icon Chevron up icon

You can pay with the following card types:

  1. Visa Debit
  2. Visa Credit
  3. MasterCard
  4. PayPal
What is the delivery time and cost of print books? Chevron down icon Chevron up icon

Shipping Details

USA:

'

Economy: Delivery to most addresses in the US within 10-15 business days

Premium: Trackable Delivery to most addresses in the US within 3-8 business days

UK:

Economy: Delivery to most addresses in the U.K. within 7-9 business days.
Shipments are not trackable

Premium: Trackable delivery to most addresses in the U.K. within 3-4 business days!
Add one extra business day for deliveries to Northern Ireland and Scottish Highlands and islands

EU:

Premium: Trackable delivery to most EU destinations within 4-9 business days.

Australia:

Economy: Can deliver to P. O. Boxes and private residences.
Trackable service with delivery to addresses in Australia only.
Delivery time ranges from 7-9 business days for VIC and 8-10 business days for Interstate metro
Delivery time is up to 15 business days for remote areas of WA, NT & QLD.

Premium: Delivery to addresses in Australia only
Trackable delivery to most P. O. Boxes and private residences in Australia within 4-5 days based on the distance to a destination following dispatch.

India:

Premium: Delivery to most Indian addresses within 5-6 business days

Rest of the World:

Premium: Countries in the American continent: Trackable delivery to most countries within 4-7 business days

Asia:

Premium: Delivery to most Asian addresses within 5-9 business days

Disclaimer:
All orders received before 5 PM U.K time would start printing from the next business day. So the estimated delivery times start from the next day as well. Orders received after 5 PM U.K time (in our internal systems) on a business day or anytime on the weekend will begin printing the second to next business day. For example, an order placed at 11 AM today will begin printing tomorrow, whereas an order placed at 9 PM tonight will begin printing the day after tomorrow.


Unfortunately, due to several restrictions, we are unable to ship to the following countries:

  1. Afghanistan
  2. American Samoa
  3. Belarus
  4. Brunei Darussalam
  5. Central African Republic
  6. The Democratic Republic of Congo
  7. Eritrea
  8. Guinea-bissau
  9. Iran
  10. Lebanon
  11. Libiya Arab Jamahriya
  12. Somalia
  13. Sudan
  14. Russian Federation
  15. Syrian Arab Republic
  16. Ukraine
  17. Venezuela
Modal Close icon
Modal Close icon