


Chapter 1: OneNote - How and Where to Use it?
OneNote is a Microsoft program like no other. However, before you can truly get a feel for OneNote, it is important that we identify why it is worth investing in.
There is an ever-increasing amount of information coming at each of us every day in many forms. With this information overload comes practical drawbacks: Where do we record this information? How do we remember what is important to us? Jotting down notes is usually a good solution to these issues, and in this chapter, we'll cover exactly why.
Microsoft OneNote is an application that is perfect for notetaking and capturing information in one place. Some examples of its usage are presented here:
- Projects and meetings: You can use OneNote to capture everything that you need to run a project. Things such as your notes from meetings and emails can be stored side by side with drawings or images, document attachments, and links to pertinent files or websites; best of all, this information can be shared with everyone on that project.
- Ideas: As ideas pop into your head, capture them in OneNote. Organize these ideas and get working on them quicker because they will all be together and easier to retrieve.
- Personal information: Track any medical information for yourself or your family by taking pictures of prescriptions or writing down notes during doctors' visits. You can also include research done on the web as links in these notes. Recipes are another perfect example of ways to use a OneNote notebook. You can capture recipes easily by using the built-in camera feature and taking a picture of an existing recipe card or page in a book. You can also link to a website for your favorite recipe, jot down notes, or record a conversation about recipe ideas or ingredients.
In this chapter, we will discuss why we use OneNote, and how to get started with it. We start here so that you can set yourself up to take full advantage of the power and flexibility offered within this program. In particular, we will cover the following topics:
- Why use OneNote as your digital notebook?
- Differences between OneNote and OneNote for Windows 10
- Notebook storage options
- Accessing your notebooks from different devices
- OneNote web application
A goal for this chapter is to get OneNote installed on your computer as well as on your smartphone and tablet. This way, moving forward, you can follow along with the instructions in this book.
Why use OneNote as your digital notebook?
In this section, we will start by looking at why it's worth using OneNote as your digital notebook. Before we get into that, though, let's get a full understanding of what OneNote actually is.
OneNote is readily available to anyone. This application comes with Microsoft 365 and Windows 10, and you can also download it for free from Microsoft's website. Whether we take notes for ourselves or for the purpose of sharing with others, OneNote is an amazing solution that is an integral part of Microsoft 365 and integrates seamlessly with Microsoft Outlook and Microsoft Teams. Instead of using Outlook to send information about a project, use OneNote to capture all updates and references on a project shared with others. This is just one example of OneNote's ability to provide great solutions.
Aside from OneNote, our other methods of notetaking include old-fashioned pen and paper, the note-taking applications found on our phones (such as Apple Notes), and competing products such as Evernote. The downside of using these other note apps is the fact that they may not be available to you when you need them, or they may not be as integrated as OneNote can be with your current work.
In this section, we will focus on why OneNote may just be the best notes solution for you.
Advantages of choosing OneNote
Without further ado, let's look at the advantages of OneNote, assessing and comparing alternative options along the way, as follows:
- Searchability: Find anything fast in OneNote is my motto. In OneNote, we can quickly search for a word or phrase, or even a special tag such as important or question. In this case, if you tag a number of notes as important or question, then you can find all those tagged notes with ease in the future.
The Evernote search feature works much the same as OneNote in terms of searching for words, phrases, or tags, showing the clear benefits of opting for digital notetaking applications such as these. Searchability is one of the big roadblocks we face with pen-and-paper notetaking: searching through your notes that were taken a while ago can be a time-consuming and laborious task. Furthermore, while the Apple Notes app does let you search for words, you cannot search for important notes or any other special category of notes.
- Organization: Being organized is what OneNote is all about. You have many ways to organize your notes so that they are easy to see and retrieve. Not only can you easily retrieve notes by the title or page name, but you also have sections that help you organize similar note pages together. You also have the search feature, as mentioned in the previous point, that can help you to find almost anything.
In contrast to this, most other notes apps do not provide organizational options—it is up to you to make your note heading as specific as possible so that you can easily find it again in the list or gallery view. In Evernote, there is also a lack of organization by sections and pages; each notebook in Evernote has pages only, with no ability to divide notebooks by sections.
Going back to our physical notebooks, we simply jot down everything on the next fresh page of the notebook, with very little ability to revisit those notes quickly to organize them by category. This method of notetaking, which is sequential regardless of the topic, does not help us when we are looking for all the examples that meet the same criteria or all the information on one topic.
- Cross-platform: You can install OneNote on any computer, phone, or tablet device. From all these devices, you can access the same notes; so, you can finish typing a note on your computer and then view it on your phone while you are away from the office. You can access OneNote from unlimited locations. Furthermore, OneNote can be synced locally with any of your devices so that if you have no internet access, you can still access your notes.
While the Notes app is very accessible from your iPhone, it does not provide a local synced copy for your computer. The Notes app on the iPhone will sync through your iCloud settings and give you access via your computer's web browser. Furthermore, Evernote will let you access notes from multiple devices but with the free version, you are limited to syncing only two locations. While your traditional notebook is portable, you will only have access to your most recent notes (unless you want to cart all of your full notebooks around!). You also risk the practicalities of leaving your notebook at home or even losing it altogether.
- Keeping everything together: Using OneNote as your digital notebook will let you keep everything together. Not only will you have access to all notes you have written, but you can also have images, embedded videos, emails, documents, weblinks, web clippings, diagrams, and much more.
Furthermore, all this information will be available to others if you share your notebook with them; for instance, you may want to share notebooks with your team when working on projects or committees together. Sharing for personal use could be handy when planning a trip with friends or when coordinating a big event such as a wedding or anniversary party. Some other things to consider are noted here:
- In your Apple Notes app, you can insert pictures, documents, and drawings, but unless you are on your phone or iPad, you cannot access this information and the sharing of notes is limited. Evernote keeps all your notes together but unless you have a paid version, you will not have everything on all your devices (keep in mind that you can only have two device locations with the free Evernote app). In addition to this, integration with Microsoft products is not available. For instance, the Teams integration is not an option unless you pay for Evernote Professional.
- A paper notebook can be full of character and overflowing with loose papers, ear-marked pages, highlights, and many other significant markers. However, this method can get messy and not really be the source of everything (as we may be missing the meeting agenda or other supporting documents that we still have to refer to on our digital devices).
To sum up, using OneNote as your notebook gives you the benefits of organization, searchability, and access to your notes and media anywhere, anytime. Because your OneNote notebook is digital, you can quickly access it on any device, and everything is together.
If you need to capture information for work or personal purposes, OneNote is your answer. There are different versions of OneNote, so let's explore that next.
Differences between OneNote and OneNote for Windows 10
OneNote has been available since 2003 and, as with any other software, it has been updated often.
At the time of writing this book, there are two versions of OneNote available, and they could both be present on your computer. This is a big confusion point for most people because someone in the office can open one version while others open the other version, and they will look slightly different. Microsoft was going to get rid of OneNote (2016) but because of all the comments from users, they decided to keep it. There are plans in the works for Microsoft to merge these two versions very soon. This book focuses on the newest version of OneNote, which is OneNote for Windows 10. In this section, we will compare the different versions of OneNote and how they differ from each other. Here are the current possibilities for the different versions:
- OneNote for Windows 10: This comes pre-installed with Microsoft Windows 10.
Important Note
In Windows 11, OneNote will not come pre-installed, but you can still download OneNote from the Microsoft Store.
- OneNote (formerly known as OneNote 2016): This comes with Office 2019, Office 2021, and Microsoft 365. We will refer to this version of OneNote as the OneNote app. If you have Windows 10 and Microsoft 365, it is possible that you have both versions of OneNote on your computer.
- OneNote for Mac: This comes with Office 2019, Office 2021, and Microsoft 365 or can be downloaded from the Mac App Store.
- OneNote for the web: This will be available to you if you store your notebooks in the cloud. This version of OneNote is accessible anytime, from any computer or device. All you need to do is visit www.onenote.com and sign in to your Microsoft account.
In this section, we will look at the unique characteristics of two of the versions that could be on your Windows-based computer: OneNote for Windows 10 and OneNote (from Office 2019, Office 2021, or Microsoft 365). OneNote for the web is covered later in this chapter, while OneNote for Mac looks and works almost the same as OneNote for Windows 10.
OneNote for Windows 10 version
Here are some quick details about the Windows 10 version of OneNote. This may help you to identify which OneNote version you're using:
- Notebooks must be stored in the cloud, on either OneDrive or SharePoint. This means you can access these notebooks on any device from anywhere. You can also access them offline, as there will be a cached copy of the notebook on your device.
- Notebooks cannot be stored on a local computer's hard drive.
- OneNote for Windows 10 does not work with earlier versions of Windows, which must be why they put Windows 10 in the name.
- There is no File menu.
- Sections are visible on the left side of the notes pages.
When people first use OneNote, they do not take note of where they started from: Was it the Windows 10 menu or the Office suite icons? I notice this happens often with my students when I am teaching how to use OneNote. Left-side tabs for sections means you are using OneNote for Windows 10, as seen in the following screenshot:
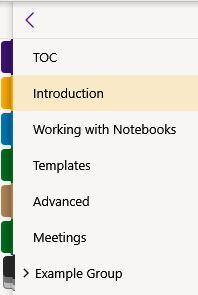
Figure 1.1 – Sections appear vertically on the left side of a notebook in OneNote for Windows
The location of the sections tabs is the easiest visual clue as to which OneNote version you are using.
OneNote version
When referring to OneNote, we are referring to the OneNote version that is part of Office 2019 or Microsoft 365. Here are some quick details about this version of the OneNote tool:
- Notebooks can be stored on your hard drive, on the company server, or in the cloud (on either OneDrive or SharePoint).
- OneNote will work with Windows 8 and above.
- A File menu is available at the top left of the screen.
- Sections are visible at the top of note pages, like so:

Figure 1.2 – Sections across the top of a notebook in OneNote
Although there are some differences between these versions of OneNote, the majority of the features will work the same to provide amazing notebooks.
Where and how you store your notebook(s) is the next important step in creating accessible and shareable notebooks. Let's look at our storage options next.
Exploring notebook storage options
Each time you create a new notebook (you will learn how to do this in Chapter 3, Creating Notebooks, Sections, and Pages), you create a new notebook file, so you can decide each time where you want this notebook to be stored. All your notebooks can be stored in the same location and using the same account name and password.
For instance, if you only use OneNote at work, then you can log in to that notebook automatically with the Microsoft account that is already attached to your work computer. Furthermore, if you always share your notebooks, you could have Microsoft Teams as your location, then each shared notebook can be shared with the appropriate team. So, where can you store your OneNote notebook? This file type is very different from a Word or Excel file, for example. This file type will house all of your sections and pages in one notebook.
Each notebook you create is actually a separate file. There is no Save as button. Where you store this file and which account you attach to it is important, because you want to know how to access it again. The storage of your notebook will also affect your ability to share the notebook.
Let's look at your location and account choices so that you understand how this works. With notebook storage, we need to consider the following:
- Location of the notebook file
- The account associated with the notebook file
In this section, we'll focus on these. To understand notebook storage better, we will explain the locations available and how accounts work.
Location of your notebook
While the OneNote app on Windows lets you store notebooks on local hard drives and on network shares, it is preferable to store them in the cloud so that you can access them from anywhere and from any device. OneNote for Windows 10 can only be stored on Microsoft OneDrive or Microsoft SharePoint.
If you are using Microsoft Teams, then you will be able to create notebooks, and these storage locations will be picked based on where you are in Microsoft Teams.
How does Microsoft Teams pick your notebook location?
If you create a notebook while you are in Microsoft Teams, there are two possible scenarios for where that new notebook will reside, as outlined here:
- If you are in the Channel area of Microsoft Teams when creating a notebook, then that notebook is stored on the SharePoint site that is associated with that team.
- If you are in the Chat area of Microsoft Teams when creating a notebook, then that notebook is stored on OneDrive (the OneDrive belonging to the person that created that notebook in the chat). The following table tells us about the location of OneNote notebooks within Microsoft Teams:

Table 1.1 – Location of OneNote notebooks within Microsoft Teams
How you store your notebook depends on which version of OneNote you are using. Let's compare what's available for locations when we use OneNote for Windows versus OneNote.
Comparing the location for OneNote for Windows 10 with OneNote
You cannot save a notebook created in OneNote for Windows 10 on your hard drive, while OneNote (which comes with Office 2019 and Microsoft 365) can be stored on your local hard drive, on your company server drive, or on Microsoft OneDrive or Microsoft SharePoint.
Refer to the following table for location options:
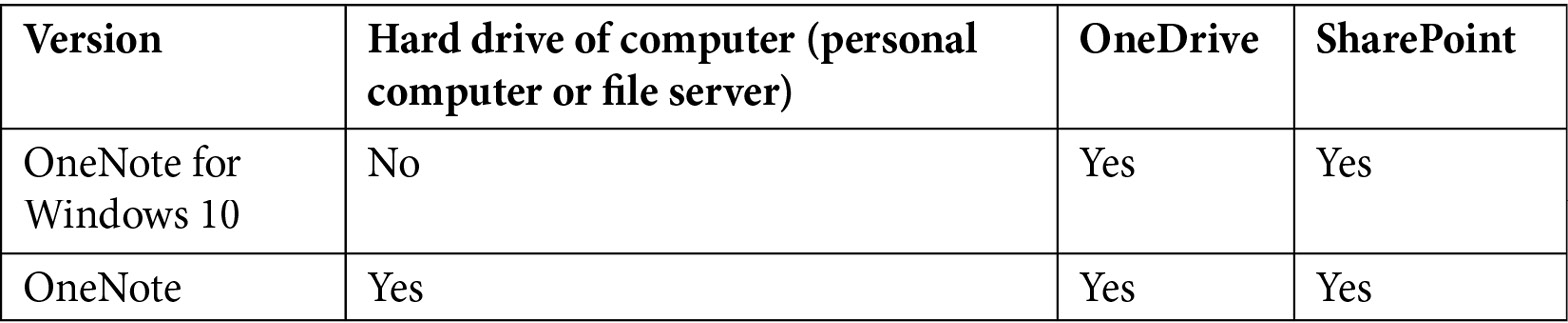
Table 1.2 – Location of notebooks, comparing OneNote for Windows 10 with OneNote
Where you choose to store your notebook will affect whether or not you can share that notebook. Let's compare the OneNote versions and see which sharing options are available.
Sharing notebooks
Although you have lots of choices for the location of your notebook, sharing your notebook is not supported in all these locations. You will not be able to share a notebook that is located on your local hard drive. If you store a notebook on your company file server, the sharing of that notebook will inherit any rules of access that the file server location has, and sharing would have to take place in the office or through a virtual private network (VPN) (if outside the office).
Refer to the following table for sharing options:
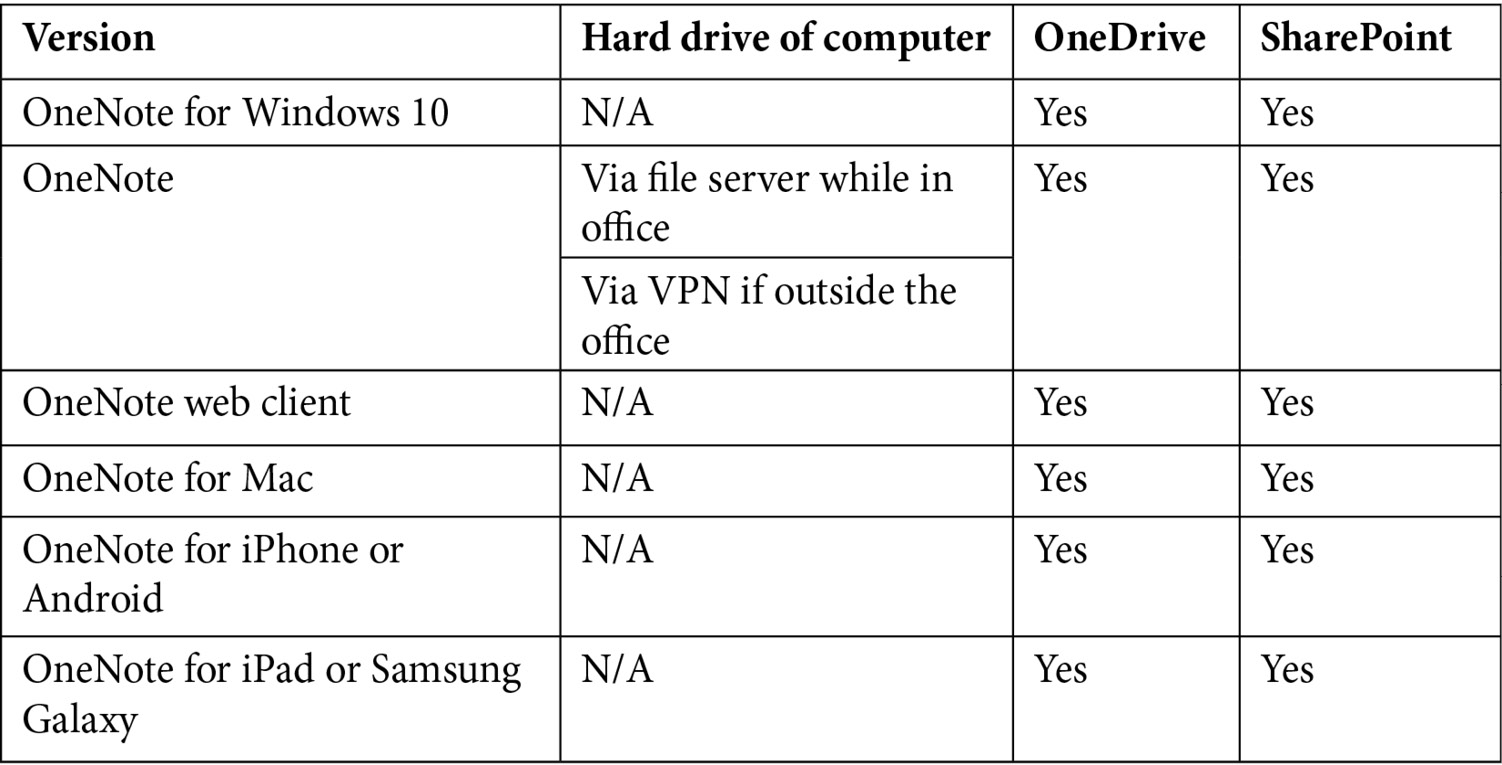
Table 1.3 – Options for sharing OneNote notebooks based on the version of OneNote
The next consideration for your notebook storage is how much storage you have available with each option.
How much storage?
The amount of physical storage available to you for your notebooks is based on the storage available in the location your notebook is saved. OneNote itself has no storage limits.
Unless there are specific OneNote features that you need that are only available in the traditional OneNote app, we recommend using one of OneNote's modern apps (OneNote for Windows 10, OneNote for iPhone/iPad, or OneNote for Android) and using OneNote with the main account on your device (that is, a Microsoft account or a work/school account). This will ensure that all your notes are saved to the cloud and accessible on all your devices and will also ensure that you have full sharing capabilities.
Account associated with the notebook
When creating a notebook in OneNote, you will be prompted to log in to your Microsoft account. You may have a Microsoft account with your work email. If this account was set up with Microsoft 365 for Business, then this account is referred to as a work or school account. A Microsoft account is free for anyone, so it is possible that you have a personal Microsoft account as well. This personal Microsoft account could use any email address as the username.
With OneNote for Windows 10, you are always signed in to your Microsoft account. This account is set up under Accounts in your Settings area via the Windows Start menu: once on the Accounts screen, choose Your info to view the account you are signed in to. Note in the following screenshot, on the right-hand side of the screen, under CONNIE, the blurred line is where your Microsoft email account would show. You can link other accounts by choosing Email & accounts on the left:
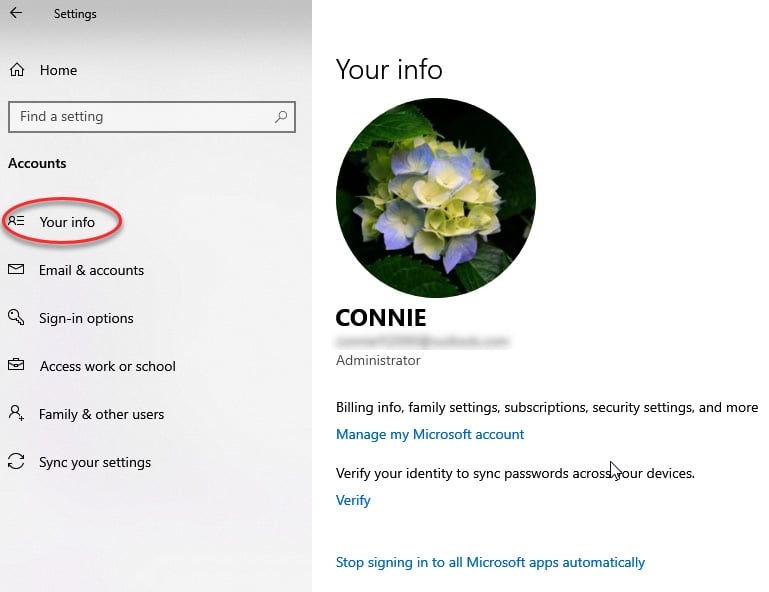
Figure 1.3 – Microsoft account information (go to Windows Start menu, then choose Settings)
If you have a work or school account, it will show under the Access work or school option, as illustrated in the following screenshot:
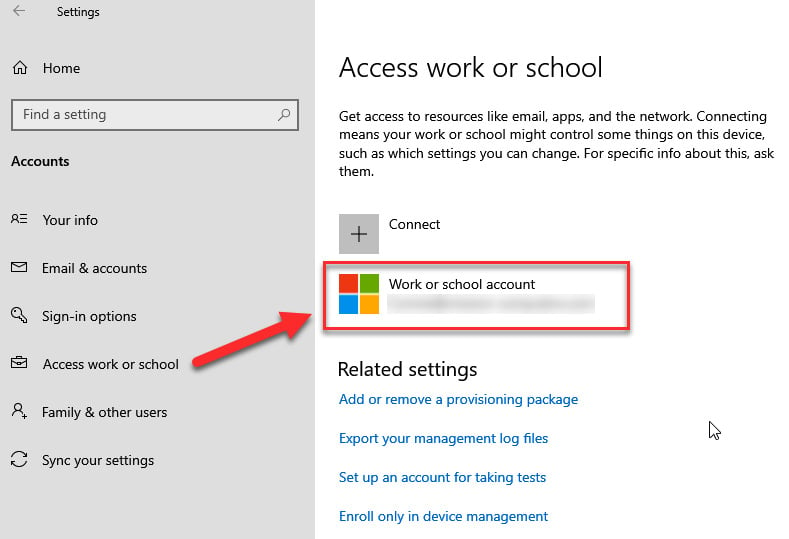
Figure 1.4 – Microsoft account: Work or school account option
When creating new notebooks in OneNote, the account used will be the main account on your computer. If you have a work or school account, then that account should be the main one.
If you have already created a notebook using one of your accounts, you can access that notebook and specify the account you used.
If you are signing in to a computer at work, you may be restricted to a certain Microsoft account, as set up by your Microsoft administrator (or information technology (IT) professional).
In addition to using OneNote for work (or wherever that main account is), you may want to access your notebook(s) on your phone, a tablet, iPad, or another computer. Let's find out how easy this is to do.
Accessing your notebooks from different devices
One of the best things about OneNote is the fact that you can access it from any device you own. All it takes is for you to log in to the appropriate Microsoft account on that device and then start opening notebooks.
In this section, we will discover which other devices we can have our OneNote notebooks on. We will also learn how to set up OneNote on these other devices so that we can view and access our notebook(s).
Opening OneNote from a different device/computer
Let's say you use OneNote on your desktop computer at work; you may also want to access this same notebook on your laptop, your phone, your iPad, or another computer (that doesn't belong to you). Let's look at all these options now.
Accessing your notebook from a different Windows device
If you are using OneNote for Windows 10 at work, then to access OneNote for Windows 10 on a different computer, it's easier if that computer has Windows 10 as well. However, if you don't have Windows 10 on that other computer, don't worry. You can still access that notebook using either OneNote for the web or the OneNote app.
To open an existing notebook on another computer, you need to take the following steps:
- Go to the Windows Start menu and open OneNote. If you do not see OneNote immediately, go down the Menu list, where it should be listed alphabetically. If you do not have OneNote for Windows 10 on your computer for some reason, go to the Microsoft Store and download this program. If your computer does not have Windows 10, you will have to download OneNote (for Office 365 or Office 2019).
- Once you open OneNote, you will see your Microsoft account email if you are using other Microsoft 365 applications or Windows 10. If the account is not correct for some reason, then go to the Windows Settings menu and choose Accounts to include the correct information. Then, proceed as follows:
- Inside the OneNote application, you will need to open up the notebooks that you want to work on. Under the Notebooks column on the left, choose More Notebooks (at the bottom). If there is no separate column for notebooks showing, you'll notice an icon of a stack of books on the left-hand side, as shown in the following screenshot. This will show or hide your notebooks area. Press on the books icon to show your notebooks and press again to hide them:
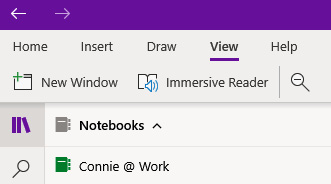
Figure 1.5 – OneNote screen with notebook show/hide icon
- Provided the Notebooks area is visible, you can choose to open pre-existing notebooks with More Notebooks (at the bottom of the page), or you can add a new notebook by choosing Add Notebook at the bottom of the notebooks area.
Now, let's look at how to access OneNote from your Mac computer.
Accessing OneNote from a Mac computer
Accessing OneNote from your Mac computer follows most of the same steps as outlined in the previous section for Windows computers. The notebooks area looks and works the same as shown in Figure 1.5.
The difference is that there is no More Notebooks option; you can simply choose Add Notebook to add in another notebook that you created on another device.
Another option on the Mac is that you can use the File menu at the top of your screen and from this menu, you will see the Open Notebook option.
Now, let's look at how to access OneNote from your smartphone.
Accessing OneNote from your smartphone
You will need to download OneNote onto your smartphone and then open or create a notebook, as follows:
- Search for
Microsoft OneNoteon the App Store of your iPhone, or the Play Store of your Android phone. Download the app. - Go through all the prompts to get the app started, as follows:
- Press the Get started button.
- Choose OK for the privacy options.
- Choose Get started to start your first notebook, as illustrated in the following screenshot:
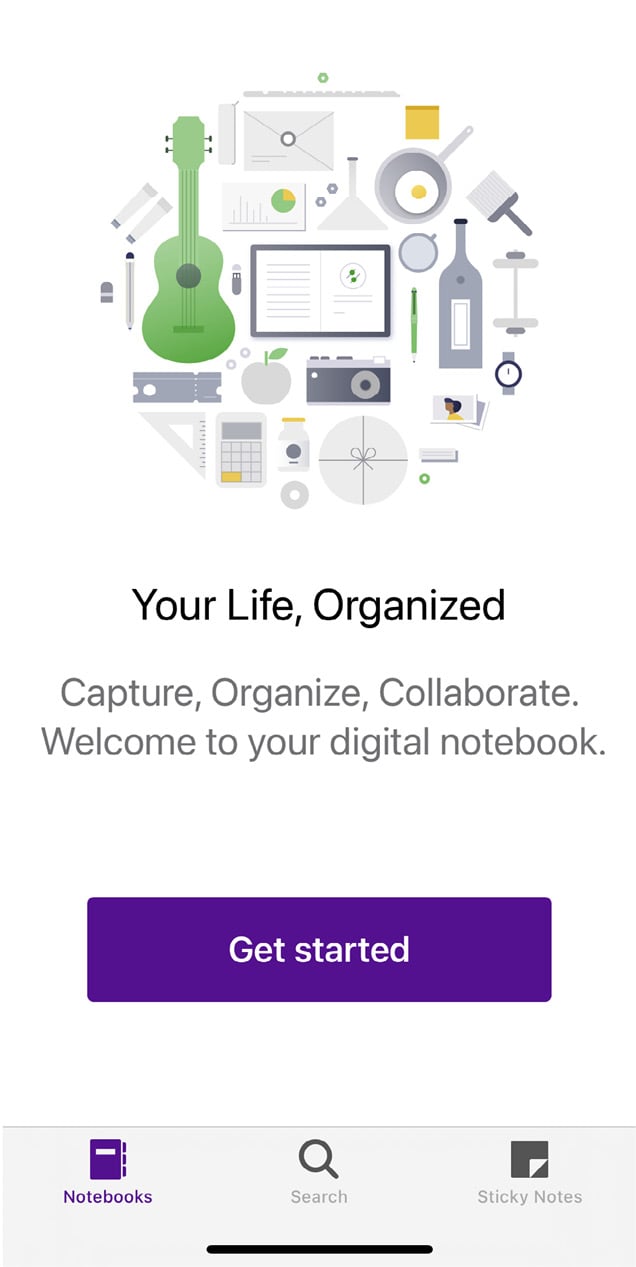
Figure 1.6 – OneNote download prompt when installing on iPhone
- To start your first notebook, you must sign in to a Microsoft account, as follows:
- At the top-left corner of the App screen, press the circular icon. The Android app opens directly to a Sign in screen titled Welcome to OneNote. You will then find a Sign in field and button at the bottom of the page.
- Choose Sign in.
- Type in your Microsoft sign-in email and password or create a new one.
- Once signed in, you can create a new notebook using the plus sign (+) at the top right of the screen, or you can open existing notebooks by selecting More Notebooks, as illustrated in the following screenshot:
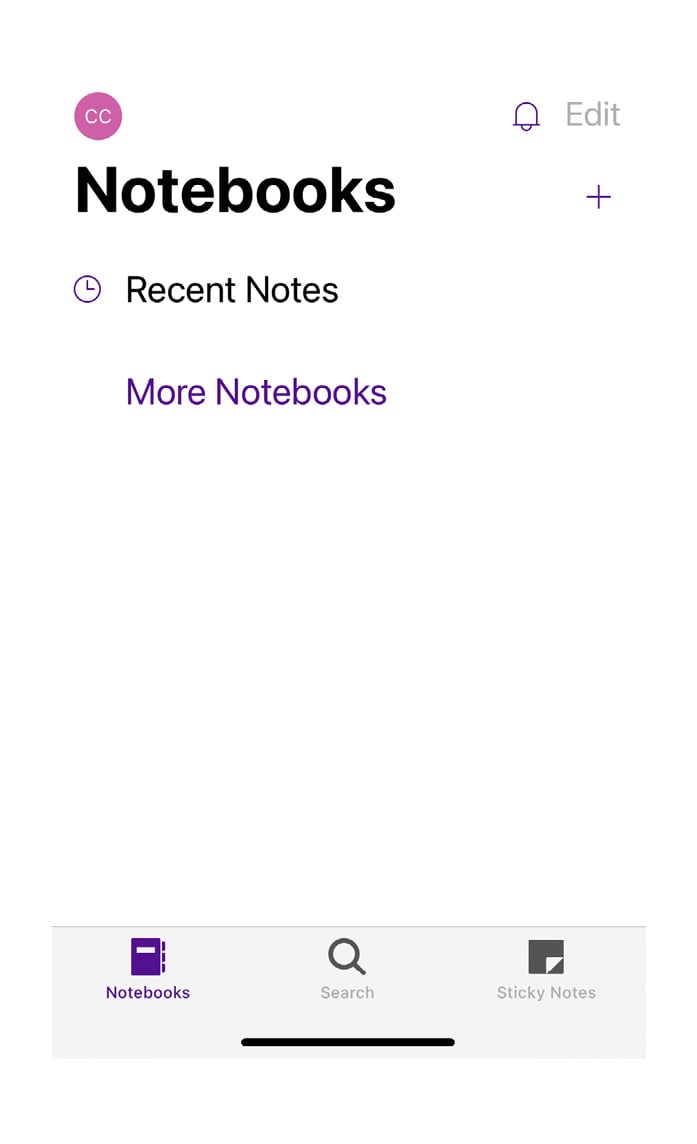
Figure 1.7 – OneNote initial notebooks screen
The instructions for downloading OneNote onto your iPad are almost the same, but there is one little difference that happens when opening up your notebooks. Let's look at that next.
Accessing OneNote from an iPad or a Galaxy tablet
You will need to download OneNote onto your iPad following the same instructions as detailed for a smartphone.
When it comes to opening up notebooks on your iPad, choose More Notebooks at the bottom of the first leftmost column. Select a notebook from the list that you wish to have open on your iPad.
On a Galaxy tablet, the More Notebooks option is shown closer to the top of the first leftmost column in OneNote.
In addition to using OneNote as an application on our computers, phones, or tablets, we can access OneNote via the OneNote web application. Let's look at how to do that next.
OneNote web application
The best thing about the web app for OneNote is that you don't even have to be on your own computer; any computer or device will give you access to your notebook(s).
This is assuming you have a web connection and that you are using OneDrive or SharePoint as the location for your notebooks. Here is how to use the OneNote web application:
- Go to the login page for Microsoft at www.office.com.
- Log in to your Microsoft account using the appropriate email and password. Do not save this login information to a device that does not belong to you.
- Go to the waffle menu at the top left of the Microsoft window, as shown in the following screenshot:

Figure 1.8 – Waffle menu for Microsoft 365 on the web
Alternatively, you can select the OneNote icon from the column of icons displayed on the left of the screen.
- Choose OneNote.
- Click on My notebooks to see all notebooks you have created using the current Microsoft login, as illustrated in the following screenshot:

Figure 1.9 – New notebook button in the OneNote web app
- To open one of the notebooks, click on the notebook name.
- Click on the + New notebook button to add a new notebook.
- If this is not your personal computer, then once you have completed working on your notebook on this computer or device, you should sign out of your Microsoft account by clicking on your icon at the top right and selecting Sign out. If you are working on your own computer, then do not sign out.
Summary
In this chapter, you learned some examples of where OneNote can help you stay organized, such as with projects, in meetings, when capturing your ideas, and even with helping to track information in your personal life. You also saw the advantages of OneNote with regards to searching, organizing, and accessibility, and how it compares to other notetaking methods. The differences between the OneNote versions were covered to help you to identify which OneNote version you have on your computer. Furthermore, information detailing the best place to store your notebook was presented so that you can understand your options for sharing and how OneNote integrates with other Microsoft products such as Teams, SharePoint, and OneDrive.
You also learned how to install OneNote on other devices so that you can open any notebook(s) from anywhere you choose. Last but not least, you were introduced to the OneNote web application so that you can open your notebook(s) anytime, anywhere.
Take the time now, before moving on to the next chapter, to get OneNote installed on your computer as well as on your smartphone and tablet. Then, you can easily follow along with the instructions in this book moving forward.
In this chapter, you discovered that the first installation of OneNote created a default notebook. In Chapter 3, Creating Notebooks, Sections, and Pages, we will go into detail on creating more notebooks and why that will be of benefit to you.
All of this sets the foundation for the rest of this book, starting with the next chapter, where we will explore more about using OneNote by identifying the parts of the screen, toolbars, and menus. We will look at all these different areas of OneNote as they appear on the computer, the smartphone, and the iPad.