


 Download code from GitHub
Chapter 1: Exploring the New Interface and Managing OneDrive
Welcome to the first chapter of Learn Microsoft Office 2021. This chapter will highlight the difference between the standalone and subscription versions of Office 2021. In our previous edition of this book, Learn Microsoft Office 2019, we provided an in-depth explanation of all the Office applications and covered the very basic to advanced skills. In this book, we will build on the skills that were presented in the first edition.
First, we will look at what Microsoft Office 2021 offers within the single-user license compared to that of the Microsoft 365 online version, then progress to upskill you on the new interface features. We will also become familiar with the importance of OneDrive when working with Office 2021, learn how to manage OneDrive, and learn how to save files in Office 365. Lastly, we'll point out any new formatting elements, as well as quick ways to control attributes and ways to speed up the document formatting process.
The following topics will be covered in this chapter:
- Exploring standalone versus online 365 apps
- Highlighting the new interface features
- Managing OneDrive
- Saving and renaming files in Office 365
The skills mentioned in this chapter will help build your confidence so that you can work on the later chapters in this book.
Note
Some of the interface features we will talk about span all the Microsoft Office suite applications and can be accessed and applied using the same method shown for Word 2021.
Technical requirements
To benefit from the contents of this book, you must be able to follow along with and work through the examples provided in each chapter. The examples for this chapter can be found at https://github.com/PacktPublishing/Learn-Microsoft-Office-2021-Second-Edition.
Exploring standalone versus online 365 apps
In this section, we will discuss the difference between the latest release of Office 2021 versions. Microsoft Office 2021 is offered as a one-time purchase, which grants you a lifetime license for the software.
The Microsoft 365 plans include online apps and can be purchased as subscription services (monthly or yearly) with regular updates to features. Apps that are included with Microsoft 365 can be shared to your devices, as well as within your family unit.
With the Office 2021 standalone desktop version, you are limited to one installation per user. You will need to purchase any further upgrades for the software when they're released. However, security updates will be pushed out to both platforms (standalone desktop and online apps).
Reference
More information regarding Microsoft 365 can be found here:
https://support.microsoft.com/en-us/office.
There are various purchase options for the desktop version of Office 2021 and your requirements will determine the best option. The following applications are always included as a standard:
- Word 2021
- Excel 2021
- PowerPoint 2021
Other applications such as Access 2021, Outlook 2021, Publisher 2021, Teams, and OneNote 2019 form part of the offering, depending on the plan you choose:

Figure 1.1 – Microsoft Office 2021 plans
The Microsoft 365 contribution (2021 apps) is divided into Home and Business plans, with a range of different options under each. Visit the following website for details: https://www.microsoft.com/en-gb/microsoft-365/buy/compare-all-microsoft-365-products-b?. Regarding the operating systems that Office 2021 requires, it can run on Windows 10 and 11 (as well as macOS).
In this chapter, we will refer to OneDrive and SharePoint. It is important to note the difference between these two online storage apps. OneDrive is a personal online storage and sharing tool that is provided, along with other apps, when you sign up for a Microsoft account. As a personal user with OneDrive, you can grant others access to files, known as file sharing. Note that some plans are free, while some must be paid. SharePoint is used to collaborate on files via a team within an organization. SharePoint offers a higher level of security and access to files is managed by the Admin team.
Let's move on to the next section, where we will look at what changes have been made to the Microsoft Office 2021 interface.
Highlighting the new interface features
In this section, you will learn how to recognize some of the new features that have been incorporated into the latest update of the desktop versions of the 2021 applications. You will also learn whether they are available within the Microsoft 365 apps.
Although most interface features and explanations are identical in some classic applications, any features that can be applied solely to an application will be addressed in the relevant chapter going forward. Let's browse the environment and learn about the different elements that make up Office 2021 applications.
Overall look and feel
Office 2021 has a much clearer interface, with tabs and groups being so much cleaner and crisper. The icons (buttons) are much less complex, with icon graphics represented using single lines. The edges seem softer and easier on the eye – you can locate features much quicker at a glance.
The following screenshot shows the Microsoft Word 2021 interface, as well as the Microsoft 365 – Word 2021 app interface:
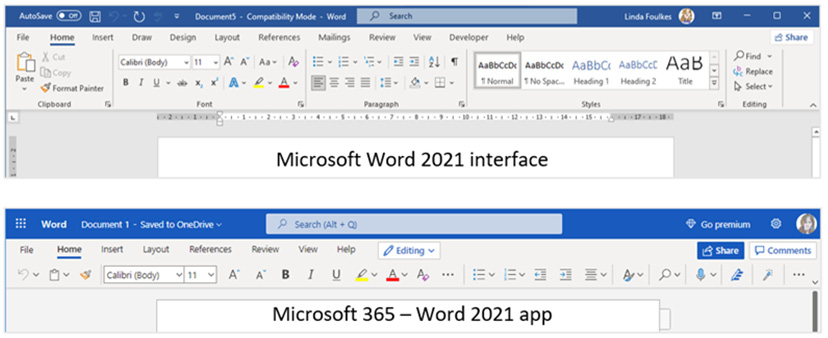
Figure 1.2 – Difference between the desktop and online app versions
Some features have been enhanced in the new version of Office 2021. Let's highlight a few of the cosmetic changes.
The title bar
As you may already know, the title bar is located at the very top of each program that's launched in the Windows app and macOS environment.
Microsoft Word 2021 includes an AutoSave button, which can be found on the left-hand side of the title bar, as well as an Editor button.
The area of the title bar that houses the AutoSave button is named the Quick Access Toolbar (QAT) and is where you can add any program manipulation icons. The AutoSave and Editor buttons have been added to the QAT by default:

Figure 1.3 – The title bar showing the QAT, which includes the AutoSave and Editor features
The title bar also includes the file's description (filename), along with a drop-down list where you can see the version history of your document, move it to another location, and rename the description of the file.
By default, the AutoSave button is set to Off, and the filename drop-down list is deactivated unless the document is saved to the cloud. Normally, the online cloud service of choice would be OneDrive (or SharePoint).
Customizing the QAT
There are two ways to customize the QAT, as follows:
- Use the Customize Quick Access Toolbar drop-down menu located to the top left of the title bar:
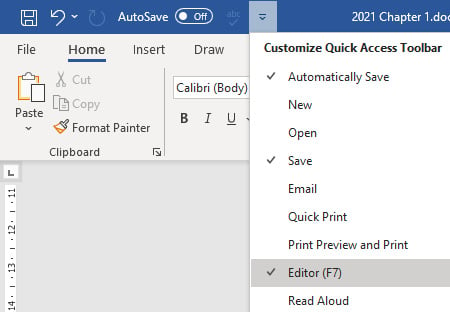
Figure 1.4 – The QAT drop-down list
Note
Icons that already display a checkmark to the left indicate that the icon is already an option on the QAT. You simply have to click on the name of the shortcut that you want to add to the QAT.
- Click on the File tab, then select Options. From the Word Options dialog box, choose Quick Access Toolbar. From the right-hand side of the dialog box, you will notice the features that are currently visible on the QAT. To add additional features to the QAT, simply double-click on the relevant feature on the left-hand side to add it. Click on OK to confirm this:
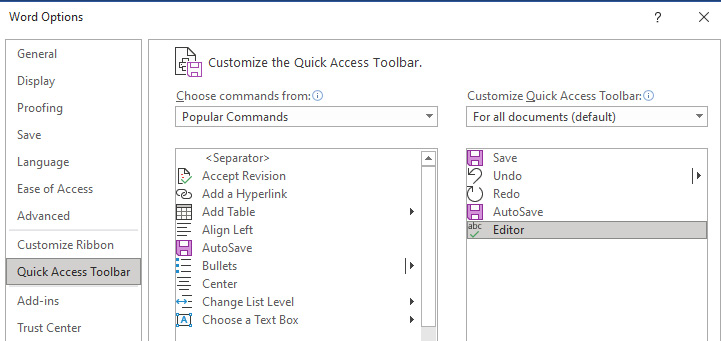
Figure 1.5 – The Word Options dialog box displaying the QAT customization options
In the next section, we will learn how to use the new Search facility in Office 2021.
Using Microsoft search
Toward the center of the title bar of your Office 365 apps or standalone Office 2021 applications, you will notice the Search facility. This facility is available when you're using Word, Excel, PowerPoint, Outlook, and OneNote:
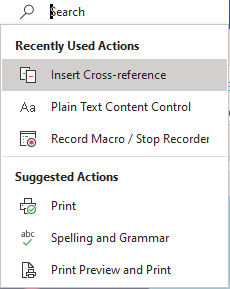
Figure 1.6 – New Search feature in Office 2021
This tool is extremely useful as it lets you do the following:
- Search for contacts (people) and locate text within the document
- Search for common features without going through all the tabs
- Locate documents you have used in the office environment
- Look up definitions
- Opens the task pane to the right-hand side of the application after entering search terms to locate information from the web, media, and help
- Find relevant features after typing in search criteria:
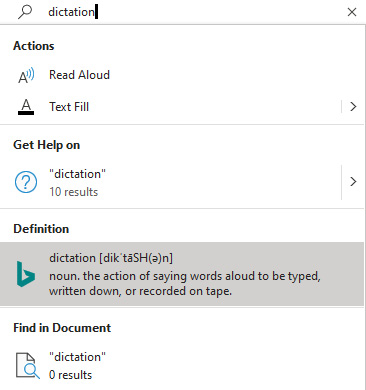
Figure 1.7 – Using the Search facility to locate a feature
The Accessibility feature lives on the status bar and watches you while you work on documents. We will discover this new feature in the next section.
Checking a document using the Accessibility feature
The Accessibility checker is included in Word, Excel, and PowerPoint 2021.
As we know, the status bar displays information about the current file we are working on and provides quick access to some tasks. The Accessibility checker is one of the default features along the status bar. The checker runs in the background while you work (by default) and offers you recommendations on various accessibility enhancements you can apply to a document:

Figure 1.8 – Status bar showing the new Accessibility feature
If we click on the Accessibility: Investigate feature on the status bar, the Accessibility pane will open to the right of the document. This pane contains the Inspection Results area:
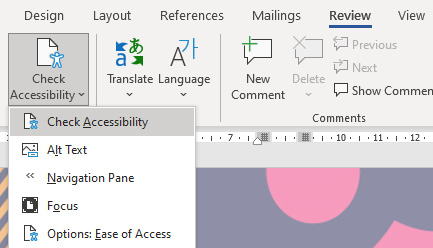
Figure 1.9 – The Accessibility checker in Word, PowerPoint, and Excel
Applying dark mode (enhanced)
Changing the visual display of the Office Theme was available in the previous versions of Office, but the document's background remained white. This feature has now been enhanced to display the document's background in dark mode too. Some enjoy this feature as it is easy on the eye and provides less strain and improved light sensitivity. To access this feature, go to File | Options | General | Office Theme:
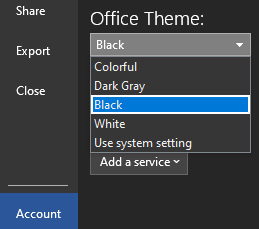
Figure 1.10 – Change the Office Theme to Black (dark mode)
We can change the canvas's mode back to display the background of the Word document in white while the rest of the display is in dark mode:
- Click on the View tab.
- Select Switch Modes from the Dark Mode group. Note that the Switch Modes feature only appears as a button on the ribbon when the Office background is set to Black.
- As you can see, the document's background appears white while the rest of the window remains in dark mode:
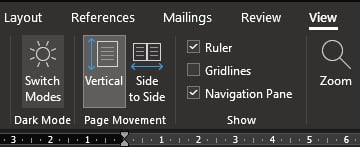
Figure 1.11 – Switching modes
While dark mode is activated, we can explore Focus mode.
Exploring Focus mode
Focus mode can be accessed through the View tab on the ribbon, or via the Focus button on the status bar. Focus mode hides all the unnecessary parts of the screen so that you concentrate on the document in question only.
While in Focus mode, move your cursor to the center top of the screen. Click on the three dots (…) to pull down the Word 2021 ribbon. Make sure you are on the View tab, then select a color from the Background button dropdown:
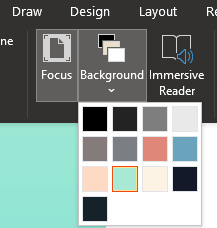
Figure 1.12 – Changing the background's color while in Focus mode
In the next section, we will look at the immersive reader. It is a brilliant tool with several benefits.
Using the immersive reader
The immersive reader is located under the View tab on the ribbon and contains several really useful tools, from reducing eye stress and removing distractions from a document, to reading the text out loud while you proofread your documents:

Figure 1.13 – Immersive reader contextual menu
Once you activate the immersive reader in Word 2021 on desktop or on the online app, your screen will open in much the same view as Focus mode to begin with (explained previously), showing a less complex view of the document.
Let's see what the immersive reader has to offer.
Column width
The width of the margin to the left and the right can be adjusted to suit you in terms of comprehension and concentration. This is especially beneficial when you're working on a smaller screen:
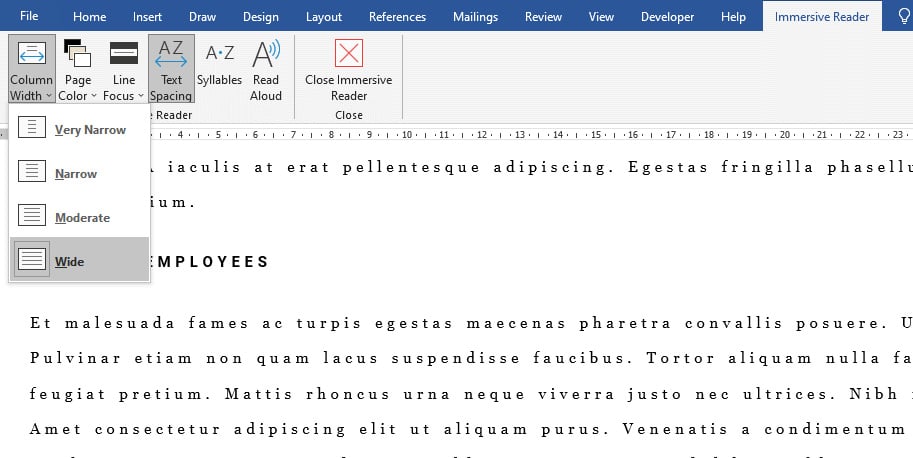
Figure 1.14 – Immersive reader column width options
As we mentioned previously, we can also set the page's color when using Focus mode. Let's learn how.
Page color
Selecting a page color here will create a softer reading experience for the reader and reduce strain on the eyes.
Line Focus
The third button on the immersive reader is the Line Focus dropdown. Dependent on the number of lines that are selected from the drop-down list, the reader will navigate through the document while reading only the number of lines that you've chosen to focus on:
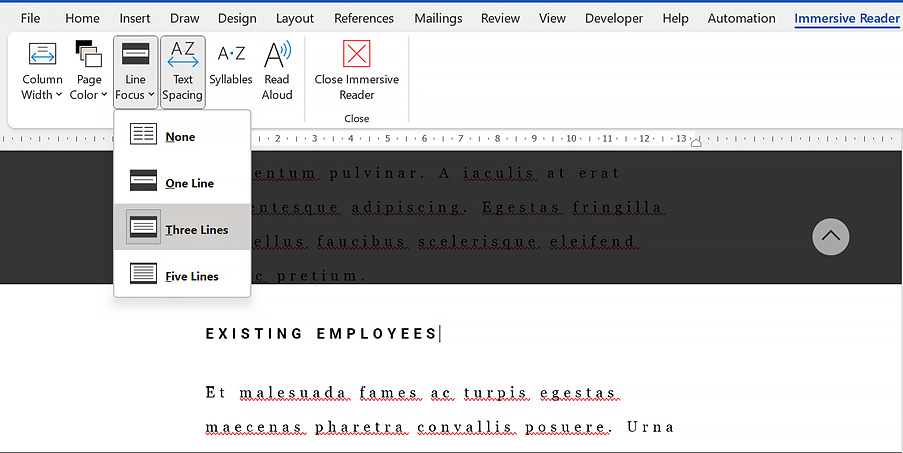
Figure 1.15 – The Line Focus option showing three lines of the document at a time
Although Line Focus is a great tool to aid concentration, increasing the text's spacing (covered in the next section) can also make a big difference.
Text spacing
The fourth option on the Immersive reader contextual tab is the ability to set the text spacing. Using this option will expand the spacing between lines, characters, and words. Click the button once to expand, and then again to reduce the spacing.
Syllables
The syllables option allows you to focus more on pronouncing words as it adjusts words to include breaks, which helps you recognize words. This is a brilliant tool for children who wish to gain command of a language:

Figure 1.16 – A paragraph showing syllable breaks when using the immersive reader
This tool can be used in conjunction with others in the immersive reader. Now, let's focus on the last option – the Read Aloud feature.
Read Aloud
This tool will highlight each word as it reads it back to you, one word at a time. Once you have activated the tool, use the buttons to the top-right-hand side of the window to rewind, play, forward, or set reading speed customizations. If you do not enjoy Microsoft David as the voice narrator, you can select Microsoft Zira or Microsoft Mark instead:
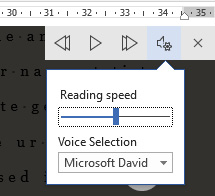
Figure 1.17 – The Read Aloud feature's playback buttons and settings
Once you get to grips with the Read Aloud feature, you may wish to experiment with the following shortcut keys:
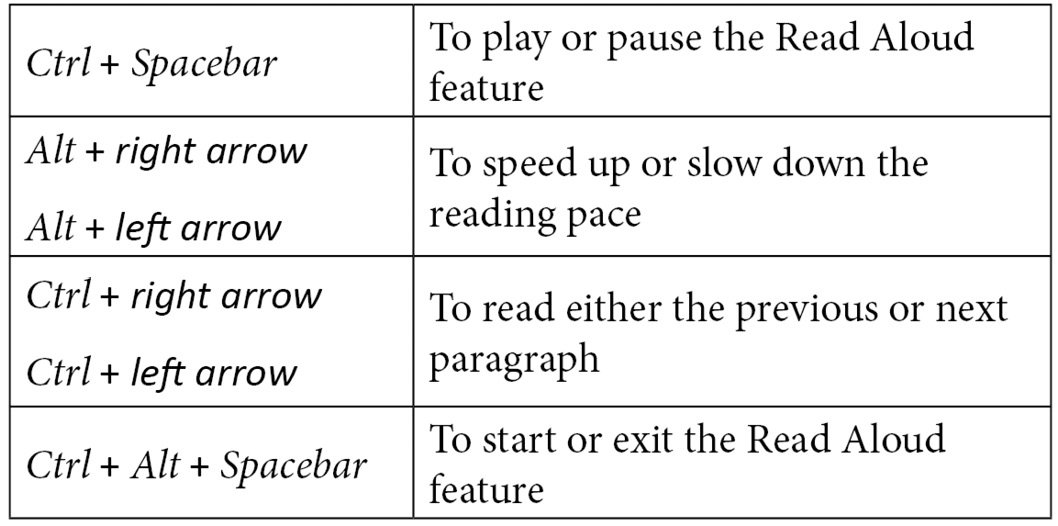
Table 1.1 – Read Aloud shortcuts
Now that we have explored some of the new features within the Word 2021 environment, let's learn about OneDrive features and understand what is meant by the term OneDrive.
Managing OneDrive
OneDrive is the online file storage area that you can access once you have signed up for a Microsoft account. It provides you with a means to access services and devices and was previously known as Windows Live ID. You can use OneDrive if you have a Microsoft account or Microsoft 365 Work/School account access. OneDrive is free to use if you are happy to only have 5 GB of storage space. If not, you can choose from a range of paid plans.
OneDrive is important as the service allows you to add (save) documents directly from within the Microsoft Office 2021 applications to the online storage facility.
Many features within the new version of Office will only be activated once you've done this. Previously, we could upload files to OneDrive and/or save them directly to OneDrive. This feature is now integrated so that we can move files and see version history directly within the Office applications, instead of having to open OneDrive to achieve this.
Like many other plans, OneDrive offers Home and Business plan options. The differences between them relate to the amount of storage quota, your monthly or annual subscription, whether you need the storage free for personal use or Microsoft 365 apps, or whether you want business use with access to Office apps.
In the next section, we will learn how OneDrive is integrated into Word 2021.
Saving documents to OneDrive
As we mentioned previously, for the AutoSave feature to be enabled within Office 2021 applications, you need to ensure that your file is saved to OneDrive. One of the pros of using OneDrive as the preferred storage location for documents is that you will not lose any work as the document is updated constantly in the background. Having files stored in the OneDrive app also means that you can access them at any time on any device that's logged into the Office 365 service.
Follow these steps to save documents to OneDrive:
- Click the File tab.
- Choose Save As from the list on the left.
- If you are connected to OneDrive, you will see your accounts already listed here. We are already associated with OneDrive – Personal, as shown in the following screenshot:
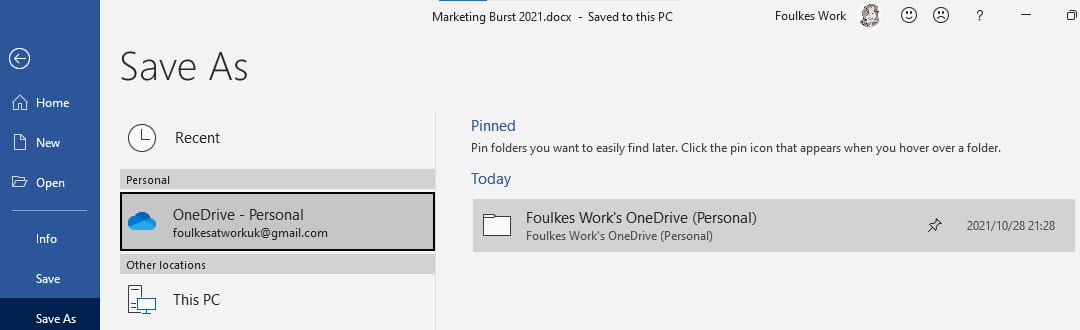
Figure 1.18 – The Save As options in Word 2021 showing the connection to OneDrive – Personal
- If the OneDrive connection is not readily available, click the Add a Place option:
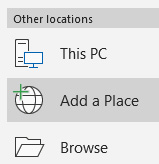
Figure 1.19 – Available locations when saving documents
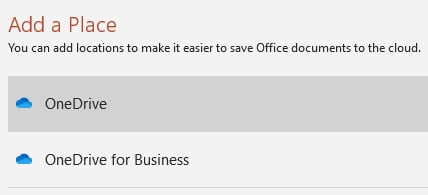
Figure 1.20 – Selecting OneDrive or OneDrive for Business as a document location
- After selecting the location, you may be asked to sign in to your OneDrive account if you have not already done so:
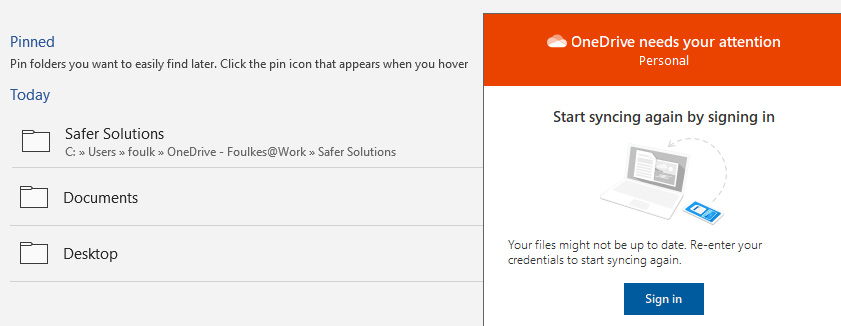
Figure 1.21 – Dialog box prompting you to sign in to OneDrive to sync files
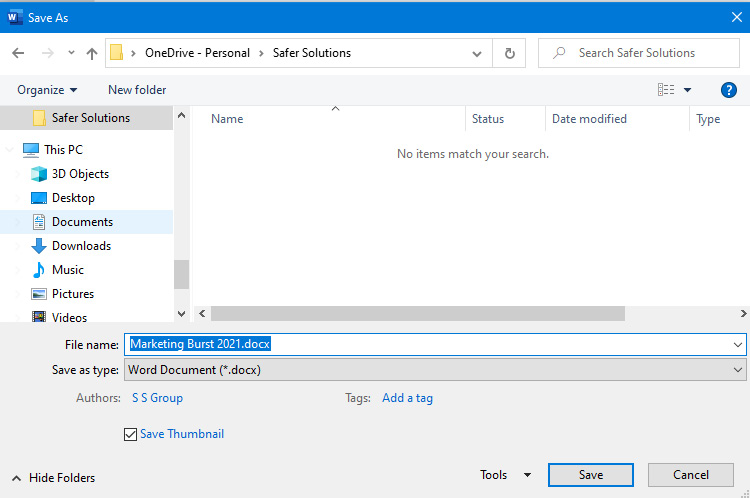
Figure 1.22 – Adding or amending the File name: description
- Click the Save button to confirm your choice.
The document will now be saved to the cloud and the title bar will display Saved… just after the description of the file. Every couple of seconds, the filename area will refresh to display Saving…. This will happen when OneDrive updates (syncing) any amendments you've made to the cloud automatically:
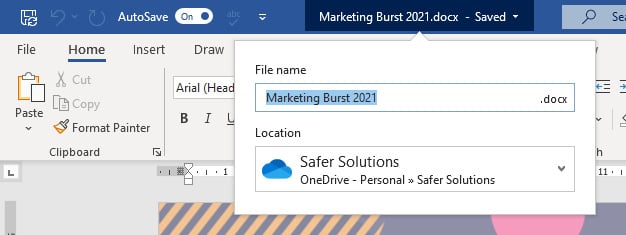
Figure 1.23 – The title bar indicating when the document is updated and saved to the cloud
Note
When a document is saved to an online location, as shown in the preceding screenshot, the Save button to the left of the QAT will display a double arrow to the bottom right of the button. Click that button to refresh the document with amendments from other authors.
Note that documents will not sync automatically to the cloud, nor from the cloud to your devices, unless the following is true:
- Sync is activated on your device.
- You have an active internet connection.
- You have set up your OneDrive account and you are signed in.
- A document is currently open and reporting a sync error.
Next, we will learn how to sync documents to OneDrive and learn about the various status icons in File Explorer for your OneDrive connections.
Syncing a document to OneDrive
When we create documents in Office 365, they are stored in OneDrive's online storage area. These documents are only available online if you're not synced to other devices. The same would happen to documents that have been created locally within Microsoft Word 2021, for instance. Although documents exist in the OneDrive location on the local computer's File Explorer area, they may not be available online until certain sync conditions have been met.
To sync documents to the cloud or from the cloud to a OneDrive-connected folder location, you will need to set up OneDrive and have sync active. To understand this better, let's look at a scenario.
The following screenshot shows an example of the contents of the Safer Solutions folder on OneDrive online:
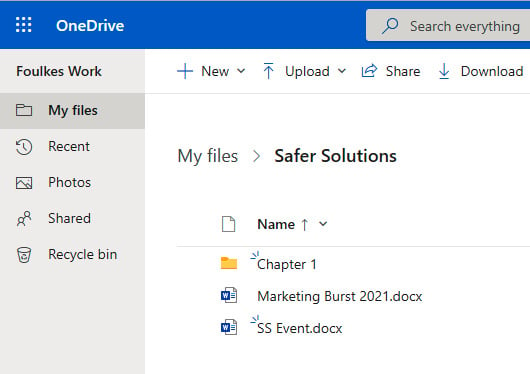
Figure 1.24 – The contents of the Safer Solutions folder on OneDrive
Tip
The three blue stripes at the top left of the filename (as shown in the preceding screenshot) indicate that the file has recently been updated.
Now, let's go to the same OneDrive folder that exists in File Explorer on our local computer. Notice the Status column in the following screenshot. Not all the status icons are the same. The SS Event document's status indicates that it only exists online, although we can see the file in the OneDrive-connected folder locally. This means that we can see the file in OneDrive and that on opening the file from this area, it will only open in the browser.
The Marketing Burst 2021 document was saved locally and synced to OneDrive online (which means that the document can be accessed online and locally). We will discuss why the folder and document are pending sync here:
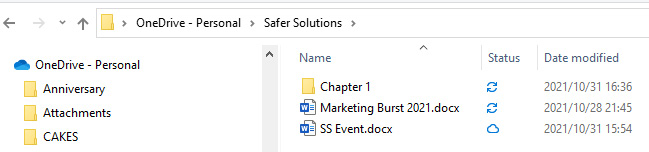
Figure 1.25 – OneDrive folder connection showing the status of documents
Next, we will discuss the different statuses so that you know how to manage your online and local environments better.
Understanding OneDrive icons
In the previous section, the OneDrive-connected folder on my local computer indicates that two of the folder items are pending sync. We can check the status of a document by placing our cursor over the status icon in the Status column (see the following screenshot). There are several status icons, so it is important to recognize the differences between them:

Figure 1.26 – Explorer showing the OneDrive sync pending status
The following table outlines the most common status icons:
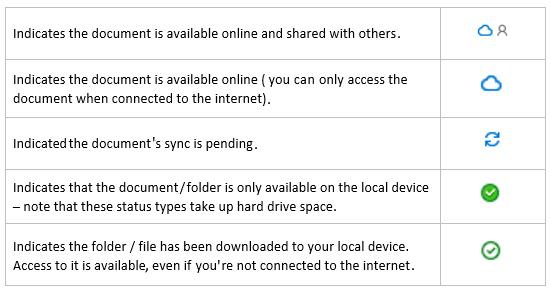
Figure 1.27 – OneDrive-connected folder status meanings
To ensure that a file/folder remains only on the local device, right-click on the file/folder in the OneDrive folder on the computer and select Always keep on this device. The status icon will display a green circle with a white checkmark:
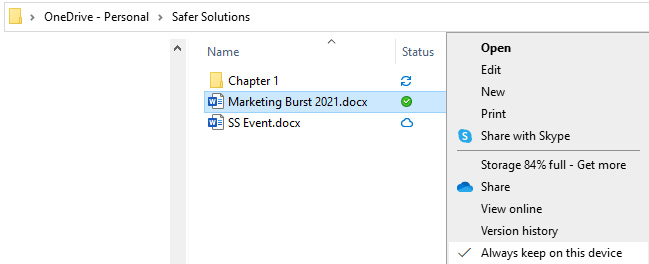
Figure 1.28 – The Always keep on this device option after right-clicking a document
There are several reasons why we may receive sync errors when working with the OneDrive folder locally. Let's learn how to troubleshoot such sync issues.
Troubleshooting sync errors
Once you have set up OneDrive on your computer, you can check its status by clicking the OneDrive icon to the right of the Windows taskbar. This icon will indicate whether you are online, offline, or if sync has been paused:

Figure 1.29 – The OneDrive taskbar's icons displaying paused, offline, and online
When you visit the OneDrive folder location within your File Explorer area, you will notice the sync status next to the document or folder. It is important to keep an eye on both these status areas so that you can ensure your documents are being synced, are accessible on all devices, and contain the latest amendments.
Depending on several factors, OneDrive could slow down your system considerably if you're syncing all the time. You can change this setting so that you only sync manually or pause syncing for a certain period.
To pause syncing
Follow these steps to learn how to pause syncing:
- Click the OneDrive icon on the Windows taskbar.
- Select Help & Settings.
- Click the Pause syncing drop-down arrow:
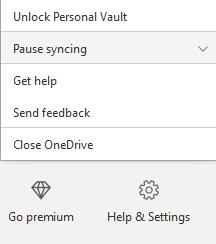
Figure 1.30 – OneDrive's Pause syncing option
- Choose to pause for 2, 8, or 24 hours.
- The OneDrive icon on the taskbar will indicate that OneDrive is paused.
Now, let's learn how to specify which online folders are available on your computer.
Choosing folders
Folders from OneDrive's online storage can be made available on your local computer. If we use OneDrive as our primary storage area, we may need to make a few of these folders accessible locally:
- Click the OneDrive icon on the Windows taskbar.
- Select Help & Settings.
- Click Settings.
- Be sure to select the Account tab at the top of the dialog box that populates.
- Click the Choose folders button (sign in to OneDrive if required), then select the folders by clicking on them:
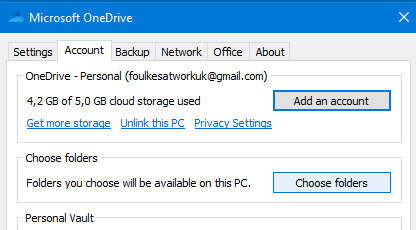
Figure 1.31 – The Account settings dialog box for OneDrive
- Select OK to confirm this.
Note
OneDrive accounts can also be unlinked from your PC using the respective Unlink this PC option on the Account tab. Go to the Settings tab to choose options related to starting OneDrive and customizing notifications.
Saving and renaming files in Office 365
Files are automatically saved to the cloud when you're using Office 365 plans. The cloud platform that can be accessed through Office 365 is OneDrive, as we explained previously.
Saving documents in Office 2021
Saving a document when you're working in the Word 2021 online application is a simple process:
- Locate the document's description on the title bar of the application.
- Select the drop-down arrow to the right of the document's description.
- The File Name area, as well as the Location areas, can be amended here.
- After typing in the filename's description, click the OneDrive location to tell OneDrive to choose an online folder to save the document to.
- Notice that Save status and Version History are also part of this drop-down list:
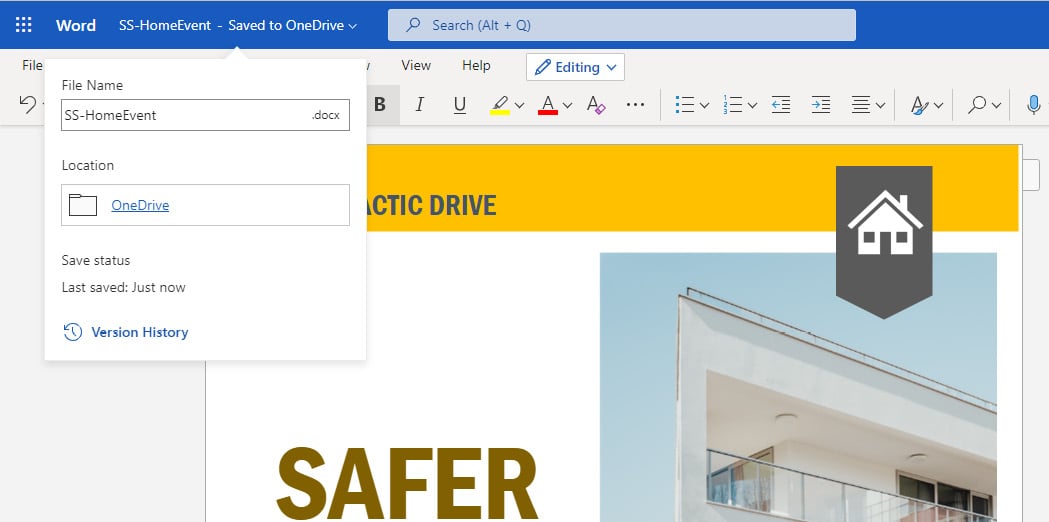
Figure 1.32 – Office 365 – Clicking the drop-down list to the right of the filename to see the Version History and save options
Renaming documents in Office 2021
In this section, we will learn how to rename documents without having to use the Save As… command or navigate back to File Explorer to rename the document. It is now possible to rename a document directly within the Office 2021 environment, without creating a copy.
If a document has been saved using the specified OneDrive location, you can edit the filename directly within the title bar area of the application, as follows:
- Open a document that's been saved to your OneDrive location or create a new document and save it to OneDrive. We are using the
Invoice.docxdocument for this demonstration. - Click into the document filename area, located on the title bar:

Figure 1.33 – Renaming a document that's been saved to OneDrive
- Rename the document by editing the filename directly.
- The document will be updated and renamed.
When we save documents to our local personal computer, we will not be able to rename the document directly within Word. Upon accessing the dropdown to the right of the filename on the title bar, we will see that the ability to edit the filename is grayed out. We would need to upload the document to OneDrive first.
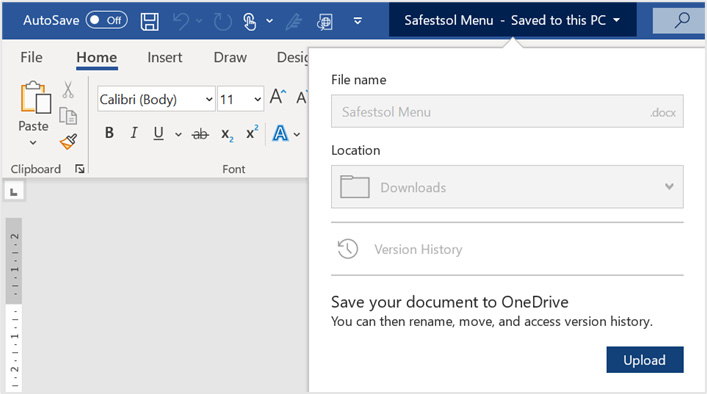
Figure 1.34 – When the File name field is grayed out, we will need to use the Upload button to save our document to OneDrive first
With that, we hope you are confident in managing OneDrive and saving files using the desktop app of OneDrive, as well as using the various online plans for Office 365.
Summary
In this chapter, we learned about the new interface features of Office 2021 and discussed the differences between the online and desktop plans. We explored the immersive reader tools such as Read Aloud and looked at ways to enhance the users' experience when proofreading documents on-screen and renaming documents. The final section concentrated on managing the OneDrive experience in the cloud and on the desktop. We also learned how to troubleshoot sync errors.
The next chapter will focus on more of the new features that Office 2021 offers, as well as the latest revisions that have been made to the Office 365 offering. We will concentrate on dictation, co-authoring, and embedding.
We will also focus on a few more features that are new to Office standalone and web applications. You will learn how to access the new Transform feature so that you can integrate amazing presentations with Microsoft Sway. Then, you will learn how to dictate directly within Word 2021, where we will discuss all the options around the new Dictate feature.
Commenting and working in real time with others is also discussed here. There, we will look at co-authoring and investigate modern commenting, embedding, and converting.