Learning Objectives
By the end of this chapter, you will be able to:
Define the different scopes in JavaScript and characterize variable declaration
Simplify JavaScript object definitions
Destructure objects and arrays, and build classes and modules
Transpile JavaScript for compatibility
Compose iterators and generators
In this chapter, you'll be learning how to use the new syntax and concepts of ECMAScript.
JavaScript, often abbreviated as JS, is a programming language designed to allow the programmer to build interactive web applications. JavaScript is one of the backbones of web development, along with HTML and CSS. Nearly every major website, including Google, Facebook, and Netflix, make heavy use of JavaScript. JS was first created for the Netscape web browser in 1995. The first prototype of JavaScript was written by Brendan Eich in just a mere 10 days. Since its creation, JavaScript has become one of the most common programming languages in use today.
In this book, we will deepen your understanding of the core of JavaScript and its advanced functionality. We will cover the new features that have been introduced in the ECMAScript standard, JavaScript's asynchronous programming nature, DOM and HTML event interaction with JavaScript, JavaScript's functional programming paradigms, testing JavaScript code, and the JavaScript development environment. With the knowledge gained from this book, you will be ready to begin using JavaScript in a professional setting to build powerful web applications.
ECMAScript is a scripting language specification standardized by ECMA International. It was created to standardize JavaScript in an attempt to allow for independent and compatible implementations. ECMAScript 6, or ES6, was originally released in 2015 and has gone through several minor updates since then.
Note
You may refer to the following link for more information about ECMA specification:https://developer.mozilla.org/en-US/docs/Web/JavaScript/Language_Resources.
In computer science, scope is the region of a computer program where the binding or association of a name to an entity, such as a variable or function, is valid. JavaScript has the following two distinct types of scope:
Function scope
Block scope
Until ES6, function scope was the only form of scope in JavaScript; all variable and function declarations followed function scope rules. Block scope was introduced in ES6 and is used only by the variables declared with the new variable declaration keywords let and const. These keywords are discussed in detail in the Declaring Variables section.
Function scope in JavaScript is created inside functions. When a function is declared, a new scope block is created inside the body of that function. Variables that are declared inside the new function scope cannot be accessed from the parent scope; however, the function scope has access to variables in the parent scope.
To create a variable with function scope, we must declare the variable with the var keyword. For example:
var example = 5;
The following snippet provides an example of function scope:
var example = 5;
function test() {
  var testVariable = 10;
  console.log( example ); // Expect output: 5
  console.log( testVariable ); // Expect output: 10
}
test();
console.log( testVariable ); // Expect reference error
Snippet 1.1: Function Scope
Parent scope is simply the scope of the section of code that the function was defined in. This is usually the global scope; however, in some cases, it may be useful to define a function inside a function. In that case, the nested function's parent scope would be the function in which it is defined. In the preceding snippet, the function scope is the scope that was created inside the function test. The parent scope is the global scope, that is, where the function is defined.
When a variable is created with function scope, it's declaration automatically gets hoisted to the top of the scope. Hoisting means that the interpreter moves the instantiation of an entity to the top of the scope it was declared in, regardless of where in the scope block it is defined. Functions and variables declared using var are hoisted in JavaScript; that is, a function or a variable can be used before it has been declared. The following code demonstrates this, as follows:
example = 5; // Assign value
console.log( example ); // Expect output: 5
var example; // Declare variable
Snippet 1.2: Function Scope Hoisting
Note
Since a hoisted variable that's been declared with var can be used before it is declared, we have to be careful to not use that variable before it has been assigned a value. If a variable is accessed before it has been assigned a value, it will return the value as undefined, which can cause problems, especially if variables are used in the global scope.
A new block scope in JavaScript is created with curly braces ({}). A pair of curly braces can be placed anywhere in the code to define a new scope block. If statements, loops, functions, and any other curly brace pairs will have their own block scope. This includes floating curly brace pairs not associated with a keyword (if, for, etc). The code in the following snippet is an example of the block scope rules:
// Top level scope
function scopeExample() {
  // Scope block 1
  for ( let i = 0; i < 10; i++ ){ /* Scope block 2 */ }
  if ( true ) { /* Scope block 3 */ } else {  /* Scope block 4 */ }
  // Braces without keywords create scope blocks
  { /* Scope block 5 */ }
  // Scope block 1
}
// Top level scope
Snippet 1.3: Block Scope
Variables declared with the keywords let and const have block scope. When a variable is declared with block scope, it does NOT have the same variable hoisting as variables that are created in function scope. Block scoped variables are not hoisted to the top of the scope and therefore cannot be accessed until they are declared. This means that variables that are created with block scope are subject to the Temporal Dead Zone (TDZ). The TDZ is the period between when a scope is entered and when a variable is declared. It ends when the variable is declared rather than assigned. The following example demonstrates the TDZ:
// console.log( example ); // Would throw ReferenceError
let example;
console.log( example ); // Expected output: undefined
example = 5;
console.log( example ); // Expected output: 5
Snippet 1.4: Temporal Dead Zone
Note
If a variable is accessed inside the Temporal Dead Zone, then a runtime error will be thrown. This is important because it allows our code to be built more robustly with fewer semantic errors arising from variable declaration.
To get a better understanding of scope blocks, refer to the following table:

Figure 1.1: Function Scope versus Block Scope
In summary, scope provides us with a way to separate variables and restrict access between blocks of code. Variable identifier names can be reused between blocks of scope. All new scope blocks that are created can access the parent scope, or the scope in which they were created or defined. JavaScript has two types of scope. A new function scope is created for each function defined. Variables can be added to function scope with the var keyword, and these variables are hoisted to the top of the scope. Block scope is a new ES6 feature. A new block scope is created for each set of curly braces. Variables are added to block scope with the let and const keywords. The variables that are added are not hoisted and are subject to the TDZ.
To implement block scope principles with variables, perform the following steps:
Create a function called
fn1as shown (function fn1()).Log the string as
scope 1.Create a variable called
scopewith the value of 5.Log the value of the variable called
scope.Create a new block scope inside of the function with curly braces (
{}).Inside the new scope block, log the string called
scope 2.Create a new variable called
scope, inside the scope block and assign the valuedifferent scope.Log the value variable
scopeinside our block scope (scope 2).Outside of the block scope defined in step 5 (scope 2), create a new block scope (use curly braces).
Log the string called
scope 3.Create a variable inside the scope block (scope 3) with the same name as the variables (call it
scope) and assign it the valuea third scope.Log the new variable's value.
Call
fn1and observe its output
Code
index.js:function fn1(){
console.log('Scope 1');
let scope = 5;
console.log(scope);
{
console.log('Scope 2');
let scope = 'different scope';
console.log(scope);
}
{
console.log('Scope 3');
let scope = 'a third scope';
console.log(scope);
}
}
fn1();Snippet 1.5: Block implementation output
Outcome

Figure 1.2: Scope outputs
You have successfully implemented block scope in JavaScript.
In this section, we covered the two types of JavaScript scope, function and block scope, and the differences between them. We demonstrated how a new instance of function scope was created inside each function and how block scope was created inside each set of curly braces. We discussed the variable declaration keywords for each type of scope, var for function scope and let/const for block scope. Finally, we covered the basics of hoisting with both function and block scope.
Basic JavaScript uses the keyword var for variable declaration. ECMAScript 6 introduced two new keywords to declare variables; they are let and const. In the world of Professional JavaScript variable declaration, var is now the weakest link. In this topic, we will go over the new keywords, let and const, and explain why they are better than var.
The three ways to declare variables in JavaScript are by using var, let, and const. All function in slightly different ways. The key differences between the three variable declaration keywords are the way they handle variable reassignment, variable scope, and variable hoisting. These three features can be explained briefly as follows:
Variable reassignment: The ability to change or reassign the variable's value at any time.
Variable scope: The extent or area of the code from which the variable may be accessed.
Variable hoisting: The variable instantiation and assignment time in relation to the variable's declaration. Some variables can be used before they are declared.
The var keyword is the older variable declaration keyword that's used to declare variables in JavaScript. All variables created with var can be reassigned, have function scope, and have variable hoisting. This means that variables created with var are hoisted to the top of the scope block, where they are defined and can be accessed before declaration. The following snippet demonstrates this, as follows:
// Referenced before declaration
console.log( example ); // Expect output: undefined
var example = 'example';
Snippet 1.6: Variables created using var are hoisted
Since variables that are created with the keyword var are not constants, they can be created, assigned, and reassigned a value at will. The following code demonstrates this aspect of the functionality of var:
// Declared and assigned
var example = { prop1: 'test' };
console.log( 'example:', example );
// Expect output: example: {prop1: "test"}
// Value reassigned
example = 5;
console.log( example ); // Expect output: 5
Snippet 1.7: Variables created using var are not constant
Variables created with var can be reassigned at any time and once the variable is created, it can be accessed from anywhere in the function, even before the original declaration point.
The let keyword functions similar to the keyword var. As expected, the keyword let allows us to declare a variable that can be reassigned at any time. This is shown in the following code:
// Declared and initialized
let example = { prop1: 'test' };
console.log( 'example:', example );
// Expect output: example: {prop1: 'test"}
// Value reassigned
example = 5;
console.log( example ); // Expect output: 5
Snippet 1.8: Variables created with let are not constant
There are two significant differences between let and var. Where let and var differ is their scoping and variable hoisting properties. Variables declared with let are scoped at the block level; that is, they are only defined in the block of code contained within a matching pair of curly braces ({}).
Variables declared with let are not subject to variable hoisting. This means that accessing a variable declared with let before the assignment will throw a runtime error. As discussed earlier, this is the Temporal Dead Zone. An example of this is shown in the following code:
// Referenced before declaration
console.log( example );
// Expect ReferenceError because example is not defined
let example = 'example';
Snippet 1.9: Variables created with let are not hoisted
The last variable declaration keyword is const. The const keyword has the same scoping and variable hoisting rules as the let keyword; variables declared with const have block scoping and do not get hoisted to the top of the scope. This is shown in the following code:
// Referenced before declaration
console.log( example );
// Expect ReferenceError because example is not defined
const example = 'example';
Snippet 1.10: Variables created with const are not hoisted
The key difference between const and let is that const signifies that the identifier will not be reassigned. The const identifier signifies a read-only reference to a value. In other words, the value written in a const variable cannot be changed. If the value of a variable initialized with const is changed, a TypeError will be thrown.
Even though variables created with const cannot be reassigned, this does not mean that they are immutable. If an array or object is stored in a variable declared with const, the value of the variable cannot be overwritten. However, the array content or object properties can be changed. The contents of an array can be modified with functions such as push(), pop(), or map() and object properties can be added, removed, or updated. This is shown in the following code:
// Declared and initialized
const example = { prop1: 'test' };

// Variable reassigned
example = 5;
// Expect TypeError error because variable was declared with const

// Object property updated
example.prop1 = 5;
// Expect no error because subproperty was modified
Snippet 1.11: Variables created with const are constant but not immutable
To understand the different keywords in more detail, refer to the following table:

Figure 1.3: Differences between var, let, and const
Now that we understand the nuances among var, let, and const, we can decide on which one to use. In the professional world, we should always use let and const, because they provide all the functionality of var and allow the programmer to be specific and restrictive with the variable scope and usage.
In summary, var, let, and const all function similarly. The key differences are in the nature of const, the scope, and the hoisting. Var is function scoped, not constant, and hoisted to the top of the scope block. let and const are both block-scoped and not hoisted. let is not constant, while, const is constant but immutable.
To utilize the var, const, and let variable declaration keywords for variable hoisting and reassignment properties, perform the following steps:
Log the string
Hoisted before assignment:and the value of thehoistedvariable.Define a variable called
hoistedwith the keywordvarand assign it the valuethis got hoisted.Log the string
hoisted after assignment:and the value of thehoistedvariable.Create a try-catch block.
Inside the
tryblock, log the value of the variable callednotHoisted1.Inside the
catchblock, give the catch block theerrparameter, then log the stringNot hoisted1 with error:and the value oferr.message.After the try-catch block, create the
notHoisted1variable with theletkeyword and assign the value5.Log the string
notHoisted1 after assignmentand the value ofnotHoisted1.Create another try-catch block.
Inside the
tryblock, log the value of thenotHoisted2variable.Inside the catch block, give the catch block the
errparameter, then log the stringNot hoisted2 with error:and the value oferr.message.After the second try-catch block, create the
notHoisted2variable with the keywordconstand assign the value [1,2,3].Log the string
notHoisted2 after assignmentand the value ofnotHoisted2.Define a final try catch block.
Inside the
tryblock, reassignnotHoisted2to thenew valuestring.Inside the catch block, give the catch block the
errparameter, then log the stringNot hoisted 2 was not able to be changed.After the try-catch block, push the value
5onto the array innotHoisted2.Log the string
notHoisted2 updated. Now is:and the value ofnotHoisted2.
Code
index.js:var hoisted = 'this got hoisted';
try{
console.log(notHoisted1);
} catch(err){}
let notHoisted1 = 5;
try{
console.log(notHoisted2);
} catch(err){}
const notHoisted2 = [1,2,3];
try{
notHoisted2 = 'new value';
} catch(err){}
notHoisted2.push(5);Snippet 1.12: Updating the contents of the object
Outcome

Figure 1.4: Hoisting the variables
You have successfully utilized keywords to declare variables.
In this section, we discussed variable declaration in ES6 and the benefits of using the let and const variable declaration keywords over the var variable declaration keyword. We discussed each keywords variable reassignment properties, variable scoping, and variable hoisting properties. The keywords let and const are both create variables in the block scope where var creates a variable in the function scope. Variables created with var and let can be reassigned at will. However, variables created with const cannot be reassigned. Finally, variables created with the keyword var are hoisted to the top of the scope block in which they were defined. Variables created with let and const are not hoisted.
Arrow functions, or Fat arrow functions, are a new way to create functions in ECMAScript 6. Arrow functions simplify function syntax. They are called fat arrow functions because they are denoted with the characters =>, which, when put together look like a fat arrow. Arrow functions in JavaScript are frequently used in callback chains, promise chains, array methods, in any situation where unregistered functions would be useful.
The key difference between arrow functions and normal functions in JavaScript is that arrow functions are anonymous. Arrow functions are not named and not bound to an identifier. This means that an arrow function is created dynamically and is not given a name like normal functions. Arrow functions can however be assigned to a variable to allow for reuse.
When creating an arrow function, all we need to do is remove the function keyword and place an arrow between the function arguments and function body. Arrow functions are denoted with the following syntax:
( arg1, arg2, ..., argn ) => { /* Do function stuff here */ }Snippet 1.13: Arrow function syntax
As you can see from the preceding syntax, arrow functions are a more concise way of writing functions in JavaScript. They can make our code more concise and easier to read.
Arrow function syntax can also vary, depending on several factors. Syntax can vary slightly depending on the number of arguments passed in to the function, and the number of lines of code in the function body. The special syntax conditions are outlined briefly in the following list:
Single input argument
No input arguments
Single line function body
Single expression broken over multiple lines
Object literal return value
To demonstrate the simplified syntax by converting a standard function into an arrow function, perform the following steps:
Create a function that takes in parameters and returns the sum of the two parameters. Save the function into a variable called
fn1.Convert the function you just created to an arrow function and save into another variable called
fn2.To convert the function, remove the
functionkeyword. Next, place an arrow between the function arguments and the function body.Call both functions and compare the output.
Code
index.js:const fn1 = function( a, b ) { return a + b; };
const fn2 = ( a, b ) => { return a + b; };
console.log( fn1( 3 ,5 ), fn2( 3, 5 ) );Snippet 1.14: Calling the functions
Outcome

Figure 1.5: Comparing the function's output
You have successfully converted normal functions into arrow functions.
If there are multiple arguments being passed in to the function, then we create the function with the parentheses around the arguments as normal. If we only have a single argument to pass to the function, we do not need to include the parentheses around the argument.
There is one exception to this rule, and that is if the parameter is anything other than a simple identifier. If we include a default value or perform operations in the function arguments, then we must include the parentheses. For example, if we include a default parameter, then we will need the parentheses around the arguments. These two rules are shown in the following code:
// Single argument arrow function
arg1 => { /* Do function stuff here */ }

// Non simple identifier function argument
( arg1 = 10 ) => { /* Do function stuff here */ }
Snippet 1.15: Single argument arrow function
If we create an arrow function with no arguments, then we need to include the parentheses, but they will be empty. This is shown in the following code:
// No arguments passed into the function
( ) => { /* Do function stuff here */ }
Snippet 1.16: No argument
Arrow functions can also have varied syntax, depending on the body of the function. As expected, if the body of the function is multiline, then we must surround it with curly braces. However, if the body of the function is a single line, then we do not need to include the curly braces around the body of the function. This is shown in the following code:
// Multiple line body arrow function
( arg1, arg2 ) => {
  console.log( `This is arg1: ${arg1}` );
  console.log( `This is arg2: ${arg2}` );
  /* Many more lines of code can go here */
}

// Single line body arrow function
( arg1, arg2 ) => console.log( `This is arg1: ${arg1}` )
Snippet 1.17: Single line body
When using arrow functions, we may also exclude the return keyword if the function is a single line. The arrow function automatically returns the resolved value of the expression on that line. This syntax is shown in the following code:
// With return keyword - not necessary
( num1, num2 ) => { return ( num1 + num2 ) }
// If called with arguments num1 = 5 and num2 = 5, expected output is 10

// Without return keyword or braces
( num1, num2 ) => num1 + num2
// If called with arguments num1 = 5 and num2 = 5, expected output is 10
Snippet 1.18: Single line body when value is returned
Since arrow functions with single expression bodies can be defined without the curly braces, we need special syntax to allow us to split the single expression over multiple lines. To do this, we can wrap the multi-line expression in parentheses. The JavaScript interpreter sees that the line are wrapped in parentheses and treats it as if it were a single line of code. This is shown in the following code:
// Arrow function with a single line body
// Assume numArray is an array of numbers
( numArray ) => numArray.filter( n => n > 5).map( n => n - 1 ).every( n => n < 10 )

// Arrow function with a single line body broken into multiple lines
// Assume numArray is an array of numbers
( numArray ) => (
  numArray.filter( n => n > 5)
          .map( n => n - 1 )
          .every( n => n < 10 )
)
Snippet 1.19: Single line expression broken into multiple lines
If we have a single line arrow function returning an object literal, we will need special syntax. In ES6, scope blocks, function bodies, and object literals are all defined with curly braces. Since single line arrow functions do not need curly braces, we must use the special syntax to prevent the object literal's curly braces from being interpreted as either function body curly braces or scope block curly braces. To do this, we surround the returned object literal with parentheses. This instructs the JavaScript engine to interpret curly braces inside the parentheses as an expression instead of a function body or scope block declaration. This is shown in the following code:
// Arrow function with an object literal in the body
( num1, num2 ) => ( { prop1: num1, prop2: num2 } ) // Returns an object
Snippet 1.20: Object literal return value
When using arrow functions, we must be careful of the scope that these functions are called in. Arrow functions follow normal scoping rules in JavaScript, with the exception of the this scope. Recall that in basic JavaScript, each function is assigned a scope, that is, the this scope. Arrow functions are not assigned a this scope. They inherit their parent's this scope and cannot have a new this scope bound to them. This means that, as expected, arrow functions have access to the scope of the parent function, and subsequently, the variables in that scope, but the scope of this cannot be changed in an arrow function. Using the .apply(), .call(), or .bind() function modifiers will NOT change the scope of an arrow function's this property. If you are in a situation where you must bind this to another scope, then you must use a normal JavaScript function.
In summary, arrow functions provide us with a way to simplify the syntax of anonymous functions. To write an arrow function, simply omit the function keyword and add an arrow between the arguments and function body.
Special syntax can then be applied to the function arguments and body to simplify the arrow function even more. If the function has a single input argument, then we can omit the parentheses around it. If the function body has a single line, we can omit the return keyword and the curly braces around it. However, single-line functions that return an object literal must be surrounded with parentheses.
We can also use parentheses around the function body to break a single line body into multiple lines for readability.
To utilize the ES6 arrow function syntax to write functions, perform the following steps:
Refer to the
exercises/exercise4/exercise.jsfile and perform the updates in this file.Convert
fn1with basic ES6 syntax.Remove the function keyword before the function arguments. Add an arrow between the function arguments and function body.
Convert
fn2with single statement function body syntax.Remove the function keyword before the function arguments. Add an arrow between the function arguments and function body.
Remove the curly braces
({})around the function body. Remove the return keyword.Convert
fn3with Single input argument syntax.Remove the function keyword before the function arguments. Add an arrow between the function arguments and function body.
Remove the parentheses around the function input argument.
Convert
fn4with no input argument syntax.Remove the function keyword before the function arguments. Add an arrow between the function arguments and function body.
Convert
fn5with object literal syntax.Remove the function keyword before the function arguments. Add an arrow between the function arguments and function body.
Remove the curly braces
({})around the function body. Remove the return keyword.Surround the returned object with parentheses.
Code
index.js:let fn1 = ( a, b ) => { … };
let fn2 = ( a, b ) => a * b;
let fn3 = a => { … };
let fn4 = () => { … };
let fn5 = ( a ) => ( … );Snippet 1.21: Arrow function conversion
Outcome

Figure 1.6: Converting the function's output
You have successfully utilized the ES6 arrow function syntax to write functions.
In this section, we introduced arrow functions and demonstrated how they can be used to greatly simplify function declaration in JavaScript. First, we covered the basic syntax for arrow functions: ( arg1, arg2, argn ) => { /* function body */ }. We proceeded to cover the five special syntax cases for advanced arrow functions, as outlined in the following list:
Single input argument:
arg1 => { /* function body */ }No input arguments:
( ) => { /* function body */ }Single line function body:
( arg1, arg2, argn ) => /* single line */Single expression broken over multiple lines:
( arg1, arg2, argn ) => ( /* multi line single expression */ )Object literal return value:
( arg1, arg2, argn ) => ( { /* object literal */ } )
Template literals are a new form of string that was introduced in ECMAScript 6. They are enclosed by the backtick symbol (``) instead of the usual single or double quotes. Template literals allow you to embed expressions in the string that are evaluated at runtime. Thus, we can easily create dynamic strings from variables and variable expressions. These expressions are denoted with the dollar sign and curly braces (${ expression }). The template literal syntax is shown in the following code:
const example = "pretty";
console.log( `Template literals are ${ example } useful!!!` );
// Expected output: Template literals are pretty useful!!!
Snippet 1.22: Template literal basic syntax
Template literals are escaped like other strings in JavaScript. To escape a template literal, simply use a backslash (\) character. For example, the following equalities evaluate to true: `\`` === "`",`\t` === "\t", and `\n\r` === "\n\r".
Template literals allow for multiline strings. Any newline characters that are inserted into the source are part of the template literal and will result in a line break in the output. In simpler terms, inside a template literal, we can press the Enter key on the keyboard and split it on to two lines. This newline character in the source code will be parsed as part of the template literal and will result in a newline in the output. To replicate this with normal strings, we would have to use the \n character to generate a new line. With template literals, we can break the line in the template literal source and achieve the same expected output. An example of this is shown in the following code:
// Using normal strings
console.log( 'This is line 1\nThis is line 2' );
// Expected output: This is line 1
// This is line 2

// Using template literals
console.log( `This is line 1
This is line 2` );
// Expected output: This is line 1
// This is line 2
Snippet 1.23: Template literal multi-line syntax
To convert standard string objects to template literals to demonstrate the power of template literal expressions, perform the following steps:
Create two variables,
aandb, and save numbers into them.Log the sum of
aandbin the formata + bis equal to<result>using normal strings.Log the sum of
aandbin the formata + bis equal to<result>using a single template literal.
Code
index.js:
let a = 5, b = 10;
console.log( a + ' + ' + b + ' is equal to ' + ( a + b ) );
console.log( `${a} + ${b} is equal to ${a + b}` );
Snippet 1.24: Template literal and string comparison
Outcome

Figure 1.7: Logging the sum of the variable's output
You have successfully converted standard string objects to template literals.
Template literals allow for expression nesting, that is, new template literals can be put inside the expression of a template literal. Since the nested template literal is part of the expression, it will be parsed as a new template literal and will not interfere with the external template literal. In some cases, nesting a template literal is the easiest and most readable way to create a string. An example of template literal nesting is shown in the following code:
function javascriptOrCPlusPlus() { return 'JavaScript'; }
const outputLiteral = `We are learning about ${ `Professional ${ javascriptOrCPlusPlus() }` }`
Snippet 1.25: Template literal nesting
A more advanced form of template literals are tagged template literals. Tagged template literals can be parsed with a special function called tag functions, and can return a manipulated string or any other value. The first input argument of a tag function is an array containing string values. The string values represent the parts of the input string, broken at each template expression. The remaining arguments are the values of the template expressions in the string. Tag functions are not called like normal functions. To call a tag function, we omit the parentheses and any whitespace around the template literal argument. This syntax is shown in the following code:
// Define the tag function
function tagFunction( strings, numExp, fruitExp ) {
  const str0 = strings[0]; // "We have"
  const str1 = strings[1]; // " of "
  const quantity = numExp < 10 ? 'very few' : 'a lot';
  return str0 + quantity + str1 + fruitExp + str2;
}
const fruit = 'apple', num = 8;
// Note: lack of parenthesis or whitespace when calling tag function
const output = tagFunction`We have ${num} of ${fruit}. Exciting!`
console.log( output )
// Expected output: We have very few of apples. Exciting!!
Snippet 1.26: Tagged template literal example
A special property named raw is available for the first argument of a tagged template. This property returns an array that contains the raw, unescaped, versions of each part of the split template literal. This is shown in the following code:
function tagFunction( strings ){ console.log( strings.raw[0] ); }
tagFunction`This is line 1. \n This is line 2.`
// Expected output: "This is line 1. \n This is line 2." The characters //'\' and 'n' are not parsed into a newline character
Snippet 1.27: Tagged template raw property
In summary, template literals allow for the simplification of complicated string expressions. Template literals allow you to embed variables and complicated expressions into strings. Template literals can even be nested into the expression fields of other template literals. If a template literal is broken into multiple lines in the source code, the interpreter will interpret that as a new line in the string and insert one accordingly. Template literals also provide a new way to parse and manipulate strings with the tagged template function. These functions give you a way to perform complex string manipulation via a special function. The tagged template functions also give access to the raw strings as they were entered, ignoring any escape sequences.
You are building a website for a real estate company. You must build a function that takes in an object with property information and returns a formatted string that states the property owner, where the property is located (address), and how much they are selling it for (price). Consider the following object as input:
{
  address: '123 Main St, San Francisco CA, USA',
  floors: 2,
  price: 5000000,
  owner: 'John Doe'
}
Snippet 1.28: Object Input
To utilize a template literal to pretty-print an object, perform the following steps:
Create a function called
parseHousethat takes in an object.Return a template literal from the function. Using expressions, embed the owner, address, and price in the format
<Owner> is selling the property at <address> for <price>.Create a variable called
houseand save the following object into it:{ address: "123 Main St, San Francisco CA, USA", floors: 2, price: 5000000, owner: "John Doe" }Call the
parseHousefunction and pass in thehousevariable.Log the output.
Code
index.js:function parseHouse( property ) {
return `${property.owner} is selling the property at ${property.address} for ${property.price} USD`
}
const house = {
address: "123 Main St, San Francisco CA, USA",
floors: 2,
price: 5000000,
owner: "John Doe"
};
console.log( parseHouse( house ) );Snippet 1.29: Template literal using expressions
Outcome

Figure 1.8: Template literal output
You have successfully utilized a template literal to pretty-print an object.
In this section, we covered template literals. Template literals upgrade strings by allowing us to nest expressions inside them that are parsed at runtime. Expressions are inserted with the following syntax: `${ expression }`. We then showed you how to escape special characters in template literals and discussed how in-editor newline characters in template literals are parsed as newline characters in the output. Finally, we covered template literal tagging and tagging functions, which allow us to perform more complex template literal parsing and creation.
ECMAScript 6 added several enhancements to object literals as part of the ES6 syntactic sugar. ES6 added three ways to simplify the creation of object literals. These simplifications include a more concise syntax for initializing object properties from variables, a more concise syntax for defining function methods, and computed object property names.
Note
Syntactic sugar is a syntax that is designed to make expressions easier to read and express. It makes the syntax "sweeter" because code can be expressed concisely.
The shorthand for initializing object properties allows you to make more concise objects. In ES5, we needed to define the object properties with a key name and a value, as shown in the following code:
function getPersionES5( name, age, height ) {
  return {
    name: name,
    age: age,
    height: height
  };
}
getPersionES5( 'Zachary', 23, 195 )
// Expected output: { name: 'Zachary', age: 23, height: 195 }
Snippet 1.30: ES5 object properties
Notice the repetition in the object literal returned by the function. We name the property in the object after variable name causing duplication (<code>name: name</code>). In ES6, we can shorthand each property and remove the repetition. In ES6, we can simply state the variable in the object literal declaration and it will create a property with a key that matches the variable name and a value that matches the variable value. This is shown in the following code:
function getPersionES6( name, age, height ) {
  return {
    name,
    age,
    height
  };
}
getPersionES6( 'Zachary', 23, 195 )
// Expected output: { name: 'Zachary', age: 23, height: 195 }
Snippet 1.31: ES6 object properties
As you can see, both the ES5 and ES6 examples output the exact same object. However, in a large object literal declaration, we can save a lot of space and repetition by using this new shorthand.
ES6 also added a shorthand for declaring function methods inside objects. In ES5, we had to state the property name, then define it as a function. This is shown in the following example:
function getPersonES5( name, age, height ) {
  return {
    name: name,
    height: height,

    getAge: function(){ return age; }
  };
}
getPersonES5( 'Zachary', 23, 195 ).getAge()
// Expected output: 23
Snippet 1.32: ES5 function properties
In ES6, we can define a function but with much less work. As with the property declaration, we don't need a key and value pair to create the function. The function name becomes the key name. This is shown in the following code:
function getPersionES6( name, age, height ) {
  return {
    name,
    height,

    getAge(){ return age; }
  };
}
getPersionES6( 'Zachary', 23, 195 ).getAge()
// Expected output: 23
Snippet 1.33: ES6 function properties
Notice the difference in the function declaration. We omit the function keyword and the colon after the property key name. Once again, this saves us a bit of space and simplifies things a little.
ES6 also added a new, efficient way to create property names from variables. This is through computed property notation. As we already know, in ES5, there is only one way to create a dynamic property whose name is specified by a variable; this is through bracket notation, that is, : obj[ expression ] = 'value' . In ES6, we can use this same type of notation during the object literal's declaration. This is shown in the following example:
const varName = 'firstName';
const person = {
  [ varName ] = 'John',
  lastName: 'Smith'
};
console.log( person.firstName ); // Expected output: John
Snippet 1.34: ES6 Computed property
As we can see from the preceding snippet, the property name of varName was computed to be firstName. When accessing the property, we simply reference it as person.firstName. When creating computed properties in object literals, the value that's computed in the brackets does not need to be a variable; it can be almost any expression, even a function. An example of this is shown in the following code:
const varName = 'first';
function computeNameType( type ) {
  return type + 'Name';
}

const person = {
  [ varName + 'Name' ] = 'John',
  [ computeNameType( 'last' ) ]: 'Smith'
};

console.log( person.firstName ); // Expected output: John
console.log( person.lastName ); // Expected output: Smith
Snippet 1.35: Computed property from function
In the example shown in the preceding snippet, we created two variables. The first contains the string first and the second contains a function that returns a string. We then created an object and used computed property notation to create dynamic object key names. The first key name is equal to firstName. When person.firstName is accessed, the value that was saved will be returned. The second key name is equal to lastName. When person.lastName is accessed, the value that was saved will be returned.
In summary, ES6 added three ways to simplify the declaration of object literals, that is, property notation, function notation, and computed properties. To simplify property creation in objects, when properties are created from variables, we can omit the key name and the colon. The name property that's created is set to the variable name and the value is set to the value of the variable. To add a function as a property to an object, we can omit the colon and function keyword. The name of the property that's created is set to the function name and the value of the property is the function itself. Finally, we can create property names from computed expressions during the declaration of the object literal. We simply replace the key name with the expression in brackets. These three simplifications can save us space in our code and make object literal creation easier to read.
You are building a simple JavaScript math package to publish to Node Package Manager (NPM). Your module will export an object that contains several constants and functions. Using ES6 syntax, create the export object with the following functions and values: the value of pi, the ratio to convert inches to feet, a function that sums two arguments, and a function that subtracts two arguments. Log the object after it has been created.
To create objects using ES6 enhanced object properties and demonstrate the simplified syntax, perform the following steps:
Create an object and save it into the
exportObjectvariable.Create a variable called
PIthat contains the value of pi (3.1415).Create a variable called
INCHES_TO_FEETand save the value of the inches to feet conversion ratio (0.083333).Using ES6 enhanced property notation, add a property called
PIfrom the variable PI. Add a property calledINCHES_TO_FEETfrom theINCHES_TO_FEETvariable, which contains the inches to feet conversion ratio.Add a function property called
sumthat takes in two input arguments and returns the sum of the two input arguments.Add a function property called
subtractthat takes in two input arguments and returns the subtraction of the two input arguments.Log the object
exportObject.
Code
index.js:const PI = 3.1415;
const INCHES_TO_FEET = 0.083333;
const exportObject = {
PI,
INCHES_TO_FEET,
sum( n1, n2 ) {
return n1 + n2;
},
subtract( n1, n2 ) {
return n1 - n2;
}
};
console.log( exportObject );Snippet 1.36: Enhanced object properties
Outcome

Figure 1.9: Enhanced object properties output
You have successfully created objects using ES6 enhanced object properties.
In this section, we showed you enhanced object properties, a syntactic sugar to help condense object property creation into fewer characters. We covered the shorthand for initializing object properties from variables and functions, and we covered the advanced features of computed object properties, that is, a way to create an object property name from a computed value, inline, while defining the object.
Destructuring assignment is syntax in JavaScript that allows you to unpack values from arrays or properties from objects, and save them into variables. It is a very handy feature because we can extract data directly from arrays and objects to save into variables, all on a single line of code. It is powerful because it enables us to extract multiple array elements or object properties in the same expression.
Array destructuring allows us to extract multiple array elements and save them into variables. In ES5, we do this by defining each variable with its array value, one variable at a time. This makes the code lengthy and increases the time required to write it.
In ES6, to destructure an array, we simply create an array containing the variable to assign data into, and set it equal to the data array being destructured. The values in the array are unpacked and assigned to the variables in the left-hand side array from left to right, one variable per array value. An example of basic array destructuring is shown in the following code:
let names = [ 'John', 'Michael' ];
let [ name1, name2 ] = names;

console.log( name1 ); // Expected output: 'John'
console.log( name2 ); // Expected output: 'Michael'
Snippet 1.37: Basic array destructuring
As can be seen in this example, we have an array of names and we want to destructure it into two variables, name1 and name2. We simply surround the variables name1 and name2 with brackets and set that expression equal to the data array names, and then JavaScript will destructure the names array, saving data into each of the variables.
The data is destructured from the input array into the variables from left to right, in the order of array items. The first index variable will always be assigned the first index array item. This leads to the question, what do we do if we have more array items than variables? If there are more array items than variables, then the remaining array items will be discarded and will not be destructured into variables. The destructuring is a one to one mapping in array order.
What about if there are more variables than array items? If we attempt to destructure an array into an array that contains more variables than the total number of array elements in the data array, some of the variables will be set to undefined. The array is destructured from left to right. Accessing a non-existent element in a JavaScript array results in an undefined value to be returned. This undefined value is saved to the leftover variables in the variable array. An example of this is shown in the following code:
let names = [ 'John', 'Michael' ];
let [ name1 ] = names
let [ name2, name3, name4 ] = names;

console.log( name1 ); // Expected output: 'John'
console.log( name2 ); // Expected output: 'John'
console.log( name3 ); // Expected output: 'Michael'
console.log( name4 ); // Expected output: undefined
Snippet 1.38: Array destructuring with mismatched variable and array items
Note
We must be careful when destructuring arrays to make sure that we don't unintentionally assume that a variable will contain a value. The value of the variable could be set to undefined if the array is not long enough.
ES6 array destructuring allows for skipping array elements. If we have an array of values and we only care about the first and third values, we can still destructure the array. To ignore a value, simply omit the variable identifier for that array index in the left-hand side of the expression. This syntax can be used to ignore a single item, multiple items, or even all the items in an array. Two examples of this are shown in the following snippet:
let names = [ 'John', 'Michael', 'Jessica', 'Susan' ];
let [ name1,, name3 ] = names;
// Note the missing variable name for the second array item
let [ ,,, ] = names; // Ignores all items in the array

console.log( name1 ); // Expected output: 'John'
console.log( name3 ); // Expected output: 'Jessica'
Snippet 1.39: Array destructuring with skipped values
Another very useful feature of array destructuring is the ability to set default values for variables that are created with destructuring. When we want to add a default value, we simply need to set the variable equal to the desired default value in the left-hand side of the destructuring expression. If what we are destructuring does not contain an index to assign to the variable, then the default value will be used instead. An example of this is shown in the following code:
let [ a = 1, b = 2, c = 3 ] = [ 'cat', null ];
console.log( a ); // Expected output: 'cat'
console.log( b ); // Expected output: null
console.log( c ); // Expected output: 3
Snippet 1.40: Array destructuring with skipped values
Finally, array destructuring can be used to easily swap values of variables. If we wish to swap the value of two variables, we can simply destructure an array into the reversed array. We can create an array containing the variables we want to reverse and set it equal to the same array, but with the variable order changed. This will cause the references to be swapped. This is shown in the following code:
let a = 10;
let b = 5;
[ a, b ] = [ b, a ];
console.log( a ); // Expected output: 5
console.log( b ); // Expected output: 10
Snippet 1.41: Array destructuring with skipped values
To extract values from an array using array destructuring assignment, perform the following steps:
Create an array with three values,
1,2, and3, and save it into a variable calleddata.Destructure the array created with a single expression.
Destructure the first array value into a variable called
a. Skip the second value of the array.Destructure the third value into a variable called
b. Attempt to destructure a fourth value into a variable calledcand provide a default value of4.Log the value of all of the variables.
Code
index.js:const data = [ 1, 2, 3 ]; const [ a, , b, c = 4 ] = data; console.log( a, b, c );
Snippet 1.42: Array destructuring
Outcome

Figure 1.10: Destructured variable's output
You have successfully applied an array destructuring assignment to extract values from an array.
In summary, array destructuring allows us to quickly extract values from arrays and save them into variables. Variables are assigned to array values, item by item, from left to right. If the number of variables exceeds the number of array items, then the variables are set to undefined, or the default value if specified. We can skip an array index in the destructuring by leaving a hole in the variables array. Finally, we can use destructuring assignment to quickly swap the values of two or more variables in a single line of code.
ES6 also introduces two new operators for arrays called rest and spread. The rest and spread operators are both denoted with three ellipses or periods before an identifier ( ...array1 ). The rest operator is used to represent an infinite number of arguments as an array. The spread operator is used to allow an iterable object to be expanded into multiple arguments. To identify which is being used, we must look at the item that the argument is being applied to. If the operator is applied to an iterable object (array, object, and so on), then it is the spread operator. If the operator is applied to function arguments, then it is the rest operator.
Note
In JavaScript, something considered iterable if something (generally values or key/value pairs) can be stepped through one at a time. For example, an array is iterable because the items in the array can be stepped through one at a time. Objects are considered iterable because the key/value pairs can be stepped through one at a time.
The rest operator is used to represent an indefinite number of arguments as an array. When the last parameter of a function is prefixed with the three ellipses, it becomes an array. The array elements are supplied by the actual arguments that are passed into the function, excluding the arguments that already have been given a separate name in the formal declaration of the function. An example of rest destructuring is shown in the following code:
function fn( num1, num2, ...args ) {
  // Destructures an indefinite number of function parameters into the
//array args, excluding the first two arguments passed in.
  console.log( num1 );
  console.log( num2 );
  console.log( args );
}
fn( 1, 2, 3, 4, 5, 6 );
// Expected output
// 1
// 2
// [ 3, 4, 5, 6 ]
Snippet 1.43: Array destructuring with skipped values
Similar to the arguments object of a JavaScript function, the rest operator contains a list of function arguments. However, the rest operator has three distinct differences from the arguments object. As we already know, the arguments object is an array-like object that contains each argument that's passed into the function. The differences are as follows. First, the rest operator contains only the input parameters that have not been given a separate formal declaration in the function expression.
Second, the arguments object is not an instance of an Array object. The rest parameter is an instance of an array, which means that array functions like sort(), map(), and forEach() can be applied to them directly.
Lastly, the arguments object has special functionality that the rest parameter does not have. For example, the caller property exists on the arguments object.
The rest parameter can be destructured similar to how we destructure an array. Instead of putting a single variable name inside before the ellipses, we can replace it with an array of variables we want to fill. The arguments passed into the function will be destructured as expected for an array. This is shown in the following code:
function fn( ...[ n1, n2, n3 ] ) {
  // Destructures an indefinite number of function parameters into the
// array args, which is destructured into 3 variables
  console.log( n1, n2, n3 );
}

fn( 1, 2 ); // Expected output: 1, 2, undefined
Snippet 1.44: Destructured rest operator
The spread operator allows an iterable object such as an array or string to be expanded into multiple arguments (for function calls), array elements (for array literals), or key-value pairs (for object expressions). This essentially means that we can expand an array into arguments for creating another array, object, or calling a function. An example of spread syntax is shown in the following code:
function fn( n1, n2, n3 ) {
  console.log( n1, n2, n3 );
}

const values = [ 1, 2, 3 ];
fn( ...values ); // Expected output: 1, 2, 3
Snippet 1.45: Spread operator
In the preceding example, we created a simple function that takes in three inputs and logs them to the console. We created an array with three values, then called the function using the spread operator to destructure the array of values into three input parameters for the function.
The rest operator can be used in destructuring objects and arrays. When destructuring an array, if we have more array elements than variables, we can use the rest operator to capture, or catch, all of the additional array elements during destructuring. When using the rest operator, it must be the last parameter in the array destructuring or function arguments list. This is shown in the following code:
const [ n1, n2, n3, ...remaining ] = [ 1, 2, 3, 4, 5, 6 ];
console.log( n1 ); // Expected output: 1
console.log( n2 ); // Expected output: 2
console.log( n3 ); // Expected output: 3
console.log( remaining ); // Expected output: [ 4, 5, 6 ]
Snippet 1.46: Spread operator
In the preceding snippet, we destructured the first three array elements into three variables, n1, n2, and n3. We then captured the remaining array elements with the rest operator and destructured them into the variable that remained.
In summary, the rest and spread operators allow iterable entities to be expanded into many arguments. They are denoted with three ellipses before the identifier name. This allows us to capture arrays of arguments in functions or unused items when destructuring entities. When we use the rest and spread operators, they must be the last arguments that are passed into the expression they are being used in.
Object destructuring is used in a very similar way to array destructuring. Object destructuring is used to extract data from an object and assign the values to new variables. In ES6, we can do this in a single JavaScript expression. To destructure an object, we surround the variables we want to destructure with curly braces ({}), and set that expression equal to the object we are destructuring. A basic example of object destructuring is shown in the following code:
const obj = { firstName: 'Bob', lastName: 'Smith' };
const { firstName, lastName } = obj;

console.log( firstName ); // Expected output: 'Bob'
console.log( lastName ); // Expected output: 'Smith'
Snippet 1.47: Object destructuring
In the preceding example, we created an object with the keys firstName and lastName. We then destructured this object into the variables firstName and lastName. Notice that the names of the variables and the object parameters match. This is shown in the following example:
Note
When doing basic object destructuring, the name of the parameter in the object and the name of the variable we are assigning it to must match. If there is no matching parameter for a variable we are trying to destructure, then the variable will be set to undefined.
const obj = { firstName: 'Bob', lastName: 'Smith' };
const { firstName, middleName } = obj;

console.log( firstName ); // Expected output: 'Bob'
console.log( middleName ); // Expected output: undefined
Snippet 1.48: Object destructuring with no defined key
As we saw, the middleName key does not exist in the object. When we try to destructure the key and save it into the variable, it is unable to find a value and the variable is set to undefined.
With advanced object destructuring syntax, we can save the key that's extracted into a variable with a different name. This is done by adding a colon and the new variable name after the key name in the destructuring notation. This is shown in the following code:
const obj = { firstName: 'Bob', lastName: 'Smith' };
const { firstName: first, lastName } = obj;

console.log( first ); // Expected output: 'Bob'
console.log( lastName ); // Expected output: 'Smith'
Snippet 1.49: Object destructuring into new variable
In the preceding example, we could clearly see that we are destructuring the firstname key from the object and saving it into the new variable, called first. The lastName key is being destructured normally and is saved into a variable called lastName.
Much like with array destructuring, we can destructure an object and provide a default value. If a default value is provided and the key we are attempting to destructure does not exist in the object, then the variable will be set to the default value instead of undefined. This is shown in the following code:
const obj = { firstName: 'Bob', lastName: 'Smith' };
const { firstName = 'Samantha', middleName = 'Chris' } = obj;

console.log( firstName ); // Expected output: 'Bob'
console.log( middleName ); // Expected output: 'Chris'
Snippet 1.50: Object destructuring with default values
In the preceding example, we set the default values for both of the variables we are trying to destructure from the object. The default value for firstName is specified, but the firstName key exists in the object. This means that the value stored in the firstName key is destructured and the default value is ignored. The middleName key does not exist in the object and we have specified a default value to use when destructuring. Instead of using the undefined value of the firstName key, the destructuring assignment sets the destructured variable to the default value of Chris.
When we are providing a default value and assigning the key to a new variable name, we must put the default value assignment after the new variable name. This is shown in the following example:
const obj = { firstName: 'Bob', lastName: 'Smith' };
const { firstName: first = 'Samantha', middleName: middle = 'Chris' } = obj;

console.log( first ); // Expected output: 'Bob'
console.log( middle); // Expected output: 'Chris'
Snippet 1.51: Object destructuring into new variables with default values
The firstName key exists. The value of obj.firstName is saved into the new variable named first. The middleName key does not exist. This means that the new variable middle is created and set to the default value of Chris.
To extract data from an object by using object destructuring concepts, perform the following steps:
Create an object with the fields
f1,f2, andf3. Set the values tov1,v2, andv3, respectively. Save the object into thedatavariable.Destructure this object into variables with a single statement, as follows:
Destructure the
f1property into a variable namedf1.Destructure thef2property into a variable namedfield2.Destructure the propertyf4into a variable namedf4and provide a default value ofv4.Log the variables that are created.
Code
index.js:const data = { f1: 'v1', f2: '2', f3: 'v3' };
const { f1, f2: field2, f4 = 'v4' } = data;
console.log( f1, field2, f4 );Snippet 1.52: Object destructuring
Outcome

Figure 1.11: Created variable's output
You have successfully applied object destructuring concepts to extract data from an object.
JavaScript requires special syntax if we declare the variables before the object destructuring expression. We must surround the entire object destructuring expression with parentheses. This syntax is not required for array destructuring. This is shown in the following code:
const obj = { firstName: 'Bob', lastName: 'Smith' };
let firstName, lastName;

( { firstName: first, lastName } = obj );
// Note parentheses around expression

console.log( firstName ); // Expected output: 'Bob'
console.log( lastName ); // Expected output: 'Smith'
Snippet 1.53: Object destructuring into predefined variables
Note
Make sure that object destructuring done in this way is preceded by a semicolon on the same or previous line. This prevents the JavaScript interpreter from interpreting the parentheses as a function call.
The rest operator can also be used to destructure objects. Since object keys are iterable, we can use the rest operator to catch the remaining keys that were uncaught in the original destructuring expression. This is done similar to arrays. We destructure the keys that we want to capture, and then we can add the rest operator to a variable and catch the remaining key/value pairs that have not been destructured out of the object. This is shown in the following example:
const obj = { firstName: 'Bob', middleName: 'Chris', lastName: 'Smith' };
const { firstName, ...otherNames } = obj;
console.log( firstName ); // Expected output: 'Bob'
console.log( otherNames );
// Expected output: { middleName: 'Chris', lastName: 'Smith' }
Snippet 1.54: Object destructuring with the rest operator
In summary, object destructuring allows us to quickly extract values from objects and save them into variables. The key name must match the variable name in simple object destructuring, however we can use more advanced syntax to save the key's value into a new object. If a key is not defined in the object, then the variable will be set to false, that is, unless we provide it with a default value. We can save this into predefined variables, but we must surround the destructuring expression with parentheses. Finally, the rest operator can be used to capture the remaining key value pairs and save them in a new object.
Object and array destructuring support nesting. Nesting destructuring can be a little confusing, but it is a powerful tool because it allows us to condense several lines of destructuring code into a single line.
To destructure values from an array that's nested inside an object using the concept of nested destructuring, perform the following steps:
Create an object with a property,
arr, that is, set to an array containing the values1,2, and3. Save the object into thedatavariable.Destructure the second value of the array into a variable by doing the following:
Destructure the
arrproperty from the object and save it into a new variable calledv2, which is the array. Replacev2with array destructuring.In the array destructuring, skip the first element. Save the second element into a variable called
v2.Log the variable.
Code
index.js:const data = { arr: [ 1, 2, 3 ] };
const { arr: [ , v2 ] } = data;
console.log( v2 ); Snippet 1.55: Nested array and object destructuring
Outcome

Figure 1.12: Nested destructuring output
You have successfully destructured values from an array inside an object.
In summary, object and array destructuring was introduced into ES6 to cut down code and allow for the quick creation of variables from objects and arrays. Array destructuring is denoted by setting an array of variables equal to an array of items. Object destructuring is denoted by setting an object of variables equal to an object of key value pairs. Destructuring statements can be nested for even greater effect.
You have registered for university courses and need to buy the texts required for the classes. You are building a program to scrape data from the book list and obtain the ISBN numbers for each text book that's required. Use object and array nested destructuring to obtain the ISBN value of the first text of the first book in the courses array. The courses array follows the following format:
[
 {
   title: 'Linear Algebra II',
   description: 'Advanced linear algebra.',
   texts: [ {
     author: 'James Smith',
     price: 120,
     ISBN: '912-6-44-578441-0'
   } ]
 },
 { ... },
 { ... }
]
Snippet 1.56: Course array format
To obtain data from complicated array and object nesting by using nested destructuring, perform the following steps:
Save the provided data structure into the
courseCatalogMetadatavariable.Destructure the first array element into a variable called
course:[ course ] = [ … ]
Replace the
coursevariable with object destructuring to save the texts field into a variable calledtextbooks:[ { texts: textbooks} ] = [ … ]Replace the
textbooksvariable with array destructuring to get the first element of the texts array and save it into the variable calledtextbook:[ { texts: [ textbook ] } ] = [ … ]Replace the
textbookvariable with object destructuring to get theISBNfield and save it into theISBNvariable:[ { texts: [ { ISBN } ] } ] = [ … ]Log the value of the
ISBN.
Code
index.js:const courseCatalogMetadata = [
{
title: 'Linear Algebra II',
description: 'Advanced linear algebra.',
texts: [ {
author: 'James Smith',
price: 120,
ISBN: '912-6-44-578441-0'
} ]
}
];
const [ course ] = courseCatalogMetadata;
const [ { texts: textbooks } ] = courseCatalogMetadata;
const [ { texts: [ textbook ] } ] = courseCatalogMetadata;
const [ { texts: [ { ISBN } ] } ] = courseCatalogMetadata;
console.log( course );
console.log( textbooks );
console.log( textbook );
console.log( ISBN );Snippet 1.57: Implementing destructuring into code
Outcome

Figure 1.13: Array destructuring output
You have successfully obtained data from arrays and objects using destructuring and nested destructuring.
In this section, we discussed destructuring assignment for arrays and objects. We demonstrated how array and object destructuring simplifies code and allows us to quickly extract values from objects and arrays. Destructuring assignment allows us to unpack values from objects and arrays, provide default values, and rename object properties as variables when destructuring. We also introduced two new operators— the rest and spread operators. The rest operator was used to represent an indefinite number of arguments as an array. The spread operator was used to break an iterable object into multiple arguments.
Classes and Modules were added to ES6. Classes were introduced as a way to expand on prototype-based inheritance by adding some object oriented concepts. Modules were introduced as a way to organize multiple code files in JavaScript and expand on code reusability and scoping among files.
Classes were added to ECMAScript 6 primarily as syntactic sugar to expand on the existing prototype-based inheritance structure. Class syntax does not introduce object oriented inheritance to JavaScript. Class inheritance in JavaScript do not work like classes in object oriented languages.
In JavaScript, a class can be defined with the keyword class. A class is created by calling the keyword class, followed by the class name and curly braces. Inside the curly braces, we define all of the functions and logic for the class. The syntax is as follows:
class name { /* class stuff goes here */ }Snippet 1.58: Class syntax
A class can be created with the optional function constructor. The constructor, if not necessary for a JavaScript class, but there can only be one method with the name constructor in a class. The constructor is called when an instance of the class in initialized and can be used to set up all of the default internal values. An example of a class declaration is shown in the following code:
class House{
  constructor(address, floors = 1, garage = false) {
    this.address = address;
    this.floors = floors;
    this.garage = garage;
  }
}
Snippet 1.59: Basic class creation
In the example, we create a class called House. Our House class has a constructor method. When we instantiate the class, it calls the constructor. Our constructor method takes in three parameters, two of them with default values. The constructor saves these values to variables in the this scope.
The keyword this is mapped to each class instantiation. It is a global scope class object. It is used to scope all functions and variables globally inside a class. Every function that is added at the root of the class will be added to the this scope. All the variables that is added to the this scope will be accessible inside any function inside the class. Additionally, anything added to the this scope is accessible publicly outside of the class.
To create a simple class and demonstrate internal class variables, perform the following steps:
Declare a class called
Vehicle.Add a constructor function to the class. Have the constructor take in two variables,
wheelsandtopSpeed.In the constructor, save the input variables to two variables in the
thisscope, that is,this.wheelsandthis.topSpeed.Instantiate the class with
wheels = 3andtopSpeed = 20and save it into thetricyclevariable.Log the value for wheels and
topSpeedfrom the class that was saved intricycle.
Code
index.js:class Vehicle {
constructor( wheels, topSpeed ) {
this.wheels = wheels;
this.topSpeed = topSpeed;
}
}
const tricycle = new Vehicle( 3, 20 );
console.log( tricycle.wheels, tricycle.topSpeed );Snippet 1.60: Creating a class
Outcome

Figure 1.14: Creating classes output
You have successfully created a simple class with values.
We instantiated a new instance of a class with the new keyword. To create a new class, simply declare a variable and set it equal to the expression new className(). When we instantiate a new class, the parameters that are passed into the class call are passed into the constructor function, if one exists. An example of a class instantiation is shown in the following code:
class House{
  constructor(address, floors = 1) {
    this.address = address;
    this.floors = floors;
  }
}
// Instantiate the class
let myHouse = new House( '1100 Fake St., San Francisco CA, USA', 2, false );
Snippet 1.61: Class instantiation
In this example, the class instantiation happens on the line with the new keyword. This line of code creates a new instance of the House class and saves it into the myHouse variable. When we instantiate the class, we are providing the parameters for address, floors, and garage. These value are passed into the constructor and then saved into the instantiated class object.
To add functions to a class, we declare them with the new ES6 object function declaration. As a quick reminder, when using the new ES6 object function declaration, we can omit the function keyword and object key name. When a function is added to an object, it is automatically attached to the this scope. Additionally, all functions that are added to the class have access to the this scope and will be able to call any function and access any variable attached to the this scope. An example of this is shown in the following code:
class House{
  constructor( address, floors = 1) {
    this.address = address;
    this.floors = floors;
  }
  getFloors() {
    return this.floors;
  }
}
let myHouse = new House( '1100 Fake St., San Francisco CA, USA', 2 );
console.log( myHouse.getFloors() ); // Expected output: 2
Snippet 1.62: Creating a class with functions
As we can see from this example, the two functions getFloors and setFloors were added with the new ES6 enhanced object property syntax for function declarations. Both functions have access to the this scope. They can get and set variables in that scope, as well as call functions that have been attached to the this scope.
In ES6, we can also create subclasses using the extends keyword. Subclasses inherit properties and methods from the parent class. A subclass is defined by following the class name with the keyword extends and the name of the parent class. An example of a subclass declaration is shown in the following code:
class House {}
class Mansion extends House {}
Snippet 1.63: Extending a class
In this example, we will create a class called House, and then we will create a subclass called Mansion that extends the class House. When we create a subclass, we need to take note of the behavior of the constructor method. If we provide a constructor method, then we must call the super() function. super is a function that calls the constructor of the parent object. If we try to access the this scope without a call to call super, then we will get a runtime error and our code will crash. Any parameters that are required by the parent constructor can be passed in through the super method. If we do not specify a constructor for the subclass, the default constructor behavior will automatically call the super constructor. An example of this is shown in the following code:
class House {
  constructor( address = 'somewhere' ) {
    this.address = address;
  }
}
class Mansion extends House {
  constructor( address, floors ) {
    super( address );
    this.floors = floors;
  }
}
let mansion = new Mansion( 'Hollywood CA, USA', 6, 'Brad Pitt' );
console.log( mansion.floors ); // Expected output: 6
Snippet 1.64: Extending a class with and without a constructor
In this example, we created a subclass that extended our House class. The Mansion subclass has a defined constructor, so we must call super before we can access the this scope. When we call super, we pass the address parameter to the parent constructor, which adds it to the this scope. The constructor for Mansion then continues execution and adds the floors variable to the this scope. As we can see from the output logging at the end of this example, the subclass's this scope also includes all variables and functions that were created in the parent class. If a variable or function is redefined in the subclass, it will overwrite the inherited value or function from the parent class.
In summary, classes allow us to expand on the prototype-based inheritance of JavaScript by introducing some object oriented concepts. Classes are defined with the keyword class and initialized with the keyword new. When a class is defined, a special scope called this is created for it. All items in the this scope are publicly accessible outside the class. We can add functions and variables to the this scope to give our class functionality. When a class is instantiated, the constructor is called. We can also extend classes to create subclasses with the extends keyword. If an extended class has a constructor, we must call the super function to call its parent-class constructor. Subclasses have access to the parent class methods and variables.
Almost every coding language has a concept of modules. Modules are features that allow the programmer to break code into smaller independent parts that can be imported and reused. Modules are critical for the design of programs and are used to prevent code duplication and reduce file size. Modules did not exist in vanilla JavaScript until ES6. Moreover, not all JavaScript interpreters support this feature.
Modules are a way to reference other code files from the current file. Code can be broken into multiple parts, called modules. Modules allow us to keep unrelated code separate so that we can have smaller and simpler files in our large JavaScript projects.
Modules also allow the contained code to be quickly and easily shared without any code duplication. Modules in ES6 introduced two new keywords, export and import. These keywords allow us to make certain classes and variables publicly available when a file is loaded.
Modules use the export keyword to expose variables and functions contained in the file. Everything inside an ES6 module is private by default. The only way to make anything public is to use the export keyword. Modules can export properties in two ways, via named exports or default exports. Named exports allow for multiple exports per module. Multiple exports may be useful if you are building a math module that exports many functions and constants. Default exports allow for just a single export per model. A single export may be useful if you are building a module that contains a single class.
There are two ways to expose the named contents of a module with the export keyword. We can export each item individually by preceding the variable or function declaration with the export keyword, or we can export an object containing the key value pairs that reference each variable and function we want exported. These two export methods are shown in the following example:
// math-module-1.js
export const PI = 3.1415;
export const DEGREES_IN_CIRCLE = 360;
export function convertDegToRad( degrees ) {
  return degrees * PI / ( DEGREES_IN_CIRCLE /2 );
}

// math-module-2.js
const PI = 3.1415;
const DEGREES_IN_CIRCLE = 360;
function convertDegToRad( degrees ) {
  return degrees * PI / ( DEGREES_IN_CIRCLE /2 );
}
export { PI, DEGREES_IN_CIRCLE, convertDegToRad };
Snippet 1.65: Named Exports
Both of the modules outlined in the preceding example export three constant variables and one function. The first module, math-module-1.js, exports each item, one at a time. The second module, math-module-2.js, exports all of the exports at once via an object.
To export the contents of a module as a default export, we must use the default keyword. The default keyword comes after the export keyword. When we default export a module, we can also omit the identifier name of the class, function, or variable we are exporting. An example of this is shown in the following code:
// HouseClass.js
export default class() { /* Class body goes here */ }

// myFunction.js
export default function() { /* Function body goes here */ }
Snippet 1.66: Default exports
In the preceding example, we created two modules. One exports a class and the other exports a function. Notice how we include the default keyword after the export keyword, and how we omit the name of the class/function. When we export a default class, the export is not named. When we are importing default export modules, the name of the object we are importing is derived via the module's name. This will be shown in the next section, where we will talk about the import keyword.
The import keyword allows you to import a JavaScript module. Importing a module allows you to pull any items from that module into the current code file. When we import a module, we start the expression with the import keyword. Then, we identify what parts of the module we are going to import. Then, we follow that with the from keyword, and finally we finish with the path to the module file. The from keyword and file path tell the interpreter where to find the module we are importing.
Note
ES6 modules may not have full support from all browsers versions or versions of Node.js. You may have to make use of a transpiler such as Babel to run your code on certain platforms.
There are four ways we can use the import keyword, all of which are shown in the following code:
// math-module.js
export const PI = 3.1415;
export const DEGREES_IN_CIRCLE = 360;
// index1.js
import { PI } from 'math-module.js'
// index2.js
import { PI, DEGREES_IN_CIRCLE } from 'math-module.js'
// index3.js
import { PI as pi, DEGREES_IN_CIRCLE as degInCircle } from 'math-module.js'
// index4.js
import * as MathModule from 'math-module.js'
Snippet 1.67: Different ways to import a module
In the code shown in preceding snippet, we have created a simple module that exports a few constants and four import example files. In the first import example, we are importing a single value from the module exports and making it accessible in the variable API. In the second import example, we are importing multiple properties from the module. In the third example, we are importing properties and renaming them to new variable names. The properties can then be accessed from the new variables. In the fourth example, we are using a slightly different syntax. The asterisk signifies that we want to import all exported properties from the module. When we use the asterisk, we must also use the as keyword to give the imported object a variable name.
The process of importing and using modules is better explained through the following snippet:
// email-callback-api.js
export function authenticate( … ){ … }
export function sendEmail( … ){ … }
export function listEmails( … ){ … }

// app.js
import * as EmailAPI from 'email-callback-api.js';
const credentials = { password: '****', user: 'Zach' };
EmailAPI.authenticate( credentials, () => {
  EmailAPI.send( { to: 'ceo@google.com', subject: 'promotion', body: 'Please promote me' }, () => {} );'
} );
Snippet 1.68: Importing a module
To use an import in the browser, we must use the script tag. The module import can be done inline or via a source file. To import a module, we need to create a script tag and set the type property to module. If we are importing via a source file, we must set the src property to the file path. This is shown in the following syntax:
<script type="module" src="./path/to/module.js"></script>
Snippet 1.69: Browser import inline
We can also import modules inline. To do this, we must omit the src property and code the import directly in the body of the script tag. This is shown in the following code:
<script type="module">
  import * as ModuleExample from './path/to/module.js';
</script>
Snippet 1.70: Browser import in script body
Note
When importing modules in browsers, browser versions that do not support ES6 modules will not run scripts with type="module".
If the browser does not support ES6 modules, we can provide a fallback option with the nomodule attribute. Module compatible browsers will ignore script tags with the nomodule attribute so that we can use it to provide fallback support. This is shown in the following code:
<script type="module" src="es6-module-supported.js"></script>
<script nomodule src="es6-module-NOT-supported.js"></script>
Snippet 1.71: Browser import with compatibility option
In the preceding example, if the browser supports modules, then the first script tag will be run and the second will not. If the browser does not support modules, then the first script tag will be ignored, and the second will be run.
One final consideration for modules: be careful that any modules you build do not have circular dependencies. Because of the load order of modules, circular dependencies in JavaScript can cause lots of logic errors when ES6 is transpiled to ES5. If there is a circular dependency in your modules, you should restructure your dependency tree so that all dependencies are linear. For example, consider the dependency chain: Module A depends on B, module B depends on C, and module C depends on A. This is a circular module chain because through the dependency chain, A depends on C, which depends on A. The code should be restructured so that the circular dependency chain is broken.
You have been hired by a car sales company to design their sales website. You must create a vehicle class to store car information. The class must take in the car make, model, year, and color. The car should have a method to change the color. To test the class, create an instance that is a grey (color) 2005 (year) Subaru (make) Outback (model). Log the car's variables, change the car's color, and log the new color.
To build a functional class to demonstrate the capabilities of a class, perform the following steps:
Create a
carclass.Add a constructor that takes in the
make,model,year, andcolor. Save themake,model,year, andcolorin internal variables (thisscope) in the constructor function.Add a function called
setColorthat takes in a single parameter, color, and updates the internal variablecolorto the provided color.Instantiate the class with the parameters
Subaru,Outback,2005, andGrey. Save the class into theSubaruvariable.Log the internal variables, that is,
make,model,year, andcolor, of the class stored inSubaru.Change the color with the
setColorof the class stored inSubaruclass method. Set the color toRed.Log the new color.
Code
index.js:class Car {
constructor( make, model, year, color ) {
this.make = make;
this.model = model;
this.year = year;
this.color = color;
}
setColor( color ) {
this.color = color;
}
}
let subaru = new Car( 'Subaru', 'Outback', 2005, 'Grey' );
subaru.setColor( 'Red' );Snippet 1.72: Full class implementation
Outcome
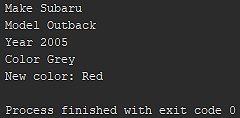
Figure 1.15: Implementing classes output
You have successfully built a functional class.
In this section, we introduced JavaScript classes and ES6 modules. We discussed the prototype-based inheritance structure and demonstrated the basics of class creation and JavaScript class inheritance. When discussing modules, we first showed how to create a module and export the functions and variables stored within them. Then, we showed you how to load a module and import the data contained within. We ended this topic by discussing browser compatibility and providing HTML script tag options for supporting browsers that do not yet support ES6 modules.
Transpilation is defined as source-to-source compilation. Tools have been written to do this and they are called transpilers. Transpilers take the source code and convert it into another language. Transpilers are important for two reasons. First, not every browser supports every new syntax in ES6, and second, many developers use programming languages based off of JavaScript, such as CoffeeScript or TypeScript.
Note
The ES6 compatibility table can be found at https://kangax.github.io/compat-table/es6/.
Looking at the ES6 browser compatibility table clearly shows us that there are some holes in support. A transpiler allows us to write our code in ES6 and translate it into vanilla ES5, which works in every browser. It is critical to ensure that our code works on as many web platforms as possible. Transpilers can be an invaluable tool for ensuring compatibility.
Transpilers also allow us to develop web or server side applications in other programming languages. Languages such as TypeScript and CoffeeScript may not run natively in the browser; however, with a transpiler, we are able to build a full application in these languages and translate them into JavaScript for server or browser execution.
One of the most popular transpilers for JavaScript is Babel. Babel is a tool that was created to aid in the transpilation between different versions of JavaScript. Babel can be installed through the node package manager (npm). First, open your terminal and path to the folder containing your JavaScript project.
If there is no package.json file in this directory, we must create it. This can be done with the npm init command. The command-line interface will ask you for several entries so that you can fill out the defaults of the package.json file. You can enter the values or simply press the return key and accept the default values.
To install the Babel command-line interface, use the following command: npm install --save-dev babel-cli. After that has concluded, the babel-cli field will have been added to the devDependencies object in the package.json file:
{
 "devDependencies": {
   "babel-cli": "^6.26.0"
 }
}
Snippet 1.73: Adding the first dependency
This command only installed the base Babel with no plugins for transpiling between versions of JavaScript. To install the plugin to transpile to ECMAScript 2015, use the npm install --save-dev babel-preset-es2015 command. Once the command finishes running, our package.json file will contain another dependency:
"devDependencies": {
 "babel-cli": "^6.26.0",
 "babel-preset-es2015": "^6.24.1"
}
Snippet 1.74: Adding the second dependency
This installs the ES6 presets. To use these presets, we must tell Babel to configure itself with these presets. Create a file called .babelrc. Note the leading period in the name. The .babelrc file is Babel's configuration file. This is where we tell Babel what presets, plugins, and so on, we are going to use. Once created, add the following contents to the file:
{
  "presets": ["es2015"]
}
Snippet 1.75: Installing the ES6 presets
Now that Babel has been configured, we must create the code file to transpile. In the root folder of your project, create a file called app.js. In this file, paste the following ES6 code:
const sum5 = inputNumber  => inputNumber + 5;
console.log( `The sum of 5 and 5 is ${sum5(5)}!`);
Snippet 1.76: Pasting the code
Now that Babel has been configured and we have a file that we wish to transpile, we need to update our package.json file to add a transpile script for npm. Add the following lines to your package.json file:
"scripts": {
 "transpile": "babel app.js --out-file app.transpiled.js --source-maps"
}
Snippet 1.77: Update the package.json file
The scripts object allows us to run these commands from npm. We are going to name the npm script transpile and it will run the command chain babel app.js --out-file app.transpiled.js --source-maps. App.js is our input file. The --out-file command specifies the output file for compilation. App.transpiled.js is our output file. Lastly, --source-maps creates a source map file. This file tells the browser which line of transpiled code corresponds to which lines of the original source. This allows us to debug directly in the original source file, that is, app.js.
Now that we have everything set up, we can run our transpile script by typing npm run transpile into the terminal window. This will transpile our code from app.js into app.transpiled.js, creating or updating the file as needed. Upon examination, we can see that the code in app.transpiled.js has been converted into ES5 format. You can run the code in both files and see that the output is the same.
Babel has many plugins and presets for different modules and JavaScript releases. There are enough ways to set up and run Babel that we could write an entire book about it. This was just a small preview for converting ES6 code to ES5. For full documentation and information on Babel and the uses of each plugin, visit the documentation.
Note
Take a look at Babel's home page at https://babeljs.io.
In summary, transpilers allow you to do source to source compiling. This is very useful because it allows us to compile ES6 code to ES5 when we need to deploy on a platform that does not yet support ES6. The most popular and most powerful JavaScript transpiler is Babel. Babel can be set up on the command line to allow us to build entire projects in different versions of JavaScript.
Your office team has written your website code in ES6, but some devices that users are using do not support ES6. This means that you must either rewrite your entire code base in ES5 or use a transpiler to convert it to ES5. Take the ES6 code written in the Upgrading Arrow Functions section and transpile it into ES5 with Babel. Run the original and transpiled code and compare the output.
To demonstrate Babel's ability to transpile code from ES6 to ES5, perform the following steps:
Ensure that Node.js is already installed before you start.
Install Node.js if it is not already installed.
Set up a Node.js project with the command line command
npm init.Put the code from the Upgrading Arrow Functions section into the
app.jsfile.Install Babel and the Babel ES6 plugin with
npm install.Configure Babel by adding a
.babelrcfile with the es2015 preset.Add a transpile script to
package.jsonthat calls Babel and transpiles fromapp.jstoapp.transpiled.js.Run the transpile script.
Run the code in
app.transpiled.js.
Code
package.json:// File 1: package.json
{
"scripts": {
"transpile": "babel ./app.js --out-file app.transpiled.js --source-maps"
},
"devDependencies": {
"babel-cli": "^6.26.0",
"babel-preset-es2015": "^6.24.1"
}
}Snippet 1.78: Package.json config file
.babelrc:
// File 2: .babelrc
{ "presets": ["es2015"] }
Snippet 1.79: Babel config file
app.transpiled.js:
// File 3: app.transpiled.js
var fn1 = function fn1(a, b) { … };
var fn2 = function fn2(a, b) { … };
var fn3 = function fn3(a) { … };
var fn4 = function fn4() { … };
var fn5 = function fn5(a) { … };
Snippet 1.80: Fully transpiled code
Outcome
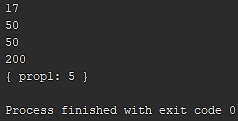
Figure 1.16: Transpiled script output
You have successfully implemented Babel's ability to transpile code from ES6 to ES5.
In this section, we discussed the concept of transpilation. We introduced the transpiler Babel and walked through how to install Babel. We discussed the basic steps to set up Babel to transpile ES6 into ES5 compatible code and, in the activity, built a simple Node.js project with ES6 code to test Babel.
In their simplest forms, iterators and generators are two ways to process a collection of data incrementally. They gain efficiency over loops by keeping track of the state of the collection instead of all of the items in the collection.
An iterator is a way to traverse through data in a collection. To iterate over a data structure means to step through each of its elements in order. For example, the for/in loop is a method that's used to iterate over the keys in a JavaScript object. An object is an iterator when it knows how to access its items from a collection one at a time, while tracking position and finality. An iterator can be used to traverse custom complicated data structure or for traversing chunks of large data that may not be practical to load all at once.
To create an iterator, we must define a function that takes a collection in as the parameter and returns an object. The return object must have a function property called next. When next is called, the iterator steps to the next value in the collection and returns an object with the value and the done status of the iteration. An example iterator is shown in the following code:
function createIterator( array ){
  let currentIndex = 0;
  return {
    next(){
      return currentIndex < array.length ?
        { value: array[ currentIndex++ ], done: false} :
        { done: true };
    }
  };
}
Snippet 1.81: Iterator declaration
This iterator takes in an array and returns an object with the single function property next. Internally, the iterator keeps track of the array and the index we are currently looking at. To use the iterator, we simply call the next function. Calling next will cause the iterator to return an object and increment the internal index by one. The object returned by the iterator must have, at a minimum, the properties value and done. Value will contain the value at the index we are currently viewing. Done will contain a Boolean. If the Boolean equals true, then we have finished the traversion on the input collection. If it is falsy, then we can keep calling the next function:
// Using an iterator
let it = createIterator( [ 'Hello', 'World' ] );
console.log( it.next() );
// Expected output: { value: 'Hello', done: false }
console.log( it.next() );
// Expected output: { value: 'World' , done: false }
console.log( it.next() );
// Expected output: { value: undefined, done: true }
Snippet 1.82: Iterator use
Note
When an iterator's finality property is truthy, it should not return any new data. To demonstrate the use of iterator.next(), you can provide the example shown in the preceding snippet.
In summary, iterators provide us with a way to traverse potentially complex collections of data. An iterator tracks its current state and each time the next function is called, it provides an object with a value and a finality Boolean. When the iterator reaches the end of the collection, calls to iterator.next() will return a truthy finality parameter and no new values will be received.
A generator provides an iterative way to build a collection of data. A generator can return values one at a time while pausing execution until the next value is requested. A generator keeps track of the internal state and each time it is requested, it returns a new number in the sequence.
To create a generator, we must define a function with an asterisk in front of the function name and the yield keyword in the body. For example, to create a generator called testGenerator, we would initialize it as follows:
function *testGen( data ) { yield 0; }.The asterisk designates that this is a generator function. The yield keyword designates a break in the normal function flow until the generator function is called again. An example of a generator is shown in the following snippet:
function *gen() {
 let i = 0;
 while (true){
   yield i++;
 }
}
Snippet 1.83: Generator creation
This generator function that we created in the preceding snippet, called gen, has an internal state variable called i. When the generator is created, it is automatically initialized with an internal next function. When the next function is called for the first time, the execution starts, the loop begins, and when the yield keyword is reached, the execution of the function is stopped until the next function is called again. When the next function is called, the program returns an object containing a value and done.
To create a generator function that generates the values of the sequence of 2n to show how generators can build a set of sequential data, perform the following steps:
Create a
generatorcalledgen.Place an asterisk before the identifier name.
Inside the generator body, do the following:
Create a variable called
iand set the initial value to 1. Then, create an infinite while loop.In the body of the while loop,
yieldiand setitoi * 2.Initialize
genand save it into a variable calledgeneratorCall your
generatorseveral times and log the output to see the values change.
Code
index.js:function *gen() {
let i = 1;
while (true){
yield i;
i = i * 2;
}
}
const generator = gen();
console.log( generator.next(), generator.next(), generator.next() );Snippet 1.84: Simple generator
Outcome

Figure 1.17: Calling the generator output
You have successfully created a generator function.
Similar to iterators, the done value contains the completion status of the generator. If the done value is set to true, then the generator has finished execution and will no longer return new values. The value parameter contains the result of the expression contained on the line with the yield keyword. In this case, it will return the current value of i, before the increment. This is shown in the following code:
let sequence = gen();
console.log(sequence.next());
//Expected output: { value: 0, done: false }
console.log(sequence.next());
//Expected output: { value: 1, done: false }
console.log(sequence.next());
//Expected output: { value: 2, done: false }
Snippet 1.85: Generator use
Generators pause execution when they reach the yield keyword. This means that loops will pause execution. Another powerful tool of a generator is the ability to pass in data via the next function and yield keyword. When a value is passed into the next function, the return value of the yield expression will be set to the value that's passed into next. An example of this is shown in the following code:
function *gen() {
 let i = 0;
 while (true){
   let inData = yield i++;
   console.log( inData );
 }
}

let sequence = gen();
sequence.next()
sequence.next( 'test1' )
sequence.next()
sequence.next( 'test2' )

// Expected output:
// 'test1'
// undefined
// 'test2'
Snippet 1.86 Yield keyword
In summary, generators are an iterative way of building a collection of data. They return values one at a time while tracking internal state. When the yield keyword is reached, internal execution is stopped and a value is returned. When the next function is called, execution resumes until a yield is reached. Data can be passed into a generator through the next function. Data that's passed in is returned through the yield expression. When a generator emits a value object with the done parameter set to true, calls to generator.next() should not yield any new values.
In the final topic, we introduced iterators and generators. Iterators traverse through data in a collection of data and return the value requested at each step. Once they have reached the end of the collection, a done flag is set to true and no new items will be iterated over. Generators are a way to generate a collection of data. At each step, the generator produces a new value based on its internal state. Iterators and generators both track their internal state as they progress through their life cycle.
You have been tasked with building a simple app that generates numbers in the Fibonacci sequence upon request. The app generates the next number in the sequence for each request and resets the sequence it is given as input. Use a generator to generate the Fibonacci sequence. If a value is passed into the generator, reset the sequence.
To build a complex iterative dataset using a generator, perform the following steps:
Look up the Fibonacci sequence.
Create a generator that provides the values in the Fibonacci sequence.
If the generator's
yieldstatement returns a value, reset the sequence
Outcome

Figure 1.18: Implementing generators output
You have successfully created a generator that can be used to build an iterative dataset based on the Fibonacci sequence.
In this chapter, we saw how ECMAScript is a scripting language specification for modern JavaScript. ECMAScript 6, or ES6, was released in 2015. Through this chapter, we covered some of the various key points of ES6 and their differences from previous versions of JavaScript. We highlighted the rules of variable scoping, the keywords for declaring variables, fat arrow function syntax, template literals, enhanced object property notation, destructuring assignment, classes and modules, transpilation, and iterators and generators. You are ready to begin applying this knowledge to your professional JavaScript projects.
In the next chapter, we will learn what an asynchronous programming language is and how to write and understand asynchronous code.